JavaScript seems to be disabled in your browser. For the best experience on our site, be sure to turn on Javascript in your browser.
- Create an Account
- Compare added products
- Superfeet Blog

10 of the Best Weekend Backpacking Trips in the US

Easily one of the best ways to spend a long weekend, regardless of the time of year, is trekking a trail over rocky mountain passes, along breezy coastlines, or in deep, verdant woodlands. Whether you make plans to revisit an old favorite or knock a new one off your bucket list, backpacking always presents a memorable adventure.
From Southeastern classics like Roan Mountain, to New England treasures like a hut-to-hut trip in the Presidentials, to epic and challenging trails in the Tetons, here are some of America's greatest backpacking trips.
1. Pictured Rocks National Lakeshore
19 miles, 1-2 days, Easy
The view of Grand Portal Point from a distance (along the North Country Trail). Rachel Kramer
Situated in the upper Midwest, the Pictured Rocks National Lakeshore is a see-it-to-believe-it sort of landscape with towering sandstone cliffs, impossibly blue lake waters, waterfalls, beaches, and dense woodlands. It also happens to be home to a 42-mile section of the 4,600 mile North Country National Scenic Trail along the south shore of Lake Superior, stretching from Munising, MI, to Grand Marais, MN.
Backcountry camping is available at 14 campgrounds along this 71,400-acre linear park. In the winter, under the right conditions, mammoth ice caves form, attracting thousands of visitors.
The 4.4 miles of the lakeshore path between the Mosquito and Chapel rivers is the most popular section of the North Country Trail. It follows the cliffs through deciduous forest and over sandy sections within view of Grand Portal Point and Lake Superior.
Most hikers start and end their day hikes at Grand Sable Visitor Center on the north end. Further south, the Coves Group to Munising Falls is an ambitious 19.2-mile trek. Yet another option is to start at Munising Falls at the southern end and take a ferry to Grand Island National Recreation Area. A popular marathon and 50K is run around the perimeter of the island in July, switching from clockwise to counter-clockwise year to year.
2. Superior Hiking Trail
18 miles, 1-2 days, Moderate
Taking in the views of Lake Superior Adam Kahtava
The Superior Hiking Trail is a 310-mile long footpath in northeastern Minnesota that follows the ridgeline on the North Coast of Lake Superior.
Most accessible is the 40-mile southernmost section through Jay Cooke State Park to the northern boundary of the city of Duluth. There are no campsites there, and due to flood damage in 2012, parts of this section remain diverted.
To the north, however, is the 18-mile stretch from Silver Bay to Country Road 6 where views of the Big Lake and smaller glacier-scoured lakes are frequently in view through the birch and maple canopy. The colors peak in late September and early October, if you can time your trek then. (Avoid the trail in May and early June, when the clouds of mosquitoes and black flies at their thickest.)
This section of the SHT includes a short but steep climb up Mount Trudee to a 30-foot waterfall on the Baptism River. If you don't catch a glimpse of the deer, wolves, or mountain lions known to inhabit the region (don't worry; they're more afraid of you than you are of them), you may still see their tracks.
Rockier and more technical sections of the SHT are favored by the trail runners who race out of Lutsen, MN, in May (25K and 50K) and September (26.2, 50 and 100 miles).
3. Roan Mountain Highlands
14 miles, 1-2 days, Difficult
The views from these ethereal highlands are stunning and constant, and bring to mind visions of Scotland and Wales. Joe Giordano
Roan Mountain is a 20-mile massif that lies along the Tennessee-North Carolina border. It consists of five sub-peaks, and is divided into two sections by Carvers Gap. To the west of Carvers Gap are Roan High Bluff and Roan High Knob, with Tollhouse Gap and Rhododendron Gardens lying between the two peaks.
A 14-mile section of the Appalachian Trail traverses the Roan Mountain between Carvers Gap and Highway 19E along the northern border of TN and NC. Heading south from 19E, plan to hike 8 miles to the Overmountain Shelter, a.k.a. “The Barn.” Stay inside with other backpackers or pitch your tent in its vicinity. Either way, you’ll be waking to a spectacular sunrise over the valley.
Pack up and trek the final tough 5 miles over three balds. As you approach Carvers Gap, you'll cross Grassy Ridge, the longest stretch of grassy bald in the Appalachian Mountains.
4. Grayson Highlands State Park
7 miles, copious bouldering, 1-2 days, Moderate to Difficult
Camping among the rhododendrons in Virginia's Grayson Highlands Jake Wheeler
Within southwestern VA lies the Jefferson National Forest. And within the forest lies Grayson Highlands State Park , a gateway to Mount Rogers and to a number of miles along the Appalachian Trail.
To summit Mount Rogers, the state’s highest peak at 5, 729 feet, there’s a 6.7-mile Mount Rogers National Recreation Trail from the Grindstone Campground six miles east of Troutdale. Or take the scenic 2.3-mile Wilburn Ridge Trail from the state park. There are no views from the forested peak, but on either route you’re likely to encounter wild ponies and clusters of exposed and inviting boulders.
In fact, both AT thru hikers and day visitors would do well to check out the bouldering scene in the Grayson Highlands. The Listening Rock Trail offers the most bouldering opportunities, followed by the AVP and Boneyard areas. Climbers take in beautiful top-outs, especially after conquering the Highland Highball, in the Highlands Bouldering Area.
Backcountry camping is not allowed within Grayson Highlands State Park, but camping is allowed in the Mount Rogers National Recreation Area (MRNRA). Hikers traveling north on the AT exit the park when they cross Big Wilson Creek. You’re welcome to camp across the creek, just past the Wise Shelter fence.
5. Standing Indian, NC
24-mile loop, 1-2 nights, Moderate
The Standing Indian Shelter McDowell Crook
A two-night stay is recommended to fully take in the Standing Indian Loop in NC’s Nantahala National Forest. Fifteen miles of the 24-mile Standing Indian Loop is on the Appalachian Trail, but all of it showcases the Nantahalas’ most impressive and beautiful features.
Knowing you start the trek at 4,000 feet makes the multiple 5,000-foot peaks a little less intimidating. For the AT, the Standing Indian trip is a moderate hike. All the better, as the views along the way are some of the most stunning you'll find in the Smokies.
From the Standing Indian Campground, travel up the Long Branch Trail until it connects with the AT. Mt. Albert is only 5.5 miles from the trailhead, but plan to spend your first night at the summit. In the morning, drink in the panoramic view before descending to Carter Cap, where there's a shelter and water. Expect to spend most of the day walking along a ridge with sweeping views.
Gradually you’ll make your way to the treeless and spectacular peak of Standing Indian itself. There is one small campsite on this bald, so if you want to snag it, you'll need to begin your second day very early in the morning.
On your final day, head back down to the Standing Indian Campground on the 7-mile Kimsey Creek Trail through dense hemlock groves and rhododendron tunnels. Keep in mind that in the early spring months, you’re likely to find snow and ice on this side of the mountain.
6. The Long Trail
23 miles, 2 days, Difficult
Some of the views you'll find along the Long Trail in Vermont Nate Merrill
The Long Trail, the oldest long-distance hiking trail in America, is a 272-mile footpath that follows the main ridge of the Green Mountains from the Massachusetts-Vermont stateline to the Canadian border. The Long Trail stretches the length of Vermont and crosses the state’s highest peaks.
It can take nearly three weeks to thru-hike the Long Trail and the 53 mountains (27 of which are 3,500 feet or higher) along it. It can be tackled section by section, too.
One of the toughest sections, the 23 miles from Birch Glen Camp northwest to the Buchanan Shelter, includes 8,000 feet of climbing and descending—including 1,700 feet at a 17 percent grade to the summit of Camels Hump . The exposed scramble over rock slabs pays off with views of Lake Champlain and the Adirondacks to the west, Mount Washington to the east, and Mount Mansfield to the north.
The descent along the ridgeline bottoms out with a 3.6-mile hike to the outskirts of Jonesville, VT. Stay overnight at the Duckbrook Shelter or wait to camp on the western slopes of Bolton Mountain at the Buchanan Shelter. There are six shelters along this stretch, thanks to the Green Mountain Club which built the trail between 1910 and 1930 and maintains it to this day.
7. Presidential Traverse, NH
23 miles, 1-2 days, Difficult to Moderate
Overlooking the White Mountains of New Hampshire after a strenuous climb Ry Glover
The Presidential Traverse in the White Mountains of New Hampshire is nearly 23 miles long with close to 9,000 feet of elevation gain. Best hiked from north to south, to bag the highest of 10 peaks first, the traverse demands a dawn-to-dusk effort if you don’t have three to four days to spare.
The traverse is almost entirely above the treeline, where the whiteout conditions are common and can cause one to turn back. Besides the right apparel, a map and compass are essential.
The first day is the toughest, with 4,000 feet to climb over the 3.8-mile Valley Way Trail to the peak of Mt. Madison. Continuing south on the Gulfside Trail, backpackers summit Adams and Jefferson to earn the right to lie down in the grass of Monticello Lawn.
Appreciate the rest, because Mt. Washington—the highest peak in the White Mountains—is next. Expect bad weather before reaching the snack bar at the summit, which tourists reach by road and rail.
From there the climbing is largely over, while the views of the southern Presidential range are not. The Crawford Path, the oldest continually maintained footpath in the U.S., leads to the Lake of the Huts and Mount Monroe. The going only gets easier past mounts Franklin, Eisenhower, Pierce, and Jackson.
8. Olympic National Park
Mileage varies, 1-3 days, Moderate to Difficult
With roughly 600 miles of trails, there are essentially endless opportunities for backpacking in Olympic National Park David Fulmer
At 1,442 square miles, Washington's Olympic National Park is nearly twice as large as Great Smoky Mountain National Park, and 300 square miles larger than Yosemite. The park has more than 600 miles of sensational trails, the majority of which are designated wilderness by the National Park Service, and 60 miles of craggy and picturesque coastline.
The backpacking options are numerous, but summitting Mt. Olympus, the tallest peak in the park, is a must. A campground within the park’s Hoh Rainforest is open year-round, so stay there and you can also enjoy backpacking the trail to Royal Basin and the Upper Royal Basin beyond where unparalleled views of glacial mountains and tarns await.
Easier hikes, from LaPush to Shi Shi and the popular Ruby Beach, are also often rewarded with whale sightings.
9. Teton Crest Trail
25 miles, 2-4 days, Difficult
Backpacking along Paintbrush Divide, arguably the most scenic stretch along the Teton Crest Trail Brian Saunders
If the Teton Crest Trail is not on your bucket list, it should be. Check it off by taking on the 25-mile section between Death Canyon to Cascade Canyon, and conquer the Alaska Basin and Hurricane Pass in the process.
The Phillips Pass Trailhead, halfway up Teton Pass, is the place to start. Plan to camp at Alaska Basin where a permit is not required because it lies just outside the boundaries of Grand Teton National Park.
Return to the park the next day to go up and over Hurricane Pass, and down into the South Fork of Cascade Canyon. End your Crest Trail trip there or head up the North Fork of Cascade Canyon to your last campsite. That would give you another day to hike Lake Solitude as well as Paintbrush Divide and Paintbrush Canyon , stopping at the North Jenny Lake parking area.
10. Old Rag in Shenandoah National Park, VA
10 miles, 1 day, Difficult
Breathlessly drinking in the views of Shenandoah National Park David Fulmer
The Old Rag Loop is the most challenging of the more than 500 trail miles within Shenandoah National Park in VA. It may be only 10 miles, but it takes 8 hours to complete, according to the National Park Service. They're not joking.
The most popular way to hike the Old Rag Loop is up the Ridge Trail, across the rock scramble to the summit, than down the Saddle Trail to the Weakley Hollow Fire Road.
The first two miles of the wooded trail gets increasingly steeper, and the vegetation changes noticeably. Once you're out of the woods onto the ridgetop, the scrambling over giant granite boulders begins. From the summit, you can breathlessly drink in the 200,000-acre expanse of the Shenandoah National Park, a portion of which is federally designated wilderness.
From here it is advisable to take the Saddle Trail, a fire road, back to your vehicle. It's 1.2 miles longer but much flatter and quicker.
Written by Joel Patenaude for RootsRated in partnership with Superfeet.

This article on the best backpacking trips in the U.S. is brought to you by Gregory , the makers of hiking backpacks that are tough enough for day hikes, weekend trips and thru-hiking adventures.
Backpack camping—an approach that involves hiking to your campsite, usually carrying a hefty backpack of gear with you—isn’t for everyone. The KOA North American Camping Report of 2019 supports that statement; while camping popularity in the U.S. has overall reached new heights among a wider audience of households in recent years, those new campers are generally drawn to car camping, glamping, and the more convenient destinations. Which means that backpacking continues to offer an escape from the crowds.
Venture out on a backcountry trail in any crowded national park and you’ll find the crowds all but disappear, just a few miles in. If you bring your camping supplies with you, a secluded, quiet camping experience awaits you in the wilderness.
The best backpacking trips in the U.S. span a range of experience levels. Once you’ve collected your gear (with some help from our backpacking checklist ), it’s time to pick a trail.
9 Bucket List Backpacking Trips in the U.S.

Photo Courtesy of William Saunders
This list of backpacking trips in the U.S. offer a range of accessibility depending on your skills and experience. No matter the experience level required, they’re all stunning and enjoyable. Researching this backpacking resource definitely made us want to get away from our computers and hit all of these trails.
1. The Lost Coast Trail —Northern California
Length: 24 miles Elevation Change: 1,542 feet Days: 2-4 Trailheads: Mattole Beach, Black Sands Beach
California’s Golden Coast gets visitors galore, with hotspots mostly south of the Bay Area. But head north, beyond the hillside mansions where the famous Pacific Coast Highway disconnects from the coastline, and you’ll find the Lost Coast Trail along the state’s King Range National Conservation Area. As a wilderness trail along some of the state’s rockiest beach terrain, this backpacking trip is relatively short, but the rock scrambles and sand dunes along the way make challenge and rewarding option for beginners.
Backpacking this trail requires an overnight permit from the Bureau of Land Management, available online from Recreation.gov. The trail is best done via a shuttle service between the two trailheads, as either route is point-to-point.
2. The North Coast Route —Olympic National Park,Washington
Length: 20 miles Elevation Change: 200 feet Days: 2-4 Trailheads: Rialto Beach, Ozette Campground
Positioned along the coastal portion of Washington’s Olympic National Park, this 20-mile backpacking trail is an ideal entry point for inexperienced backpackers with a penchant for seaside views. Backpackers will find a relatively flat shoreline and fair weather seasonally along this trail, ideal for a long weekend backpacking trip on the Olympic Peninsula. With one of the lowest elevation gains on this list, hikers looking to test their distance-per-day will find a perfect path ahead.
Camping along the trail is done at established campgrounds between the trailheads, and no permit is needed for the hike itself. Keep your eyes peeled for tidepools teeming with life, as much of the coast’s rocky shore plays host to underwater life.
3. Lake Aloha Trail —Central California
Length: 12 miles Elevation Change: 1,873 feet Days: 2-3 Trailheads: Echo Lake Trailhead
The Lake Aloha trail, on the southern end of California’s Lake Tahoe, is seemingly custom built for entry-level backpackers interested in a postcard-worthy view. A hike along this 12-mile loop trail takes you along a number of alpine lakes in the Desolation Wilderness, and brings you up 1,800 feet in total. Take a leisurely pace to make the incline portion much easier, and after a long sweaty hike, take a swim in Lake Aloha, where there’s dispersed camping along a ridge nearby.
Since this is one of the best backpacking trips in the U.S., snagging a reservation for camping in the area can be tough—look to plan this trip early in the off-season, and expect to check online regularly for openings. Campfires are never allowed in the Desolation Wilderness, and campers should check out safety tips from the Lake Tahoe Basin Management Unit .

The Timberline Trail
4. Mount Sterling Loop Trail (Via Low Gap) —Great Smoky Mountains National Park, Tennessee
Length: 28.5 miles Elevation Change: 8,110 feet Days: 4-5 Trailheads: Low Gap Trailhead, Big Creek Trailhead
Situated in the country’s most visited national park, the Mount Sterling Loop Trail offers an intermediate-level backpacking trip to the peak of one of the tallest points in the park. Hike from the Low Gap trailhead in Crosby, NC and pass through old growth forests—crossing state lines into Tennessee on your way. You’ll follow the Big Creek to the summit of Mount Sterling, where you’ll come across a firetower, built during the 1930s by the Civilian Conservation Corps—perfect for getting sweeping views of the misty mountains. Continue on from the summit and you’ll complete a loop around the mountain, circling back to the Low Gap Trailhead. The total 8,000+ elevation gain is subtle on the majority of the trail, although some points climb sharply via switchbacks as you begin to circle the mountain.
As part of the Great Smoky Mountains National Park , backcountry camping on this trail requires a backcountry permit from the park office, alone with reservations made in advance for campgrounds/shelters along the way. More information on reservations and permits can be found from the park’s Backcountry Office at 865-436-1297.
5. Timberline Trail —Mount Hood National Forest, Oregon
Length: 38.3 miles Elevation Change: 9,000 feet Days: 4-5 Trailheads: Timberline Lodge
Mount Hood is one of Oregon’s Seven Wonders, an active volcano just about an hour outside of Portland. While many make a point to visit the mountain’s cozy Timberline Lodge, backpackers looking for a more scenic view of this monolith can venture out on the Timberline Trail which circles the mountain. Start from the parking lot of Timberline Lodge and head east or west on the trail to get started; you’ll traverse roughly 9,000 feet of elevation change over about four days. The loop will circle you back to Timberline Lodge, where you should relax apres-hike with a warm drink indoors.
This trail involves a decent amount of trail merges, so be careful when navigating that you don’t make a wrong turn on to various off-shoots. The Timberline Trail can be dangerous when inclement weather is present, as with any instance of high-elevation hiking, you should feel confident that your backpacking skills match the worst weather scenarios you might face. No permits are needed for the hike.
6. Cottonwood Marble Canyon Loop Trail —Death Valley National Park, California
Length: 26-28 miles Elevation Change: 5,613 feet Days: 3 Trailheads: Stovepipe Wells
With terrain and scenery pulled straight from Mars, hiking around Death Valley National Park (or the Mojave desert in general) is as interesting as it is intense. The Cottonwood-Marble Canyon Loop Trail takes backpackers through a dry and stark terrain, and requires more planning than a typical backpacking trip. The trail, running close to 30 miles in a loop, will connect from the Stovepipe Wells trailhead, and can take about 3 days. As with most desert backpacking, you must plan your trip around water resources—this trail offers a few natural streams at some campsites but water is scarce for the majority of the hike. Along with plenty of water, be sure to bring a water filter to refill when available.
Getting to the trailhead requires a 4WD vehicle at all times of the year, but no pre-planning for a permit is needed. Permits are available for free at visitor contact stations across the park. The challenge of this trail lies mainly in the difficult conditions of the desert, so be sure to read Death Valley National Park’s tips on planning this hike in advance.

The John Muir Trail
7. The John Muir Trail —California
Length: 221 Miles Elevation Change: cumulative 47,000 feet Days: 20-30 Trailheads: (Southbound) Happy Isles, Sunrise Lakes, Glacier Point, Lyell Canyon
Cutting more than 200 miles through central California’s Sierra Nevada mountains, the John Muir Trail is as legendary as it is scenic. Plan for close to a month of hiking, camping, and exploring part of the state’s rocky, snow-spotted terrain, with an elevation gain more than 1.5 times the height of Mount Everest.
Getting yourself a backpacking permit for the John Muir Trail might be one of the hardest parts of this trip. Hikers should plan to enter the online lottery system as early as possible, about 24 weeks before your planned trip, or possible chance a first-come, first-served permit available from the ranger station. As well, hikers should plan out resupply stops at certain campsites and vantage points along the way.
8. The Wonderland Trail —Mount Rainier National Park, Washington
Length: 93 miles Elevation Change: cumulative 22,000 feet Days: 12-14 Trailheads: Fryingpan Creek Trailhead
With so many amazing mountains to climb and trails to backpack in the Pacific Northwest, it’s hard to think there could be one trail that stands above the rest. At least in elevation, the Wonderland Trail around Washington’s Mount Rainier does just that, circling the PNW’s only mountain over 14,000 feet.
The trail itself isn’t as lengthy as other advanced backpacking trips, but serves as a short-but-tough alternative to many other trails. Climbing over 22,000 feet in cumulative elevation gain along the Wonderland Trail, you’ll enjoy dense evergreen forests and snowy peaks year-round.
The trail’s high elevation is a serious consideration as thin air can wear on hikers who aren’t used to these conditions. Take caution when beginning and ending the trip, as acclimation might be necessary for a comfortable hike. While specific permits aren’t required to thru-hike the trail, a general wilderness permit is required for backcountry camping along the way.
9. The Long Trail —Vermont
Length: 272 miles Elevation Change: cumulative 69,000 feet Days: 20-30 Trailheads: Appalachian Trail Vermont/Massachusetts, Journey’s End Road
While it may not rival some of the more scenic trails in the western U.S., Vermont’s Long Trail offers hikers a look at a stunning variety of nature along one of the greenest states east of the Mississippi River. Stretching 272 miles from the southern border with Massachusetts to the Canadian border to the north, the oldest thru-hiking trail in the United States spares no view of the Green Mountain State throughout. What this hike lacks in dramatic views akin to the western U.S., it makes up for in greenery and ease‚ with a relatively balanced elevation incline throughout. While trail conditions can get muddy starting in the late summer and early fall, hiking through the New England fall foliage is one of the most popular attractions for the backpacking trip. Finishing the trail from north to south or south to north earns you the title of “End-to-Ender,” a boast-worthy epithet you can share at the breweries along the trail .
Planning for this hike is pretty simple; no permits are required for hiking or camping along the way. The Green Mountain Club has maintained the trail since its establishment in 1930, and offer tips and guidebooks online and in print for hikers planning ahead.
This post was brought to you by our pals at Gregory .
From small day hiking backpacks to top-of-the-line backpacking backpacks — Gregory has you covered!
Related Campgrounds:
- Clear Lake Campground , Mount Hood National Forest, OR
- Tahoe Valley Campground , South Lake Tahoe, CA
- New Melones Lake Camping , CA
- Sly Park Campground , Pollock Pines, CA
Popular Articles:
- Get the Latest 2023 Camping Travel Trends
- How To Find Free Camping in National Forests
- The Checklist Every First Time RVer Needs
- Find Free Camping With The Dyrt Map Layers
- The Ulimate Boondocking Guide To Free Camping
- Everything You Need To Know About Wifi For Your RV
- 7 of The Best Overland Routes in North America
- 14 Wilderness Survival Tools You Should Have in The Backcountry
- Here's What To Add To Your Primitive Camping Checklist
Kevin Johnson
Kevin is the Assistant Editor for The Dyrt, with bylines in National Geographic Traveler and Atlas Obscura. Although originally from the swamps of Washington, D.C., he's now based in the trees of Portland. He's been interested in geography and travel since seeing his first map as a kid, and is now working toward seeing it all in person. You can find him exploring the coastal beaches or a record store in his free time.
More Articles
7 Coffee Gear Essentials for Campers Who Need Their Caffeine (Like, Now)
On my daily commute to The Dyrt’s office in Portland, Oregon, I find myself passing five coffee shops within a 15-minute bike ride. Portland is…

Pickleball Has Become a Favorite Sport at RV Parks Across the Country
This article is brought to you by Liquid IV, which is the perfect addition to your pre- or post- workout routine. Get all the hydration…
- National Parks
- Tiny Houses
11 Backpacking Trips in the U.S. That Should be on Your Bucket List
Posted by Sarah Lamagna May 17, 2022 Updated December 18, 2023
Being in the wild is dope, and so is keeping it clean for future generations. If you’re hiking, camping or backpacking, you can minimize your impact on the environment with Leave No Trace principles and ensure everyone has a good time with basic trail etiquette tips. Now let’s get wild.
Forget the crowded viewpoints and roadways — experience the wonder and solitude (most of the time) of the nation’s most epic trails!
Americans have been walking across our country’s beloved public lands for decades. The Long Trail in Vermont (although not on our list below) holds the title for the oldest long-distance trek in the country — it was completed in 1930. The record for the longest hike (which, surprisingly isn’t the Long Trail) goes to two trails: American Discovery Trail and Great Western Loop, both of which are 6,800 miles each! There are also the most famous trails like Pacific Crest Trail, Continental Divide Trail, and Appalachian Mountain Trail.
These are all great treks throughout the nation but not everyone has the time, money, or even desire to do a thru-hike . Instead, most outdoor enthusiasts like the idea of finding a bit of solitude without having to log the mega miles. Because the United States is home to thousands of trails to backpack, the list below narrows down your best choices. Whether you’re looking for a quick jaunt during a long weekend or weeks-long adventure, there’s something on this list for everyone.
Best Backpacking Trips in the U.S. – Our Top Picks
As a reminder, backpacking should be taken seriously and isn’t the same as going for a long day hike. Make sure you have the proper gear (for some cheaper options, check this out ), are in shape to carry upwards of 50 pounds (depending on the length of your trip), and are well-accustomed to outdoor excursions. Regardless of if you are backpacking solo or backpacking with your kids , or with your friends, it’s always imperative to be prepared.
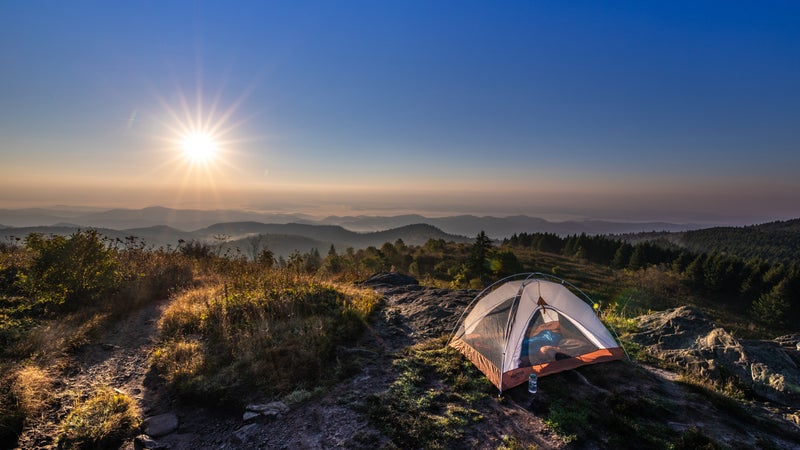
1. Pemigewasset Loop

Why you should go: it traverses one of the most incredible ridgelines — Franconia Ridge.
- Location: White Mountain National Forest, New Hampshire
- Distance: 31 miles
- Elevation gain: 10,000 feet
- Recommended number of nights: 1 to 2
When most people think of epic backpacking routes, the White Mountains of New Hampshire likely don’t show up in your head. The Pemigewasset Loop (known affectionately by locals as the “Pemi Loop”), though, is one of the hardest hikes in the country with strenuous elevation gain and some of the worst weather in the country. It traverses the western half of the Pemigewasset Wilderness and climbs over eight 4Kers (mountains above 4,000’ above sea level and on the AMC’s 4000-footer list ).
You can add other peaks that are not on the AMC’s list to add a total of eleven mountain summits! Many people have done this as a brutal day trip, but it’s not recommended.
Pro Tip: stay in one of the AMC huts (either Greenleaf or Galehead ) where you won’t have to worry about trudging uphill with a tent in your bag. Plus, dinner and breakfast is included in the fee for the night.
Related Read: 8 Epic Camping Spots in White Mountain National Forest
2. Cracker Lake

Why you should go: experience Glacier National Park without the crowds.
- Location: Glacier National Park, Montana
- Distance: 12 miles
- Elevation gain: 1,300 feet
- Type: out-and-back
- Recommended number of nights: 1
Backpack to the brilliant turquoise waters of Cracker Lake . You’ll camp at the base of Mount Siyeh whose towering cliffs rival those in Yosemite. The trail to this alpine lake is not as popular as other backpacking routes in the Glacier National Park but you shouldn’t miss out on this one.
Skip the Highline Trail and having to battle your way through the hordes of tourists that make the trek every year. Instead, enjoy a relatively moderate hike to a quieter part of the Park. Bonus: the lake has a pit toilet!
Pro tip: go during peak wildflower season. Just do it.
Related Read: Crown Jewels: 14 Majestic Hikes in Glacier National Park
3. 100-Mile Wilderness

Why you should go: get all the glory of hiking the Appalachian Trail without having to walk the full 2,180 miles.
- Location: 100-Mile Wilderness, Maine
- Distance: 93 miles (weirdly not 100)
- Elevation gain: 15,000 feet
- Type: point-to-point
- Recommended number of nights: 7 to 10
The Appalachian Trail is hiked by hundreds of thru-hikers every year. Most argue that the hardest part is the last 100 miles before the summit of Mount Katahdin — known as the 100-Mile Wilderness. It is a true wilderness experience and one that should not be your first foray into backpacking.
The backcountry of Maine woods is unforgiving at best and deadly at worst so take heed when attempting this. But if you do decide to do this trek, it’ll bring you through some of the most spectacular and remote places in the entire country.
Pro tip: avoid hiking in early June as it happens to be black fly season and they are the literal worst.
Related Read: 14 Best Hikes in Maine for Exploring the Great Outdoors
4. Roan Highlands Section of the AT
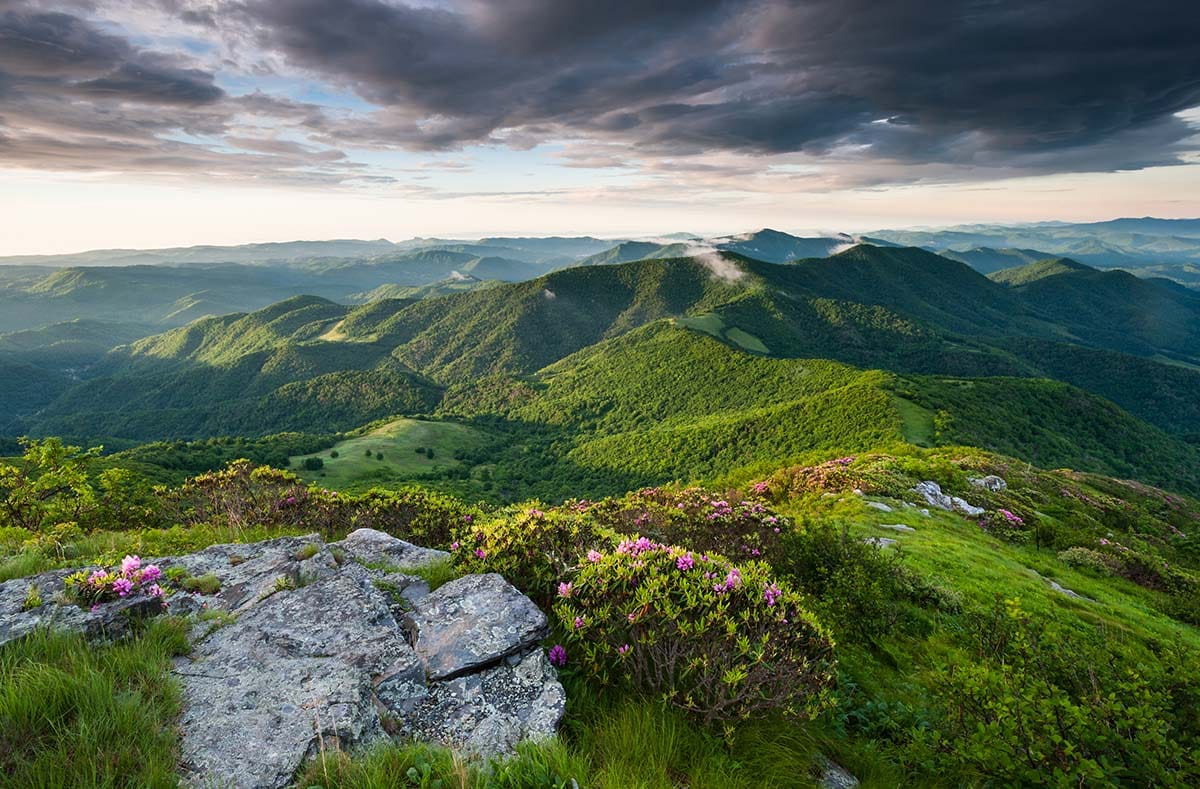
Why you should go: considered by most thru-hikers to be the prettiest part of the Appalachian Trail.
- Location: Pisgah National Forest, Tennessee/North Carolina
- Distance: 22 miles
- Elevation gain: 5,000 feet
If you’ve ever wanted to know what the undulating trails are like in the Scottish Highlands, look no further than the Roan Highlands (coincidence?) section of the Appalachian Trail.
The 22-mile trek traverses over grassy, bald summits and through the world’s largest rhododendron garden. The 360-degree views from the several summits will leave you breathless — although that might also be from the elevation gain.
Pro tip: if you go around the third week of June, the rhododendrons will be in full bloom and are spectacular.
Related Read: 10 Can’t-Miss Glamping Sites Near Great Smoky Mountains National Park
5. Greenstone Ridge Trail

Why you should go: where else can you take a seaplane to your trailhead?
- Location: Isle Royale National Park, Michigan
- Distance: 42 miles
- Elevation gain: 4,000 feet
- Recommended number of nights: 5 to 8
The Greenstone Ridge Trail allows you a glimpse into the diverse landscape of the upper Midwest. From sweeping vistas, orchid-filled bogs, wildflowers galore, and more lakes than you can count, the ecosystems are endless.
Most begin their journey at the Windigo trailhead which is accessible by boat or seaplane. You end your hike at the Hidden Lake trailhead where you can hop on ferry or charter another seaplane for your return journey.
Pro tip: grab a satellite messenger since cell reception is spotty at best.
Related Read: Traveler’s Guide to the Best Michigan National Parks
6. Wonderland Trail

Why you should go: never-ending views of Mount Rainier.
- Location: Mount Rainier National Park, Washington
- Distance: 93 miles
- Elevation gain: 25,000 feet (it’s a doozy)
- Recommended number of nights: 8 to 12
One of the most exclusive backpacking trails in the country also loops around one of the most famous volcanoes. The Wonderland Trail is a strenuous backpacking excursion that travels through a diverse array of ecosystems.
If you’re lucky enough to snag a wilderness permit to attempt the hike, you’ll be rewarded with incredible views at almost every turn. You won’t need mountaineering experience (that’s left for those wanting to summit Mount Rainier) but you should be a practice backpacker before attempting this trip.
Pro tip: have flexibility with your dates since permits for the trail are highly coveted.
Related Read: 14 Jaw Dropping Hikes in Mount Rainier National Park
7. Olympic Coast Trail – North Route

Why you should go: moody beaches but happy campers.
- Location: Olympic National Park, Washington
- Distance: 20 miles
- Elevation gain: 3,000 feet
The hike from Rialto Beach north to the Ozette trailhead is more than just a walk on the beach. It’s home to some of the most rugged coastline and unforgiving weather. Don’t let that deter you from a backpacking trip. You can combine the South Route with this hike, but the North Route has the better views and landscape.
Although you’re mostly walking on the beach, there are many headlands that can only be rounded at low tide. Sometimes there are ropes to aid during non-low tide times but not always.
Pro tip: always have a tide chart on this trip to plan out when you need to take the overland/headland trails.
Related Read: 13 Outdoorsy Things to Do on the Washington Coast
8. Four Pass Loop

Why you should go: see a side of the Maroon Bells the tourists don’t usually experience.
- Location: Maroon Bells – Snowmass Wilderness, Colorado
- Distance: 27 miles
- Elevation gain: 7,800 feet
- Recommended number of nights: 2 to 3
Coined as the most popular backpacking trip in Colorado, the Four Pass Loop traverses (you guessed it!) four passes all above 12,000’ above sea level.
If you’re coming from sea level, you might need to give yourself a few extra days ahead of time to acclimate. Once you’re satisfied with your lung capacity, enjoy the majestic maroon peaks and incredible alpine scenery on the trek!
Pro tip: do the loop in a clockwise direction as the trail up West Maroon Valley is easier to climb with a full pack.
Related Read: 5 Spectacular Backpacking Destinations in Colorado
9. Buckskin Gulch

Why you should go: probably the most iconic slot canyon ever.
- Location: Paria Canyon – Vermillion Cliffs Wilderness, Utah
- Distance: 21 miles
- Elevation gain: 3,400 feet
It doesn’t get much better than Buckskin Gulch if you’re in the mood for some spectacular slot canyon hiking. The permits to get into Buckskin are highly competitive, but that also means you’ll have solitude for your trip. For those lucky enough to grab one, you’ll be hiking in one of the longest (if not the longest) continuous slot canyon in the entire world.
Flash floods are a real concern here, as with any slot canyon hiking. Make sure to always check the weather for the surrounding areas. If there is even the slightest chance of rain, do not attempt this hike. Avoid hiking during the summer months as monsoon season occurs during this time and the slots can be dangerously hot.
If you can’t snag one of the permits, you can always head to Grand Staircase-Escalante National Monument and try one of these hikes .
Pro tip: there is only one escape route once you reach Buckskin Gulch and is aptly-named the Middle-Out Escape Route.
Related Read: The 20 Best Backpacking Trips In Utah
10. Cirque of the Towers

Why you should go: easily accessible and no permits are required.
- Location: Wind River Mountain Range, Wyoming
- Distance: 24 miles
You won’t find much solitude on the Fremont Trail to Cirque of the Towers . Due to its accessible trailhead and absolute stunning scenery, it’s a popular trail. However, Wyoming has got some big sky so even if you have company on the trail, you’ll be spread out. Most go in a clockwise direction as that will leave the best views for last.
You’ll pass through alpine meadows, around the edge of nine lakes on the path ,and over two mountain passes (one of which is named Jackass Pass). The first views of the Cirque begin when you hit Texas Pass and they just get better from there.
Pro tip: go as late in the summer as possible to avoid the atrocious amounts of mosquitos on the trail. Or bring a bug net otherwise.
Related Read: 8 Gorgeous Backpacking Trails In The Wind River Range
11. Sawtooth Wilderness Loop

Why you should go: it’s as remote as you get in Idaho so way less people.
- Location: Sawtooth Wilderness Area, Idaho
- Distance: 70 miles
- Elevation gain: 12,500 feet
- Recommended number of nights: 4 to 6
Basically jumping from lake to lake, the Sawtooth Wilderness Loop brings you on an epic journey through one of the most underestimated states. Idaho is usually passed over for the more epic Rocky Mountains or the Pacific Northwest. But you’d be wrong to turn a blind eye to this incredible wilderness area.
The trail navigates through dense forest, alpine lakes, and even some burn areas. Downed logs are fairly common across the trail since trail crews don’t get back into this remote area as much as more popular areas. Nothing is too hard to overcome, though. Just come with some sturdy pants and a good attitude and you’ll be all set.
Pro tip: it’s imperative to bring a bear-resistant canister (or hang your food) and bear spray as this is prime grizzly bear habitat.
More Backpacking Inspiration
10 Best Backpacking Trips in Grand Canyon National Park
12 Epic Hiking Camps & Summer Backpacking Trips
Sunshine & Solitude: Best Backpacking Routes in Big Bend
10 Killer Backpacking Trails in Yosemite National Park
5 Incredible Backpacking Excursions in Zion National Park
Get epic travel ideas delivered to your inbox with Weekend Wanderer, our newsletter inspiring more than 10,000 readers every week.
Seen in: Backpacking , Destinations

Posted by Sarah Lamagna
Sarah is an ecologist-turned-freelance writer specializing in the ecotourism and slow/sustainable travel industry. Her bylines include The Denver Post, 5280 magazine, VeryWellFamily, Matador Network, and was an expert on NPR’s The Takeaway for her work on the wildfires in Colorado.

6 Phenomenal Backpacking Trails in Joshua Tree National Park
Find your next adventure.
Sign up for Weekend Wanderer and join thousands of readers getting epic travel ideas weekly.
Related Posts

Itinerary Ideas for One Breathtaking Day in Zion National Park
Use this a "pick-your-own-adventure" rubric to plan ONE beautifully epic day in the nation's 15th National Park.

8 Wildly Scenic Drives in Nevada to Explore this Year
Get ready to explore the parks and ghost towns of the Silver State by highway.

The Ultimate Zion to Bryce Canyon Road Trip Itinerary
Two of the most unique and beautiful national parks sit within two hours of one another, but make sure not to race from one straight to the other.

Top 5 Pacific Crest Trail Section Hikes in Oregon & Washington
Here's some of the best sections to tackle first if you're looking to traverse the Pacific Crest Trail one piece at a time.

8 Epic Camping Spots in White Mountain National Forest
Within White Mountain National Forest's 750,000 acres, you'll find nearly endless woodlands, alpine lakes, and the highest mountain in the Northeast.

The Best Time to Visit Arches National Park, Utah
Despite being in one of the most touristy towns in Utah, Arches National Park is a true natural marvel no matter what time of year you visit.

9 Unique Places to Stay in Gatlinburg, Tennessee
As the gateway to America’s incredible Great Smoky Mountains, Gatlinburg treats visitors to untouched nature and pleasant creature comforts.

6 Stunning Backpacking Routes in Canyonlands National Park, Utah
Once you’ve seen the landscapes of Canyonlands National Park, odds are a day hike through the amazing rock formations just isn’t going to cut it.
2-FOR-1 GA TICKETS WITH OUTSIDE+
Don’t miss Thundercat, Fleet Foxes, and more at the Outside Festival.
GET TICKETS
BEST WEEK EVER
Try out unlimited access with 7 days of Outside+ for free.
Start Your Free Trial

8 Once-in-a-Lifetime Backpacking Trips
From a trail in Isle Royale National Park with spectacular views to a hike that hits four 6,000-foot peaks in 30 miles, these are our favorite classic routes in the U.S.

Heading out the door? Read this article on the Outside app available now on iOS devices for members! >","name":"in-content-cta","type":"link"}}'>Download the app .
Whether you’re a veteran backpacker who’s already checked off many long-distance treks or you’re brand new to the idea of carrying everything you need on your back into the wilderness for days, the point is: Backpacking can be for everyone. You just need to find the right trail for you. (Before you go, read up on backpacking basics and make sure you have the proper gear .) Maybe you’re bringing little kids and hiking one or two miles a day, or maybe you’re going fast and light and logging dozens of miles before sundown. It doesn’t matter. We’ve compiled a list of some of our favorite classic backpacking routes around the U.S. Take on the whole thing or just a portion.
Art Loeb Trail, North Carolina
The Art Loeb Trail isn’t an easy trail—it climbs four 6,000-foot peaks—but at just 30 miles, it’s doable in a matter of days. Most hike it in two to five. Named after an activist from the Carolina Mountain Club , this trail is one of the more popular routes in Pisgah National Forest but still requires a bit of navigating on the lesser-marked sections of the trail. Hike it out and back for a shorter distance or add a connecting trail to make it a loop. Blue Ridge Hiking Company leads guided, four-day hikes on the Art Loeb Trail (from $705), or do it yourself and book a shuttle with Pura Vida Adventures (from $125).
Tahoe Rim Trail, California and Nevada
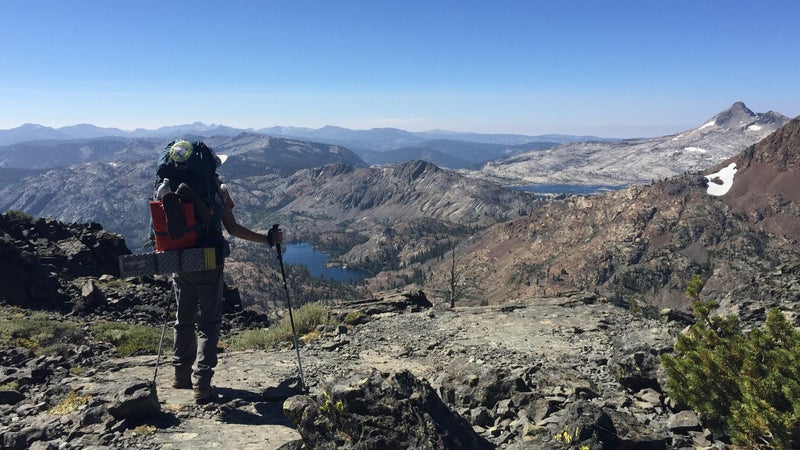
At 165 miles, the Tahoe Rim Trail is a gorgeous long-distance route around the ridgeline of the Lake Tahoe Basin that most hikers complete in 10 to 14 days. Or tackle just a stretch of it—the 32-mile section from Echo Lakes to Barker Pass, along the lake’s west shore, passes through the stunning Desolation Wilderness and makes for a great two- or three-day trip. (This is the only section of the trail that requires an overnight camping permit .) The best time of year to go is July through September. The Tahoe Rim Trail Association leads guided multi-day hikes (from $1,100).
Long Trail, Vermont
The Long Trail , the oldest long-distance trail in the U.S., follows the spine of the Green Mountains for over 272 miles, with 70 designated backcountry campsites. Plan on spending 20 to 30 days on the trail for a thru-hike or pick just a section: the 20-mile stretch from Mad Tom Notch Road in the Vermont town of Peru to Route 140 in Wallingford doesn’t see many crowds, has great views of Little Rock Pond and Griffith Lake, and can be done in a weekend. Early fall is the best time of year to avoid the summer’s crowds and catch colorful foliage. Not into sleeping in a tent every night? Inn to Inn arranges self-guided hikes that include overnight stays at boutique hotels close to the trail, or Wildland Trekking hosts guided hikes (from $2,690) in the fall, which includes stays at B&Bs.
Kalalau Trail, Kauai

The 22-mile round trip Kalalau Trail , within Kauai’s Na Pali Coast State Wilderness Park , is not for the inexperienced: It involves hundreds of feet of elevation gain on rugged trails with steep, precipitous cliffs above the ocean. Your reward is reaching Kalalau Beach, a secluded stretch of sand at the trail’s terminus, where you’ll camp in an oceanside forest neighboring a waterfall. Because of strong currents, swimming at the beach isn’t recommended, and be sure to check current trail, weather, stream, and ocean conditions before you go. Most people do this hike in two days, but you can add an extra day or two to hang out at Kalalau. If you’re hiking beyond a day trip out to Hanakapi’ai Valley, you’ll need an overnight permit —reservations for those are currently available 30 days in advance and book up quickly.
Greenstone Ridge Trail, Michigan

The longest trail in Isle Royale National Park , the 41-mile Greenstone Ridge Trail goes from the southwest tip of the island to the northeast corner and tops out on 1,394-foot Mount Desort, the highest point in this off-the-radar park. You’ll need a free-of-charge permit for all overnight backcountry stays within the park, but you don’t need to reserve ahead—you can pick it up when you get there. Speedy hikers can do the whole trail in three days or give yourself extra time to look for moose and enjoy the views of Lake Superior . The Sierra Club leads guided seven-day treks (from $1,425) on this trail most years.
Teton Crest Trail, Wyoming

This iconic backpacking route traverses through glaciated, granite peaks and high-alpine lakes in Grand Teton National Park , as well as Bridger Teton and Caribou-Targhee National Forests . It covers about 40 miles and is usually done in three to five days. You’ll need hard-to-snag backcountry permits to camp at any of the 11 designated campsites along the Teton Crest Trail. There are a handful of ways to access this trail and multiple options for starting and ending points. Many people start at the Phillips Trailhead and end in Paintbrush Canyon within the national park, or you can kick off your hike with a lift from the tram at Jackson Hole Mountain Resort , which dumps you at the Granite Canyon trail that leads to the Teton Crest. Bear-resistant food canisters are required. Teton Backcountry Guides leads guided multi-day hikes (from $795) on shorter sections of this trail in the summer or full traverses of this trail on skis during the winter.
Three Sisters Loop, Oregon
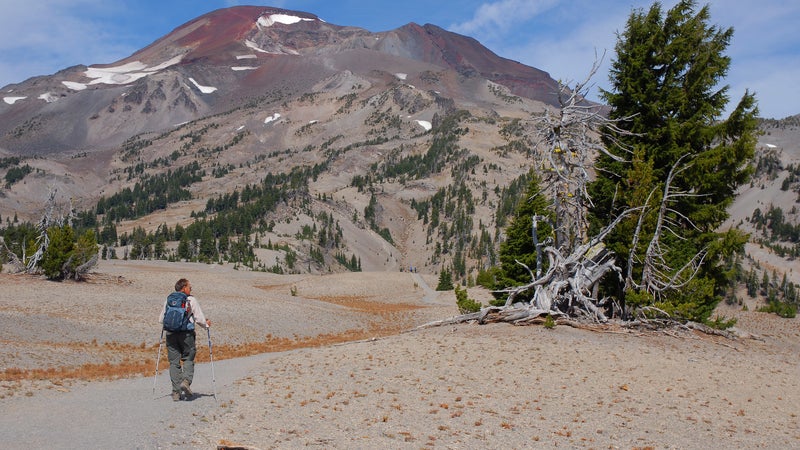
The Three Sisters Loop is about 47 miles long and passes through alpine lakes and meadows filled with wildflowers and tops out on volcanic peaks in the Cascade Range . The Three Sisters themselves are among Oregon’s top-five tallest peaks. Crowds exist on popular day-hike sections of the trail at the peak of summer, but for most of the way, you’ll have the spectacular views to yourself. With a few variations of the loop, you can tweak the route based on your needs. The hike overlaps with parts of the Pacific Crest Trail and score great views of Mount Bachelor. Hike Oregon will plan a custom itinerary for you (from $75) that includes a detailed map and route, plus where to camp each night.
Rim to Rim, Grand Canyon, Arizona
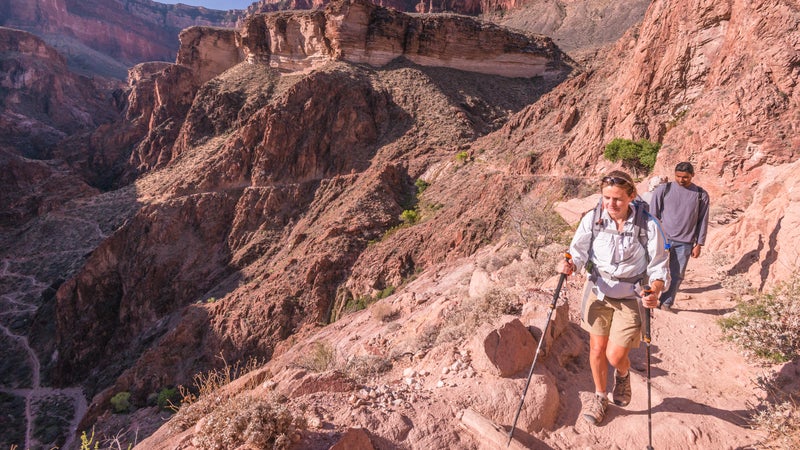
Hiking Rim to Rim on the Grand Canyon is a classic bucket list adventure. Start at the North Kaibab Trail, on the North Rim, and hike down a relentless 14 miles and 6,000 vertical feet to the bottom of the canyon and the shores of the Colorado River. From there, you’ll pitch a tent at Bright Angel Campground or Cottonwood Campground , which require a backcountry permit that gets released four months ahead of time. Or if plan way in advance spend a night in a cabin at Phantom Ranch (from $172), where bookings fill up a year out. From the bottom, it’s a long, steep nine-mile climb up to the South Rim via the Bright Angel Trail. Summer is hot here, so go in late spring or early fall. Unless you want to turn around and repeat what you’ve just done, schedule a ride with Trans Canyon Shuttle . Or let someone else handle the logistics and join O.A.R.S. for a guided, five-day Rim to Rim hike (from $2,699), that includes a stay at Phantom Ranch.
- Grand Canyon
- Grand Teton National Park
Popular on Outside Online

Enjoy coverage of racing, history, food, culture, travel, and tech with access to unlimited digital content from Outside Network's iconic brands.
Healthy Living
- Clean Eating
- Vegetarian Times
- Yoga Journal
- Fly Fishing Film Tour
- National Park Trips
- Warren Miller
- Fastest Known Time
- Trail Runner
- Women's Running
- Bicycle Retailer & Industry News
- FinisherPix
- Outside Events Cycling Series
- Outside Shop
© 2024 Outside Interactive, Inc
2-FOR-1 GA TICKETS WITH OUTSIDE+
Don’t miss Thundercat, Fleet Foxes, and more at the Outside Festival.
GET TICKETS
BEST WEEK EVER
Try out unlimited access with 7 days of Outside+ for free.
Start Your Free Trial
Powered by Outside
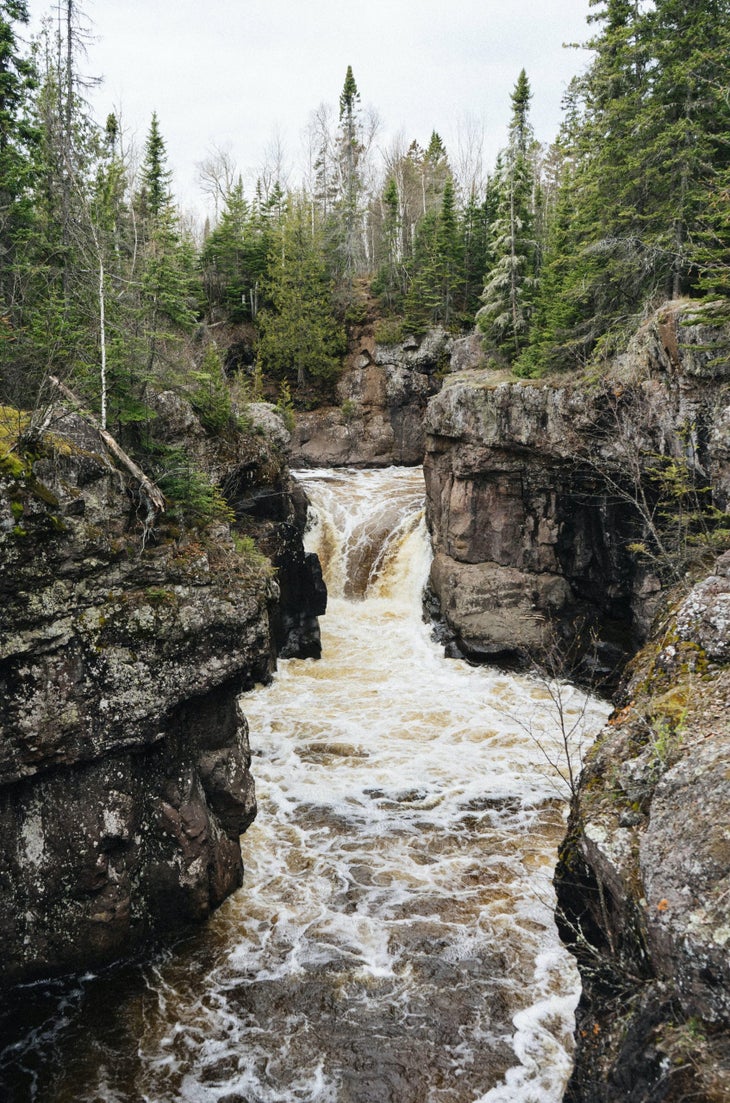
These 5 Midwest Backpacking Trips Reveal Mountains, Forests, and Solitude (and Maybe a Corn Field)
From lakeshore rambles to mountain peaks, these trails showcase the very best of the midwest..
Heading out the door? Read this article on the new Outside+ app available now on iOS devices for members! >","name":"in-content-cta","type":"link"}}'>Download the app .
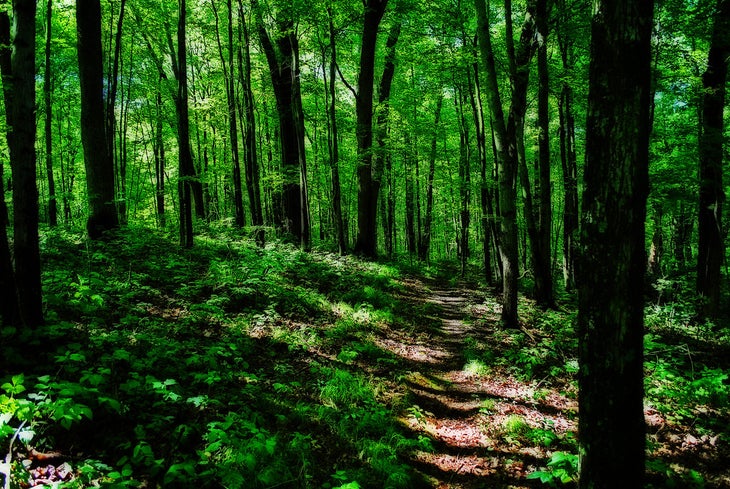
The Midwest has an advantage the country’s more dramatic and mountainous regions struggle with: easily attained solitude.. Not only is this region home to some of the most overlooked, under-visited trails in the country, but they’re also some of the best trails in the country, period, winding through cascading waterfalls, deep forests, and gently-sloping mountains.
While the Midwest houses thousands of miles of trail, these five trips stand out as some of the best backpacking the region has to offer. Here’s all the beta you need to start dreaming and planning.
Weekend trip: Porcupine Mountains Wilderness Loop, Michigan (21.2 miles)
There’s a lot to love about hiking the Porkies: the views of Lake Superior, the picturesque inland lakes and streams , and one of the finest old-growth hardwood forests in the country. The Porcupine Mountains are some of the oldest in the world at 2 billion years old, cored with reddish-brown sandstone and volcanic rock that gently slopes for miles parallel to the Lake Superior shoreline.
This 21.2-mile hike starts and ends at Lake of the Clouds in Porcupine Mountains Wilderness State Park. From there, you’ll weave your way to Mirror Lake, Greenstone Falls, Lake Superior, and Big Carp River before finishing at Lake of the Clouds. You can look forward to roaring rivers, untouched old-growth forests, and rocky shorelines. Be sure to snag your backcountry camping permit ahead of time (available from 6 months to 72 hours before your trip), and remember to be aware of black bears—either bring a bear canister or hang your food between two trees 12 feet up and 100 feet from camp.
Trailhead: Lake of the Clouds trailhead
Permit: Required ($15/night), reservations May 15 – October 14 strongly recommended
Week-long trip: North Dakotan section of North Country Trail (135 miles)
While it takes 8-10 months to complete the entire North Country Trail from New York to North Dakota, a week on its western terminus is the perfect place to dip your thru-hiking toes. This section treks through a disappearing prairie pothole ecosystem comprised of native wetlands and open, grassy plains.
Start at Lake Sakakawea State Park, home to the third-biggest man-made reservoir in the U.S. after Lake Mead and Lake Powell. As you hike east, you’ll head through the Audubon National Wildlife Refuge — home to 246 bird species, including piping plovers and bobolinks — and end at the prairies of Lonetree Wildlife Management Area before the trail heads toward the Sheyenne . About 113 miles of the trail will be off-road and 22 miles will be on-road, mainly on gravel country roads with a few miles on a lightly-traveled paved highway.
Trailhead: Visitor’s Center, Lake Sakakawea State Park
Permit: Small camping fees in established campgrounds
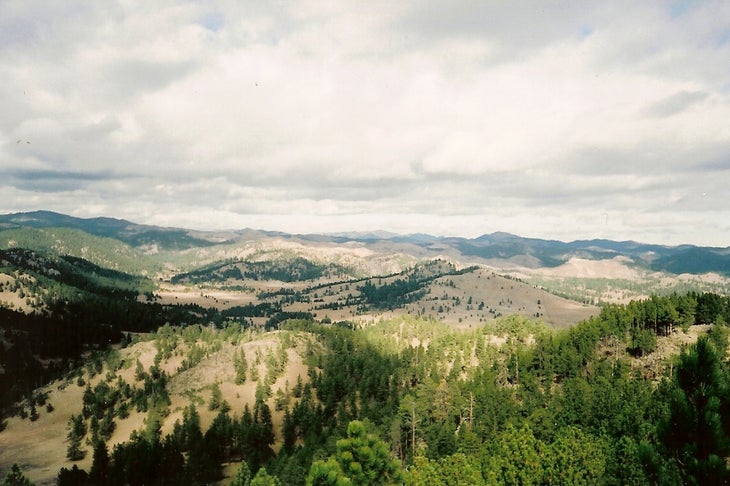
Short Thru-Hike: Centennial Trail, South Dakota (123 miles)
Experience the Black Hills from end-to-end on this 7-day hike. South Dakota’s Centennial Trail traverses Wind Cave National Park, Custer State Park, Black Elk Wilderness, Sheridan Lake, and even skirts Mount Rushmore. Hikers can expect rolling hills of prairie grasses, ponderosa pine forests, low mountains, several creek crossings, and plenty of solitude. And hey, you might even see a bison herd or a jackalope , too.
You can hike in either direction: SOBO from Bear Butte State Park or NOBO from Wind Cave National Park. The trail is relatively well-marked and not too rugged, but there are no shelters along the way. Backpackers should plan to carry at least a day’s worth of water during drier years; streams may dry up in early summer depending on conditions. Check the Black Hills National Forest website for what water sources are in season.
Trailhead: Wind Cave National Park or Bear Butte State Park
Permit: Required for backcountry camping in Wind Cave National Park, small entrance fee for Custer State Park , camping fee in U.S. Forest Service campgrounds and Bear Butte State Park campgrounds. Hikers must self-register to enter Black Elk Wilderness .
Long Thru-Hike: Superior Hiking Trail, Minnesota (310 miles)
The 310-mile Superior Hiking Trail is perfect for new and seasoned thru-hikers and covers the entire Minnesota North Shore from the Minnesota-Wisconsin border to Canada. The trail mostly follows the rocky shoreline of Lake Superior but also curves inward toward swift-moving rivers , waterfalls, and open vistas along the spine of the Sawtooth Mountains. These mountains, named for the way steady slopes suddenly drop off on their northern sides in regularly-spaced intervals like the teeth of a saw blade, rise to a high point of 1, 814 feet. You’ll even trek through 8 Minnesota State Parks — and take it from a Minnesotan: these are the best parks in the state.
To nab the whole thru-hike, start at the southern terminus just outside Jay Cooke State Park along the Minnesota/Wisconsin border. The first 52.8 miles of the hike to Duluth is only open to day hikers, unfortunately, so this will need to be section-hiked in order to complete the entire trail. You can start north of Duluth instead to hike 269 miles of trails full of spurs and free camping opportunities. Relatively short compared to many thru-hikes and with lots of re-supply options, this trail makes a great first thru-hike. Beware the mosquitoes and humidity in late summer, though.
Trailhead: Wild Valley Road trailhead southeast of Jay Cooke State Park
Permit: No permits, fees, or reservations required for the 93 SHT campsites spaced every 5-10 miles; reservations and fees needed to stay in the 8 state parks.
Longer Thru-Hike: Ice Age Trail, Wisconsin (1,200 miles)
When most people think of remote thru-hikes full of solitary wilderness, they don’t think Wisconsin. But that’s exactly what you’ll find on the Ice Age Trail. This rough landscape was carved out by glaciers more than 10,000 years ago, and the path winds through glacial moraines and eskers, deciduous forests, prairies, and wetlands. Even better, the trail draws very few thru-hikers (the Ice Age Trail Alliance lists fewer than 300 individuals that have hiked the entire trail), which makes for a secluded journey .
The trail crosses the width — and quite nearly the length as well — of the state of Wisconsin. Thru-hikers are split on which direction to complete the hike, with some opting to start on the mellower eastern side and others on the tougher (but more scenic) western side. The trail is fairly well marked but only half completed, with the gaps filled by quiet country roads and multi-use trails. While there are plenty of resupply points in towns and cities near the trail, sleeping conditions vary widely from primitive camping in dispersed backcountry sites to shelters and state park campgrounds. The biggest natural hazards along the trail are bears, ticks and mosquitoes, so carry bear spray and a bear canister for your food and get tips for tick prevention .
Trailhead: Potawatomie State Park for the eastern terminus, Interstate State Park for the western terminus.
Permit: There is no permit required to hike the trail or camping in primitive or dispersed campsites, but developed shelters and campgrounds in state forests, state and county parks, and recreation areas require a reservation and fee. Check the Ice Age National Scenic Trail Hiker Resource Map to plan and reserve accordingly.
Popular on Backpacker
>", "path": "https://www.backpacker.com/trips/adventure-travel/cheap-life-list-hiking-backpacking-trips/", "listing_type": "recirc", "location": "list", "title": "5 dream hiking trips you can take for cheap this summer"}}'> 5 dream hiking trips you can take for cheap this summer, >", "path": "https://www.backpacker.com/gear/best-hiking-gear-april-2024-backpacker-editors/", "listing_type": "recirc", "location": "list", "title": "the gear that backpacker’s editors loved in april 2024"}}'> the gear that backpacker’s editors loved in april 2024, >", "path": "https://www.backpacker.com/trips/trips-by-state/north-carolina-trails/the-best-trails-around-asheville-according-to-a-local-hiker/", "listing_type": "recirc", "location": "list", "title": "the best trails around asheville, according to a local hiker"}}'> the best trails around asheville, according to a local hiker, >", "path": "https://www.backpacker.com/gear/essentials/lighting/best-headlamps/", "listing_type": "recirc", "location": "list", "title": "the best headlamps to light the way, from forest trail to mountain peak"}}'> the best headlamps to light the way, from forest trail to mountain peak.
You are using an outdated browser. Please upgrade your browser or activate Google Chrome Frame to improve your experience.

- Trip Styles
- Destinations
15 Best Beginner Backpacking Trips in the U.S.
- All Inspiration and Destinations
- Canadian Rockies
- New Hampshire
- New Zealand
- North Carolina
- Vancouver Island
- Washington State

If you’re new to backpacking, you may have a lot of questions , like what to pack , what to eat , and — most excitingly — where to go. In the US, you have dozens of beginner backpacking trips at your fingertips. Whether you want to plan an epic hiking vacation to your favorite national park or you want to hit the trails closer to home, you’ll have options.
When planning your first backpacking trip, you can either, 1) choose a trip within your comfort zone and go with family, friends, or a partner or 2) join a guided trip so you can learn new skills, develop friendships, and take on a more difficult challenge. Some people try to fit too much into their first backcountry trip and end up ditching the pack for good after their adventure is over. Or, they don’t set their sights high enough and end up underwhelmed, wondering why anyone would willingly lug 30 pounds of gear into the backcountry.
We know that if you’re backpacking, you want to escape the crowds, take in stunning views, and put in some effort. So, we want to help you plan a trip that will make you fall in love with the sport so that every time you dust off your backpack, a smile spreads across your face. If you’re looking for inspiration for your first backpacking trip (or your second, third, or seventieth), we’ve compiled a list of 15 beginner-friendly backpacking trips and trails across the United States that will immerse you in wild environments and challenge you just the right amount.
Explore Your World with Award Winning Guides
how to choose an appropriate trail
While each new backpacker is entering into the sport with a different set of skills and fitness levels, we’ve crafted a list of trips with all beginner backpackers in mind. These trips fit a few criteria:
- You’ll hike relatively low-mileage for the length of the trip.
- The trails don’t have extreme elevation gain for the region.
- They travel on well-maintained trails and avoid tricky terrain like boulder fields.
- You’ll get a lot of bang for your buck, whether in the form of peaks, alpine lakes, or lush meadows.
However, backpacking is never easy (or else we’d never do it!) — so, if you want to maximize your fun, be sure to train for your backpacking trip .
1. Point of Arches, Olympic National Park

Mileage: 8 miles out-and-back | Length: 2 – 3 days | Elevation Gain/Loss: 200 feet
Point of Arches is a perfect beginner backpacking destination on the edge of Olympic National Park, accessed via the Makah Reservation. You can hike this trail as an overnight, but if you have a third day to spare, you won’t be disappointed by the abundance of tidepools to explore and wildlife to observe. The sea-stack studded coastline is complemented by lush forests, which are home to banana slugs, Roosevelt elk, and black bears. Each night, as the sun sets over the Pacific Ocean and you fall asleep to the sound of crashing waves, you’ll start scheming up your next trip.
Why is it great for a beginner?
This relatively-flat trail gives you quick access to a stunning beach environment, without much hard hiking or elevation gain. In fact, we offer this as a family-friendly trip option. You’ll get the pay-off of a bigger backpacking trip, but without all the work. So, pack a chair and relax on the beach as seals play in the coastal waters and eagles fly along the bluffs hunting for fish.
Unlike many beach destinations, the campsite near Point of Arches sits along a creek, so you don’t have to pack in water for your whole trip — just a water filtration device.
logistics and permits
You’ll need to secure two permits to make this trip a reality. First, you’ll need to pick up a Makah Recreation Pass ; it costs $10 and is good for an entire year. You can get one in Neah Bay at the marina, the general store, the mini-mart, and the tribal center, among other areas. Also, as this trail enters into Olympic National Park, you will need a Wilderness Camping Permit for any overnight stays in the park. Make sure you reserve this in advance. However, if you join a guided trip, we take care of all permits and reservations for you!
As of February 2021, this trail is closed due to COVID-19, as are many of the coastal areas of the park because they are on tribal lands. If you’re looking for an alternate route in Olympic National Park, the Seven Lakes Basin backpacking loop is a great — yet more difficult — alternative.
Guided Trip Options
Wildland Trekking offers this trip as a guided backpacking adventure package with expert guides, gear, meals, transportation and more all included! Click here to learn more!
2. Shining Rock Wilderness, North Carolina

Mileage: 22 miles roundtrip | Length: 4 days | Elevation Gain/Loss: 2,300 feet with backpacking packs (plus 1,700 ft with a day pack)
The Shining Rock Wilderness in the Blue Ridge Mountains of North Carolina is one of the most spectacular East Coast backpacking destinations. The name comes from a unique geologic outcropping of quartzite rock that guards the summit of Shining Rock. Not only will these rocks dazzle you with their beauty, but they also provide a great perch to look out across the sweeping views of the surrounding peaks. On your trek, you’ll hike past cascading waterfalls and swimming holes that are perfect for a dip in the right season.
Relatively short-mileage days lead to exciting destinations. And while many beginner-friendly backpacking trails are packed with crowds, you can find mountain solitude in the Shining Rock Wilderness. Plus, a two-night backcountry basecamp lowers the number of miles you need to hike with a full pack. One of the hardest parts of backpacking is fine-tuning your pack packing routine, so you’ll appreciate the layover day when you get to leave your tent set up.
You don’t need to obtain a permit to backpack in Pisgah National Forest. However, due to the prevalence of black bears in the area, you must carry all your food and scented items in bear canisters .
This trail is in a wilderness area , so as with all backpacking trips, please leave no trace and minimize signs of human impact. We recommend first hiking in this area with a guiding company because the trails are not signed or blazed, unlike more popular destinations such as Great Smoky Mountains National Park. However, if you do choose to backpack alone in this region, carry and map and compass so you can navigate the trails.
3. Golden Cathedral, Grand-Staircase, Utah

Mileage: 10 miles roundtrip | Length: 3 – 4 days | Elevation Gain/Loss: 1.100 feet
The Golden Cathedral is a stunning display of geologic processes set in Neon Canyon. On this trip, you set up a basecamp along the Escalante River so you get to enjoy both the lush desert oasis and impressive slickrock features, like the pothole arch pictured above. While camping is not permitted in Golden Cathedral to protect the fragile environment, you’ll enjoy your sandstone surroundings as you explore the labyrinth of canyons during the days. Plus, southern Utah is known for its endlessly dark night skies. So as you peer out of your tent at night, be sure to gaze up between the canyon walls to see a smattering of stars.
This low-mileage trip is doable as a day hike, but spending the night between the narrow canyon walls in red rock country is quite the experience. You’ll carry a pack on the first and last day of your trip, setting up basecamp once you arrive in the canyon. Then, on your layover days, you’ll have time to explore slot canyons and washes without the weight of your pack. Unlike some desert hikes, this destination has plenty of water, so while you’ll need to stay hydrated, you won’t weigh your pack down with a trip’s worth of H20.
While this is a great first beginner backpacking trip with a guiding company, it can be a challenging trail to navigate on your own. However, if you plan to go solo, follow the cairns (piles of rocks) and keep your senses engaged so you don’t get lost. Don’t forget the map and compass!
Stop by a ranger station to obtain a free backcountry permit. Study up on desert leave no trace procedures, as this unique environment requires that you travel mindfully.
Also, check the forecast before you go because flash floods can be an incredible danger in canyon country. During certain times of the year, you may need to wade through thigh-deep water in the canyons. Bring along a pair of hiking sandals and trekking poles to make the journey more fun!
4. Tuolumne Meadows area, Yosemite

Mileage: 20 miles roundtrip | Length: 3 – 4 days | Elevation Gain/Loss: 1,300 feet with a pack ( + 1,700 as a day hike)
The Tuolumne region of Yosemite National Park is defined by expansive green meadows, dome-shaped mountains, and the pinnacle spires of the Cathedral Range. Water flows freely through the Grand Canyon of the Tuolumne, where you can witness cascades tumbling down silver slabs of granite. On our Yosemite Alpine Meadows and Waterfalls Trek , you can see some of the best that it has to offer on a moderate trip.
Unlike the Yosemite Valley, Tuolumne Meadows has high-elevation trailheads with relatively flat relief landscapes and far fewer crowds. Water is plentiful and the views are outstanding. Up in Tuolumne, wildlife is less accustomed to humans, so you’ll have fewer concerns about a hungry bear sneaking into camp.
The campsite along this route (where you’ll stay for two nights) has treated water and solar-powered outhouses for ultimate backcountry comfort. Plus, unlike many areas in Yosemite National Park, you’ll have access to bear boxes at camp, so you won’t have to carry bear canisters which are heavy and inconvenient.
You’ll need to obtain a permit to stay overnight in the backcountry of Yosemite National Park. We recommend you reserve a permit in advance, however, some first-come-first-served permits are available if you visit the ranger station the morning before your intended trip. If you’re traveling during the weekends or holidays, don’t expect to get a last-minute permit.
5. Havasupai Garden, Grand Canyon

Mileage: 15 miles roundtrip | Length: 3 days | Elevation Gain/Loss: 3,000 feet with a pack ( + 1.500 ft as a day hike)
Okay, no backpacking trip in the Grand Canyon is exact beginner-friendly because of the nature of the terrain. However, if you’re set on hiking Arizona ‘s Grand Canyon for your first backpacking trip, the Havasupai Garden backpacking trip is a solid choice. Instead of backpacking to the bottom of the canyon, you’ll hike down the iconic Bright Angel Trail and stay at Havasupai Garden (a lush oasis with plenty of shade). The next day, you’ll hike down to the Colorado River without a big pack on your back. This three-day excursion allows you to experience the canyon beyond the rim — something not a lot of visitors can say. And as you enjoy dinner and panoramic views at Plateau Point, you’ll feel glad you put in the effort.
Havasupai Garden is a bit of an oasis, offering hikers more shade and water than other areas along the canyon. Potable water is available year-round to hikers. These qualities are important because heat and dehydration are two of the most dangerous factors for visitors. Additionally, this trail has less elevation gain and loss than other Grand Canyon trips. You’ll still get the expansive views and magic feelings that come along with an overnight stay in the Grand Canyon , without the knee-pounding descent to the bottom. Plus, this campground has toilets, so you don’t have to worry about properly burying or packing out your waste.
You must reserve and obtain a permit to backpack in Grand Canyon National Park. Because of the popularity of this park, these permits can go quickly! A few permits for Corridor campgrounds (including Havasupai Garden) are available for walk-ups at the Backcountry Information Center in the park.
Just because the Havasupai Garden Campground is more accessible than many backcountry campsites doesn’t mean you shouldn’t take it seriously. Anytime you’re hiking below the canyon rim, you need to carefully consider the conditions, your water capacity, and your fitness level. In the hot seasons, start early to avoid mid-day heat; this is an unforgiving climate and many hikers have died by setting out unprepared. Hiking with a guide can ensure that you have the tools you need to successfully backpack in the Grand Canyon .
6. White Mountain Hut to Hut, New Hampshire

Mileage: 15 miles point-to-point | Length: 3 – 4 days | Elevation Gain/Loss: 3,600 feet
Traversing an alpine ridgeline and staying at high mountain huts — you expect that in Europe, but not in the U.S., right? But in the White Mountains of New Hampshire, you can enjoy the luxury of backcountry accommodations with the adventure of the alpine. Similar to the popular Presidential Peaks Traverse but less daunting, the High Peaks of the Pemigewasset Hut to Hut Trek offers the same appeal for a fraction of the difficulty. Staying along the Appalachian Trail (AT), you’ll bag peaks during the day and settle into cozy mountain huts at night. These trails offer a sense of camaraderie that is often hard to find when backpacking. As travelers from all over the world stay at the mountain huts, you’ll be able to chat about your hike over dinner.
On a hut-t0-hut trek , you’ll get to leave the tent and sleeping pad behind, shedding some of the heavy weight required for backpacking trips. If you’ve always wanted to spend the night in the backcountry, but aren’t ready to give up the luxuries of a bed, toilets, and running water, this will be a great introductory trip.
Also, you’re hiking above treeline for most of your trek, so the views per mile are exceptional. But, the terrain is a bit rougher than some of the other trails on this list.
Because this trek takes place primarily above the treeline, you should check the forecast , have good decision-making skills, and stay aware of thunderstorm conditions. The White Mountains are notorious for their erratic weather, so make sure to be prepared for some wild winds and weather.
You should book your stays in the AMC huts in advance. If you plan a point-to-point traverse, check out the shuttle system to ensure you can get back to your car at the end of your journey. The Appalachian Mountain Club strongly recommends reserving your shuttle; walk-ons are only accepted when space is available.
7. Lake Blanche, Wasatch Range, Salt Lake City

Mileage: 7 miles out-and-back | Length: 2 days | Elevation Gain/Loss: 2,700 feet
Lake Blanche is a popular day hiking destination in Big Cottonwood Canyon outside of Salt Lake City. Those that pack a bag to spend the night near the lakeshore (well, 200 feet from the water’s edge) will be rewarded by dwindling crowds and dazzling alpenglow on Sundial Peak. As you approach the photogenic basin, keep an eye out for moose grazing on aspens. Once you’ve set up camp, hike the spur trail to explore Lake Florence and Lake Lillan.
This backpacking trip can be completed as a quick overnight, as it is incredibly accessible from Salt Lake City, Utah. While the trail has a fair amount of elevation gain, the low mileage (3.5 one-way) makes this trip achievable for most first-time backpackers. Once you set up camp, you’ll have access to water. Also, while solitude can be desirable, you probably won’t be alone if you camp near Lake Blanche. Some first-time backpackers may feel reassured at the presence of other humans.
You do not need any permits for this backpacking trip. Check out the Uinta-Wasatch-Cache National Forest backcountry regulations before you go.
However, no swimming or campfires are allowed. Respect the watershed and don’t wash your dishes in the lake.
All-inclusive Backpacking Adventures
8. Heart Lake and Mount Sheridan, Yellowstone

Mileage: 23 miles roundtrip | Length: 3 days | Elevation Gain/Loss: 900 feet (+ 1,800 as day hike from camp)
This remote region of Yellowstone is teeming with wildlife, rolling meadows, expansive lakes, and geothermal features. So what more could you ask for? Well, when you backpack to the shores of Heart Lake, you won’t want to miss Mount Sheridan. Adding on a summit attempt to an already fantastic hiking trail really elevates this itinerary. This area is so classically Yellowstone that you’ll fall in love with the subtleties, like a pine marten running through the trees, the feeling of the wind as you approach the ridgeline, and the rising steam of the hot springs along Witch Creek.
The Heart Lake Trailhead in Yellowstone National Park is a great jumping-off point for many backpacking trips, including our Heart Lake and Mount Sheridan and Heart Lake/Snake River trips. While they are both great options for a new backpacker, the Heart Lake/Mount Sheridan trip doesn’t require a shuttle, making it easier to execute for non-guided hiking parties.
You’ll set up a basecamp for two days near Heart Lake. There, you’ll get to relax along the lakeshore in the evenings. On your layover day, you’ll hike into the alpine during your summit attempt of Mount Sheridan. If you make it to the top (and even if you don’t), you’ll get sweeping views of the Absaroka Range, the Tetons, and Yellowstone Lake.
The rewards are big for a relatively flat 8-mile hike in to camp. This itinerary gives you plenty of downtime to enjoy the leisurely pleasures of backpacking, while also ensuring you work hard to get a well-rounded experience in Yellowstone.
When it comes to the Greater Yellowstone Ecosystem (Yellowstone, into the Tetons and beyond), you’ll have one big safety consideration when backpacking. Grizzly bears. This not-so-small detail is one of the only reasons this isn’t an ideal beginner trip. However, the elevation gain and mileage are very achievable by most beginners. So, if you like the idea of this trip but aren’t keen on hiking in grizzly country, join us on a guided trip and we’ll help you build the skills you need to travel with confidence.
If you do decide to hike in grizzly country without a guide, be sure to read up on safety protocol, hike smart, carry bear spray, and keep a bear-safe camp. You’ll also need to be prepared to hang all of your food at the designated bear hangs in the Park. We’ve written all about in this blog post .
If you want to stay overnight in Yellowstone National Park, you’ll need to obtain a permit . Heart Lake is one of the more popular backpacking destinations in the park, so you should make an advanced reservation. However, permits are also available for walk-ups up to two days before your trip date. If you do decide to chance your trip with a last-minute permit, you should have a backup itinerary in place in case you can’t secure your ideal campsite.
9. Ancient Lakes, Eastern Washington

Mileage: 4 miles out-and-back | Length: 2 days | Elevation Gain/Loss: minimal
If you’re searching for the perfect early-season overnighter, look no further than Ancient Lakes near Quincy, Washington. This desert oasis is close enough to Seattle that you can squeeze in a quick weekend trip even if you only have Saturday and Sunday to play. As you wander among the columnar basalt rocks, you’ll watch waterfalls splash over the edges and create green streaks of life on the walls. Once you arrive at the lake, you’ll find many paths to explore the area. And nearly every campsite you can find has great views of the dark night sky.
Low-mileage and minimal elevation gain make this a great trip for beginners, kids, and the pup. While you do need to pack in all your water, you shouldn’t be deterred because you only have a 2-mile hike to the lake.
logistics and permits’
Pack in all the water you’ll need for your overnight trip! Even though you are hiking to lakes, all of the water is irrigation water from nearby farmlands. Agricultural runoff pollutes these water sources, so you’re better off bringing potable water from home. Also, you may want to avoid this one during the hot summer season. If you do backpack in this area during the summer, keep an eye out for rattlesnakes.
You do not need a permit to camp overnight in the Quincy Wildlife Recreation Area. However, you’ll need a Discover Pass to park at the trailhead.
10. Superior Hiking Trail, Minnesota

Mileage: varies (10+ mile one-way) | Length: varies (2+ days) | Elevation Gain/Loss: varies
We’re not recommending that you hike all 310 miles of this thru-hike for your first backpacking trip (not that we’d stop you…), but the Superior Hiking Trail (SHT) in Minnesota has many trail sections that you can complete in a weekend or on a three-to-four-day trip. Weave in and out of deciduous forests as you follow the shore of Lake Superior. You’ll cross deep gorges, pass fairytale-esque waterfalls, and even find your fair share of swimming spots. In the autumn, you’ll hike to vistas to see a sea of reds, oranges, and yellows. While the entire trail is stunning, some standout sections are from Caribou Falls State Wayside to Lutsen and from Two Harbors to Silver Bay .
The SHT hiker’s shuttle makes it easy to customize your route for your timeline and hiking ability, without having to do an out-and-back hike. Just choose one of 50 different trailheads and hike north or south! Most hikers travel from south to north. The trails are well-marked with a blue blaze.
When you’re on the trail, you encounter designated campsites very frequently. So, you never have to hike far to find a place to rest your head (unless you want to pack in the miles!) Additionally, some sections of the trail pass through towns. If you’re considering your first thru-hike or week-long trip, restocking supplies is incredibly easy.
No permits or reservations are required to hike and camp along the SHT. During busy weekends, you may have to share campsites with other hiking parties.
The trail does pass through state parks. In these areas, you can only camp with a reservation and fee. If you don’t want to make reservations, plan your itinerary so you camp in the other numerous campgrounds.
11. Glacier Gorge, Rocky Mountain National Park

Mileage: 10 miles roundtrip | Length: 2 – 3 days| Elevation Gain/Loss: 1,700 feet
If you don’t mind the company of other hikers, Glacier Gorge is a fantastic destination for a first backpacking trip in Rocky Mountain National Park . It’s hard to snag a backcountry permit for this coveted area, but if you do, you’ll stay in one of two designated campsites — either in the Glacier Gorge Valley or along Andrews Creek. If you’re staying at Andrews Creek, establish your basecamp and set out on a hike to Sky Pond , a sparkling alpine lake nestled beneath Taylor and Powell Peaks. Spend an extra day exploring the area and head up to Andrews Glacier. If you’re at the Glacier Gorge site, bring a fishing rod and test the waters at Jewel Lake. Or, hike up to Black Lake and Ribbon Falls.
The campsites are relatively close to the trailhead. Once you set up camp, you’ll have opportunities to explore stunning high mountain lake basins without the weight of a heavy pack. Starting from the Glacier Gorge Trailhead, you don’t have to gain much elevation to get some pretty impressive views.
You’ll need to reserve a wilderness camping permit if you plan to spend the night in Rocky Mountain National Park. As there are only two designated campsites in this area, the spots fill up quickly. If you plan to fish, you’ll need a valid Colorado fishing license .
In Rocky Mountain National Park, you must carry and store all your food and scented items in a bear canister. This is the only food storage method permitted in this park.
12. Observation Peak Trek, Yellowstone National Park

Milage: 10MI / 16KM roundtrip | Length: 2-3 days | Elevation Gain/Loss: 1300 ft
If you’re looking for an introduction to backpacking that will have you deep in the backcountry without having to hike for days, then a trek to Observation Peak is an excellent option. In the heartland of wild Yellowstone National Park, this relatively popular trail can be done in 2 or 3 days and gives you some of the most stunning scenery in the park. You can either chose to day hike to Observation Peak with a basecamp at Cascade Lake or include this summit on the first day of your trek before setting up camp. With moderate elevation gain and well maintained trails coupled with stunning lakes and vistas, this trail is one of the best extended weekend options in Yellowstone.
Why is it Great for a beginner?
An Observation Peak trek is a great option for first time backpackers as there are so many options for customizing the trip to what you want. Depending on if you are going for 2 or 3 days, you have options to hike to Observation Peak and take in the views, stroll to Grebe Lake and fish for trout, or simply relax at Cascade Lake if you want to rest your legs. Plus, the milage is minimal and doesn’t leave you exhausted by the time you reach camp. This trail is popular enough to make first time backpackers feel comfortable with others around, but doesn’t have so many people as to spoil the wilderness effect.
Logistics and Permits
The biggest logistical concern of hiking in Yellowstone is the wildlife. Grizzly bears are very active in this area and other wildlife such as bison and elk can also pose danger to hikers. This is one of the only downsides to embarking on this trip as an introduction to backpacking. However, with the moderate elevation and easy milage, you’ll be able to prepare for the possible dangers of wildlife and still complete this trip safely. If the wildlife seems like a bit much but the hike sounds appealing, Wildland Trekking offers this trip in both 2 and 3 day options so that you can get your feet wet before going out there on your own.
Like everywhere in Yellowstone, permits are required for overnight camping. Yellowstone’s traditional backpacking season is shorter than other national parks, mostly limited to summer, so you’ll want to make advanced reservations to ensure you get the route you want. Walk up permits are available at ranger stations 1 or 2 days before you begin your trek, but they go quickly each morning. It’s a good idea to have a back up itinerary in case you don’t get the permit you want. Permits are included on guided trips
Wildland Trekking offers this trip as an all-inclusive guided hike with meals, gear, transportation, permits, and an expert mountain guide all included. Guided trips are a great way to find out what backpacking is like before getting out there on your own. Click here to learn more!
13. Little Lakes Valley, Inyo National Forest, California

Milage: 8-10MI / 13-16KM Roundtrip | Length: 2-3 days | Elevation Gain/Loss: 1218 ft
Just north of Bishop on California’s Highway 395 is a blink-and-you’ll-miss-it turnoff with one of the Eastern Sierra’s best short distance hiking destinations: Little Lakes Valley. This valley, accessed from Mosquito Flats , is a great destination for a first time backpacking trip. With over a dozen serene alpine lakes, this valley is overflowing with campsite options, day hiking, fishing, and stunning views. While the trail is easily assessable, it’s no overly crowded and with the abundance of campsites, hikers may get an opportunity to have a lake to themselves. Located in the Inyo National Forest, there’s much less competition for permits compared to national park trails, but the scenery is no less spectacular.
Little Lakes Valley is great for beginner backpackers because of the big bank for your buck (or view for your step) that you get on this short and relatively flat trail. There is some elevation gain on the way into the valley, but that means it’s downhill on the way back! The abundance of lakes and streams make finding water a breeze and the pristine lakes with a back drop of snow capped, jagged peaks is unbeatable. Plus, the trail is easily accessible from Highway 395 and Tom’s Place at the turnoff is a great place to spot at for a burger on the way out!
Logistics for backpacking in Little Lakes Valley are pretty minimal as the short trail is out and back and there is only one access point. Your biggest concern is going to be the elevation as the trailhead is over 10,000 ft above sea level. All backpackers (not just beginners) who don’t live at elevation should spend at least one night (if not two) at a nearby campground that’s around 7,000 to 8,000 ft in order to acclimate to the elevation. Convict Lake is a good, close-by option for this.
Only attempt this hike in summer and early fall and make sure to check the weather before you go to assess road and snow conditions. Permits are required to spend the night here, but there is much less competition for them compared to national parks. You can make reservations online or get walk up permits at Inyo National Forest’s backcountry permit office.
This is bear country and you will need to use bear resistant containers for all food and smelly items. There are no campfires allowed anywhere in the valley and water collected from lakes and streams should be filtered.
14. Half Dome, Yosemite National Park

Milage: 16MI / 26KM Roundtrip | Length : 4 days | Elevation Gain/Loss: 2845 ft
First, a disclaimer: this trip is hard. Hiking to and up Half Dome is a challenge with large elevation gains and lots of exposure to heights. Beginning with the Mist Trail and ending with hiking the cables , this hike is not to be underestimated. But the views from the top are worth it. While many people do this hike in a single day, backpacking to the base of Half Dome and then summiting in the morning before any day hikers arrive is a great option, allowing you to skip the extremely long and strenuous milage day. It is notoriously difficult to get permits to hike Half Dome, but the backpacking permit is separate from the day hiking permit and will be easier to get.
So if this trip is so hard, why is it included in this list of best trips for beginner backpackers? Well, beginner trips don’t necessarily mean easy trips. If you are already an avid outdoors person, in good physical condition, and accustomed to hiking, you might want your first backpacking trip to be a bit of a physical (if not a technical or logistical) challenge. In this case, Half Dome may be a great option for you, especially if you’ve already done it as a day hike.
While the elevation is still hefty even for avid hikers, backpacking to the monolith cuts down the milage to reasonable days, making a backpacking trip arguably easier than a day hike. Of course, you might consider going with a guiding company due to the somewhat technical terrain on the granite and to avoid the hassle of getting permits.
Hiking Half Dome comes with some logistics to work out. The cables on the last miles of the climb are only up from late May through early October when there won’t be snow and ice on the granite. In addition, you won’t be able to hike on a rainy day (or even a day that is threatening rain) as the granite becomes extremely slippery when wet. Most accidents happen in wet weather. Check the forecast and make sure there are no storms brewing.
Permits are notoriously difficult to obtain for Half Dome, but backpacking permits are a little bit easier as you are not competing against all the day hikers for a spot. You can reserve permits on the National Park Service’s website.
The trail is in and back, so you won’t have to worry about transportation if you park your car at the trail head. Remember, this trail is commonly done as a day hike, so don’t expect to have backcountry solitude on this trek.
Backpacking to Half Dome with a guiding company can be a great way to challenge yourself physically, but have an expert guide to show you the ropes of backpacking before you get out there on your own. We offer this trek as a guided tour for anyone wanting a bit of a challenge with great rewards. All of our trips are all-inclusive with meals, gear, transportation, permits, and an expert mountain guide all included. Click here to learn more!
15. West Rim, Zion National Park

Milage: 16MI / 27KM Point to Point | Length: 2 days | Elevation Gain/Loss: 1700 ft
Beginning far from the gorgeous yet busy canyon that is Zion’s main attraction, the West Rim trail is a scenic, mostly downhill, 2 day backpacking trip that will knock the socks off any first time backpacker. Even seasoned backpackers will be kept interested on this moderate trail with non-stop views of Zion’s majestic red rock canyons and some campsites from which you can see both the sunset and the sunrise. Beginning at Zion’s highest point at Lava Point and hiking down toward the canyon, this trip takes hikers up to the alpine portions of Zion and then down into traversing through the classic canyons. And to top it all off, you’ll end at Scout Lookout with some of the most famous views in the park.
The West Rim in Zion is a great trip for first time backpackers because it is simply loaded with gorgeous views and isn’t too strenuous. You’ll be able to take leisurely mornings when hiking this trail over two days and if you start at Lava Point, it’s almost entirely downhill! (You will want to bring trekking poles however, all that downhill hiking can be hard on the knees). The elevation and milage are moderate and you simply can’t beat the views down into the canyon. While Zion is known for its crowds, you won’t find this trail overly crowded, giving first time backpackers a chance for some solitude on the trail.
Zion’s West Rim comes with a few logistical issues, but none that a first time backpacker can’t figure out. The trail is out and back so you will need to either park a car at the end of the trail and drive a second one to the trail head or use a shuttle service. Shuttles can be arranged from town easily.
Another logistical concern is water. There are seasonal springs along the trail, but the only one that flows year round is Cabin Spring. Water from streams and rivers may be impacted by a recent bacteria bloom that contain cyanotoxins, making the water unsafe for drinking and swimming. Please see the Zion’s official website for current updates on the cyanobacteria bloom.
Permits are required for overnight use and they double as campsite reservations for one of the 9 campsites along the trail. Walkup permits are available, but it’s best to reserve them online to make sure you get the permit you want. Zion has stricter regulations about backpacking compared to other national parks, so make sure to read the trail rules before setting out.
About Hannah Singleton

Hannah is a content strategist, writer, and guide for Wildland Trekking Company. She was born and raised on the East Coast but currently resides in Salt Lake City, UT where she spends her time exploring the wonders of the Rocky Mountain West. You can check out more of her freelance writing at www.hannah-singleton.com.

wildland Wires
Sign up to receive our exclusive Wildland Wire emails and stay up to date with Wildland Trekking's promotions, discounts, contests, outdoor tips and tricks, trip reports and more!

My complete weekend backpacking pack list
Here I’m sharing everything I pack for a weekend backpacking trip. Feel free to use it as a complete packing check list or to get ideas and inspiration for deciding what to bring for a backpacking trip of your own.
I always love seeing what other backpackers are packing. People are so creative and have such well thought out systems. As a gear junkie, I’m on an endless mission to try new things and fine tune my own setup.
Click here for a list of all my current favorite outdoor gear
When I first started backpacking, I also started out with just the essentials, buying used and borrowing things. Since then it’s been a continuous journey of upgrading my gear and trying out lots of different things, and that’s just part of the fun! You don’t need to spend a ton of money to get backpacking, I wrote a blog post here on how to save money on gear.
About my pack style
Over the past ten years, I’ve really been able to fine tune exactly what works for me. Most of the trips I take are on the shorter side (one to two nights), and for these trips I’m looking for comfort and don’t mind carrying a little extra weight, since I’m usually not covering tons of miles in just a single weekend.
I did write a blog post about what I packed for the High Sierra Trail, which is what I would typically pack for longer trips up to a week long.
Affiliate disclaimer: this article includes some affiliate links, which means I may earn a small commission on any purchase made - at no additional cost to you. As always, all opinions are my own. Thank you for supporting the work I do to keep creating meaningful content like this for you!
Basic Backpacking Essentials
These are the items you should have in their most basic form for any trip into the backcountry. As simple as the basics might seem, you should always be prepared for anything Mother Nature might have in store for you!
Tent - out of the three tents I own I usually opt for the MSR Hubba Hubba for weekenders for its nice balance between being light weight and livable.
Backpack - for all trips, short and long, I use my trusty and comfortable Osprey Aura 65 since it can expand or pack down.
Boots - usually my Danner boots for these shorter, less rugged trips.
Sleeping bag - this will depend on the season and anticipated night time temperatures, but I will usually opt for a warmer bag rated for 21-30F even in the summer (you’ll never regret being too warm in the mountains!).
Sleeping pad - I like this one that doesn’t require blowing for inflation, and it is more comfortable and less crinkly than my ultralight option.
Stove - honestly I’ve found that most stoves work to my liking regardless of their price. I’ve been using an older, discontinued MSR version for years.
Water filter - this one by Platypus is probably my favorite piece of gear I own. I’ll never go back to pumping water ever again. The bladders have a high capacity, so it’s great for groups and even doubles as a camp sink when hung from a tree.
Utensils - as much as I love to cook at home, to avoid doing dishes, and mostly out of laziness 99% of the time I’ll go with dehydrated meals in the backcountry. This long-handled spoon is a necessity for not getting food on the back of your hand while eating.
First aid kit - I always pack a small first aid kit (did you know medical kits are FSA eligible? Score!) for any emergencies or booboos. I’ve amped mine up with moleskin , blister bandaids , sleeping pad patch kit , a small nub of duct tape, and an emergency blanket .
Knife - I’ve used the same Spyderco knife for 10+ years! Light, compact, and durable.
Water container - I use a 3L reservoir since I find having a tube encourages me to drink more water while hiking, but a Nalgene is also a budget-friendly and light option.
Headlamp - it’s super important to also know where it is at all times for quick access. This one has 400 lumens, and I also bring an extra set of batteries ( these rechargeable ones ) just in case.
Map/GPS - I use my phone with several different apps. I download offline Google maps, and I also use Gaia and the Garmin app with my Garmin watch .
Clothes - for a weekend alpine trip I will typically pack a fleece jacket, down jacket , and rain jacket for outerwear. Then always my wool base layers , one warm pair of socks for sleeping, and a pair of leggings or hiking pants (I love the fit of these sustai nable ones ). Don’t be afraid to rewear clothes, socks, sports bras, etc! See my main gear page for my current favorite women’s hiking clothes.

What I always pack
These items aren’t commonly regarded as necessary as the items above are, but these are items that I will always pack for my shorter trips since they make my time in the backcountry comfortable and more enjoyable.
Pillow - as a side sleeper, this super light and compact inflatable pillow is essential for getting a good night’s rest in the outdoors.
Sleeping bag liner - I’m a cold sleeper, so this liner not only gives me a couple degrees of warmth, but it also protects my bag from any oils, lotions, or dust on my clothes or body that could seep into the sleeping bag over time.
Hat/sunglasses - you’re more prone to sunburn at higher elevation, so be sure to pack protection. Don’t think your eyeballs can’t burn too, because I’ve seen it!
Toiletries - for me this means sunscreen, chapstick, contact solution and case, mini toothbrush and toothpaste, and a little bit of lotion.
Mug - what is a morning in the backcountry without a hot drink in hand? I either bring a collapsible one or if I have more room, this insulated one .
Trowel & toilet paper - I use this ultralight one and pack some toilet paper and a couple ziplocs to pack out any used toilet paper.
Snacks - snacks are crucial for long hikes, and I must admit I am a food-driven individual. Some of my favorites for the trail are sour candy, protein bars, and trail mix. If I’m going for an overnighter with friends, I might even include boxed wine and … a mini charcuterie spread! Always a crowd favorite. I cover backpacking food and snack ideas more in this blog post .

Location-specific gear
Bear can - California and many other mountainous regions in North America require the use of bear canisters in some areas. Be sure to know the regulations for your area. I have a full-size one for 2+ people and a mini one for individual/overnight use, and I like that these are clear so you can see inside. You can also rent from some visitor centers and outdoor gear stores like REI.
Bug repellent/head net - depending on the season and location, mosquitos can really put a damper on any trip. I like to treat my clothes with Permethrin , and also bring bug repellent and even a head net for the more extreme cases (early season destinations with water).

Optional gear to consider
Depending on the type of trip, there are several items that I might want pack. These are by no means necessary, but they are items that I occasionally pack on shorter trips and greatly enjoy having.
Trekking poles - I’ll bring these light poles if the terrain is particularly rocky or uneven, or if I’m trying to hike longer distances than usual in a day.
Packable daypack - if my weekend route involves a base camp for more than one night and doing a day hike with a lighter pack, I’ll pack this super light and compact backpack that fits in the palm of my hand.
Hammock - if I know there will be lots of trees and down time, I love this ultralight hammock to kick up my feet and relax near camp.
Camp chair - an alternative to the hammock when I know I’ll want to be relaxing a lot but not sure if there will be trees to hang a hammock. I like to pack this budget-friendly one particularly on desert or sandy trips.
Microfiber towel - a packable and quick dry towel is a must if I can get in the water.
Camp sandals - after a long day of hiking, wearing sandals is such a luxury to take a break from boots or to go swimming in. I love something really light that can clip onto the outside of my pack like these Teva sandals .

Camera gear
Camera setup - one lens is plenty enough for me, and my current favorite pairing is the Sony a7Riii + 16-35mm wide angle zoom lens. Check out the rest of my favorite camera gear here .
Camera clip - this nifty clip attaches to my backpack strap and allows me to hang my camera from my shoulder so that I can hike and shoot at the same time, which is something I often do.
Lens cap bungees - I’ve dropped too many lens caps in rock crevasses and streams to count, so you can bet I have one of these lens cap keepers on each lens.
Lens cleaner pen - being out in the elements means a lot of dust or water. This compact tool helps keep my lens clean and clear.
Don’t be daunted by this long list. As long as you have some variation of the essentials, you’re ready to go backpacking! The rest is just fluff. That is what I love most about backpacking, it truly is empowering to see how little you need in your life to thrive in the outdoors.
Do you have a favorite item to bring backpacking? Let me know in the comments!

- Meet the Team
- Work with Us
- Czech Republic
- Netherlands
- Switzerland
- Scandinavia
- Philippines
- South Korea
- New Zealand
- South Africa
- Budget Travel
- Work & Travel
- The Broke Backpacker Manifesto
- Travel Resources
- How to Travel on $10/day
Home » Europe » Moscow
EPIC MOSCOW Itinerary! (2024)
Moscow is the heart of Mother Russia. Just the mention of this city conjures images of colorful bulbous pointed domes, crisp temperatures, and a uniquely original spirit!
Moscow has an incredibly turbulent history, a seemingly resilient culture, and a unique enchantment that pulls countless tourists to the city each year! Although the warmer months make exploring Moscow’s attractions more favorable, there’s just something about a fresh snowfall that only enhances the appearance of the city’s iconic sites!
If you’re a first-time visitor to Moscow, or simply wanting to see as much of the city as possible, this Moscow itinerary will help you do just that!

Unlock Our GREATEST Travel Secrets!
Sign up for our newsletter and get the best travel tips delivered right to your inbox.
Best Time To Visit Moscow
Where to stay in moscow, moscow itinerary, day 1 itinerary in moscow, day 2 itinerary in moscow, day 3 and beyond, staying safe in moscow, day trips from moscow, faq on moscow itinerary.
Here is a quick look at the seasons so you can decide when to visit Moscow!
The summer months (June-August) are a great time to travel to Moscow to take advantage of the enjoyable mild temperatures. This is considered peak travel season. Bear in mind that hotel prices rise along with the temperatures!

If you’re planning a trip to Moscow during fall (September-November) try to plan for early fall. This way the temperatures will still be pleasant and winter won’t be threatening.
Russian winters (December-February) are not for the faint of heart as Napoleon learned to his peril. Some days the sun will be out for less than an hour, and snow is guaranteed. Although winters are exceptionally cold, this is when you’ll get a true glimpse of the Moscow experience!
The best time to visit Moscow is during spring (March-May). The temperatures will begin to creep up and the sun begins to shine for significant portions of the day. Hotel rates will also have yet to skyrocket into peak ranges!

With a Moscow City Pass , you can experience the best of Moscow at the CHEAPEST prices. Discounts, attractions, tickets, and even public transport are all standards in any good city pass – be sure invest now and save them $$$ when you arrive!
Moscow is a large city with many accommodation options to choose from. Staying in a location that fits with your travel plans will only enhance your Moscow itinerary. Here is a brief introduction to a few great areas of the city we recommend checking out!
The best place to stay in Moscow to be close to all the action is Kitay-Gorod. This charming neighborhood will put you within walking distance to Moscow’s famous Red Square, thus cutting down on travel time. This will allow you to see more of the city in a shorter amount of time!

It’s surrounded by restaurants, cafes, bars, and shops. If you’re a first-time visitor to Moscow, or just planning a quick weekend in Moscow, then this area is perfect for you!
Another great area to consider is the Zamoskvorechye district. This area of the city offers a blend of new and old Moscow. It has an artsy vibe and there are plenty of fun sites you can explore outside of the main touristy areas of Moscow.
Of course, as in all areas of Moscow, it’s close to public transportation that will quickly connect you with the rest of the city and make your Moscow itinerary super accessible!
Best Airbnb in Moscow – Exclusive Apartment in Old Moscow

Modern and cozy, this apartment is in the heart of Old Moscow. Bordering the Basmanny and Kitay-Gorod districts, this two-bedroom flat is walking distance to the Kremlin and Red Square. Safe, quiet, and comfortable, this is the best Airbnb in Moscow, no question!
Best Budget Hotel in Moscow – Izmailovo Alfa Hotel

The Izmailovo Alfa Hotel is a very highly rated accommodation that provides all the components necessary for a comfortable trip to Moscow. There is an on-site restaurant, bar, fitness center, and an airport shuttle service. The rooms are modern and spacious and are equipped with a TV, heating/air conditioning, minibar, and more!
Best Luxury Hotel in Moscow – Crowne Plaza Moscow World Trade Centre

If you’re touring Moscow in luxury, the Crowne Plaza Moscow World Trade Centre is the hotel for you! Elegantly furnished rooms are equipped with a minibar, flat-screen TV, in-room safes, as well as tea and coffee making facilities! Bathrooms come with bathrobes, slippers, and free toiletries. There is also an onsite restaurant, bar, and fitness center.
Best Hostel in Moscow – Godzillas Hostel

Godzillas Hostel is located in the center of Moscow, just a short walk from all the major tourist attractions and the metro station. Guests will enjoy all the usual hostel perks such as self-catering facilities, 24-hour reception, Free Wi-Fi, and security lockers. This is one of the best hostels in Moscow and its wonderful social atmosphere and will make your vacation in Moscow extra special!
Godzillas Hostel is one of our favourites in Moscow but they’re not taking guests right now. We’re not sure if they’re closed for good but we hope they’ll come back soon.
An important aspect of planning any trip is figuring out the transportation situation. You’re probably wondering how you’re going to get to all of your Moscow points of interest right? Luckily, this sprawling city has an excellent network of public transportation that will make traveling a breeze!
The underground metro system is the quickest and most efficient way to travel around Moscow. Most visitors rely exclusively on this super-efficient transportation system, which allows you to get to pretty much anywhere in the city! It’s also a great option if you’re planning a Moscow itinerary during the colder months, as you’ll be sheltered from the snow and freezing temperatures!

If you prefer above-ground transportation, buses, trams, and trolleybuses, run throughout the city and provide a rather comfortable alternative to the metro.
Moscow’s metro, buses, trams, and trolleybuses are all accessible with a ‘Troika’ card. This card can be topped up with any sum of money at a metro cash desk. The ticket is simple, convenient, and even refundable upon return to a cashier!
No matter which method you choose, you’ll never find yourself without an easy means of getting from point A to point B!
Red Square | Moscow Kremlin | Lenin’s Mausoleum | St. Basil’s Cathedral | GUM Department Store
Spend the first day of your itinerary taking your own self guided Moscow walking tour around the historic Red Square! This is Moscow’s compact city center and every stop on this list is within easy walking distance to the next! Get ready to see all of the top Moscow landmarks!
Day 1 / Stop 1 – The Red Square
- Why it’s awesome: The Red Square is the most recognizable area in Moscow, it has mesmerizing architecture and centuries worth of history attached to its name.
- Cost: Free to walk around, individual attractions in the square have separate fees.
- Food nearby: Check out Bar BQ Cafe for friendly service and good food in a great location! The atmosphere is upbeat and they’re open 24/7!
The Red Square is Moscow’s historic fortress and the center of the Russian government. The origins of the square date back to the late 15th century, when Ivan the Great decided to expand the Kremlin to reflect Moscow’s growing power and prestige!
During the 20th century, the square became famous as the site for demonstrations designed to showcase Soviet strength. Visiting the Red Square today, you’ll find it teeming with tourists, who come to witness its magical architecture up close!

The square is the picture postcard of Russian tourism, so make sure to bring your camera when you visit! No matter the season, or the time of day, it’s delightfully photogenic!
It’s also home to some of Russia’s most distinguishing and important landmarks, which we’ve made sure to include further down in this itinerary. It’s an important center of Russia’s cultural life and one of the top places to visit in Moscow!
In 1990, UNESCO designated Russia’s Red Square as a World Heritage site. Visiting this historic site is a true bucket-list event and essential addition to your itinerary for Moscow!
Day 1 / Stop 2 – The Moscow Kremlin
- Why it’s awesome: The Moscow Kremlin complex includes several palaces and cathedrals and is surrounded by the Kremlin wall. It also houses the principal museum of Russia (the Kremlin Armory).
- Cost: USD $15.00
- Food nearby: Bosco Cafe is a charming place to grat a casual bite to eat. They have excellent coffee and wonderful views of the Red Square and the Moscow Kremlin!
The iconic Moscow Kremlin , also known as the Kremlin museum complex, sits on Borovitsky Hill, rising above the Moscow River. It is a fortified complex in the center of the city, overlooking several iconic buildings in the Red Square!
It’s the best known of the Russian Kremlins – citadels or fortress’ protecting and dominating a city. During the early decades of the Soviet era, the Kremlin was a private enclave where the state’s governing elite lived and worked.
The Kremlin is outlined by an irregularly shaped triangular wall that encloses an area of 68 acres! The existing walls and towers were built from 1485 to 1495. Inside the Kremlin museum complex, there are five palaces, four cathedrals, and the enclosing Kremlin Wall with Kremlin towers.
The Armoury Chamber is a part of the Grand Kremlin Palace’s complex and is one of the oldest museums of Moscow, established in 1851. It showcases Russian history and displays many cherished relics. Definitely make sure to check out this museum while you’re here!

The churches inside the Moscow Kremlin are the Cathedral of the Dormition, Church of the Archangel, Church of the Annunciation, and the bell tower of Ivan Veliki (a church tower).
The five-domed Cathedral of the Dormition is considered the most famous. It was built from 1475–1479 by an Italian architect and has served as a wedding and coronation place for great princes, tsars, and emperors of Russia. Church services are given in the Kremlin’s numerous cathedrals on a regular basis.
The Grand Kremlin Palace was the former Tsar’s Moscow residence and today it serves as the official workplace of the President of the Russian Federation (Vladimir Putin seems to have bagged that title for life) .
Insider Tip: The Kremlin is closed every Thursday! Make sure to plan this stop on your Moscow itinerary for any other day of the week!
Day 1 / Stop 3 – Lenin’s Mausoleum
- Why it’s awesome: The mausoleum displays the preserved body of Soviet leader Vladimir Lenin .
- Cost: Free!
- Food nearby: Khinkal’naya is a charming Georgian restaurant with vaulted ceilings and exposed brick. It’s a popular place with locals and right next to the Red Square!
Lenin’s Mausoleum, also known as Lenin’s Tomb, is the modernist mausoleum for the revolutionary leader Vladimir Lenin. It’s located within the Red Square and serves as the resting place for the Soviet leader! His preserved body has been on public display since shortly after his death in 1924.
It’s located just a few steps away from the Kremlin Wall and is one of the most controversial yet popular Moscow attractions!
Admission is free for everyone, you’ll only need to pay if you need to check a bag. Before visitors are allowed to enter the mausoleum, they have to go through a metal detector first. No metal objects, liquids, or large bags are allowed in the mausoleum!

Expect a line to enter the building, and while you’re inside the building, you’ll be constantly moving in line with other visitors. This means you won’t be able to spend as long as you’d like viewing the mausoleum, but you’ll still be able to get a good look. Pictures and filming while inside the building are strictly prohibited, and security guards will stop you if they see you breaking this rule.
The mausoleum is only open on Tuesday, Wednesday, Thursday, and Saturday – unless it’s a public holiday or a day scheduled for maintenance. The hours it’s open for each day are limited, make sure to check online before you visit to make sure you can fit this into your Moscow itinerary for that day!
Insider Tip: The Lenin’s Museum is there for people to pay their respect; remember to keep silent and move along quickly, it’s not intended for people to congregate around. Also, men are not allowed to wear hats and everyone must take their hands out of their pockets when inside the building.
Day 1 / Stop 4 – St. Basil’s Cathedral
- Why it’s awesome: A dazzling designed cathedral that showcases Russia’s unique architecture. This cathedral is one of the most recognizable symbols of the country!
- Cost: USD $8.00
- Food nearby: Moskovskiy Chaynyy Klub is a cozy cafe serving food items and pipping hot tea; it’s the perfect place to go if you’re visiting Moscow during the winter months!
Located in the Red Square, the ornate 16th-century St. Basil’s Cathedral is probably the building you picture when you think of Moscow’s unique architecture. Its colorful onion-shaped domes tower over the Moscow skyline!
The cathedral was built from 1555-1561 by order of Tsar Ivan the Terrible. It was designed with an iconic onion dome facade and enchanting colors that captivate all who see it. Fun fact: If you’re wondering why Russian churches have onion domes, they are popularly believed to symbolize burning candles!
This iconic cathedral has become a symbol of Russia due to its distinguishing architecture and prominent position inside the Red Square. It’s one of the most beautiful, wonderful, and mesmerizing historical cathedrals in the world!

The interior of the church surprises most people when they visit. In contrast to the large exterior, the inside is not so much one large area, but rather a collection of smaller areas, with many corridors and small rooms. There are 9 small chapels and one mausoleum grouped around a central tower.
Visiting the inside is like walking through a maze, there are even small signs all around the cathedral tracing where to walk, and pointing you in the right direction! The walls are meticulously decorated and painted with intricate floral designs and religious themes.
The church rarely holds service and is instead a museum open for the public to visit.
Insider Tip: During the summer months the line to go inside the cathedral can get quite long! Make sure to arrive early or reserve your tickets online to guarantee quick access into the cathedral!
Day 1 / Stop 5 – GUM Department Store
- Why it’s awesome: This is Russia’s most famous shopping mall! It’s designed with elegant and opulent architecture and provides a real sense of nostalgia!
- Cost: Free to enter
- Food nearby: Stolovaya 57 is a cafeteria-style restaurant with a variety of inexpensive Russian cuisine menu items including soups, salads, meat dishes, and desserts. It’s also located inside the GUM department store, making it very easily accessible when you’re shopping!
The enormous GUM Department Store is located within the historic Red Square. It has a whimsical enchantment to it that sets it apart from your typical department store.
A massive domed glass ceiling lines the top of the building and fills the interior with natural sunlight. There are live plants and flowers placed throughout the mall that give the shopping complex a lively and cheerful feel! A playful fountain sits in the center, further adding to the malls inviting a sense of wonder and amusement!
The GUM department store opened on December 2, 1893. Today, it includes local and luxury stores, including Fendi, Louis Vuitton, Prada, and many more! There are numerous cafes, restaurants, and even a movie theater inside!

For a special treat, head into Gastronom 1. This 1950s-style shop sells gourmet food items, like wine, freshly-baked pastries, cheese, Russian chocolate, and of course, vodka! Also, be on the lookout for a bicycle pedaling ice cream truck with an employing selling ice cream!
The ambiance is simply amazing, a trip to this idyllic shopping mall is an absolute must on any Moscow itinerary!
Insider Tip: Make sure to carry some small change on you in case you need to use the restroom, you’ll need to pay 50 rubles – or about USD $0.80 to use the bathroom in GUM.

Wanna know how to pack like a pro? Well for a start you need the right gear….
These are packing cubes for the globetrotters and compression sacks for the real adventurers – these babies are a traveller’s best kept secret. They organise yo’ packing and minimise volume too so you can pack MORE.
Or, y’know… you can stick to just chucking it all in your backpack…
Novodevichy Convent | Gorky Park | State Tretyakov Gallery | All-Russian Exhibition Center | Bolshoi Theater
On your 2 day itinerary in Moscow, you’ll have a chance to use the city’s excellent public transportation service! You’ll explore a few more of Moscow’s historic highlight as well as some modern attractions. These sites are a little more spread out, but still very easily accessible thanks to the metro!
Day 2 / Stop 1 – Novodevichy Convent
- Why it’s awesome: The Novodevichy Convent is rich in imperial Russian history and contains some of Russia’s best examples of classical architecture!
- Cost: USD $5.00
- Food nearby: Culinary Shop Karavaevs Brothers is a cozy and simple place to have a quick bite, they also have vegetarian options!
The Novodevichy Convent is the best-known and most popular cloister of Moscow. The convent complex is contained within high walls, and there are many attractions this site is known for!
The six-pillared five-domed Smolensk Cathedral is the main attraction. It was built to resemble the Kremlin’s Assumption Cathedral and its facade boasts beautiful snowy white walls and a pristine golden onion dome as its centerpiece. It’s the oldest structure in the convent, built from 1524 -1525, and is situated in the center of the complex between the two entrance gates.
There are other churches inside the convent as well, all dating back from many centuries past. The convent is filled with an abundance of 16th and 17th-century religious artworks, including numerous large and extravagant frescos!

Just outside the convent’s grounds lies the Novodevichy Cemetery. Here, you can visit the graves of famous Russians, including esteemed authors, composers, and politicians. Probably the most intriguing gravestone belongs to Russian politician Nikita Khruschev!
The Novodevichy Convent is located near the Moscow River and offers a peaceful retreat from the busy city. In 2004, it was proclaimed a UNESCO World Heritage Site. The convent remains remarkably well-preserved and is an outstanding example of Moscow Baroque architecture!
Insider Tip: To enter the cathedrals inside the complex, women are advised to cover their heads and shoulders, while men should wear long pants.
Day 2 / Stop 2 – Gorky Central Park of Culture and Leisure
- Why it’s awesome: A large amusement area in the heart of the city offering many attractions!
- Cost: Free!
- Food nearby: Check out Mepkato, located inside Gorky Central Park for a casual meal in a cozy setting. There are indoor and outdoor seating options and the restaurant is child-friendly!
Gorky Central Park of Culture and Leisure is a large green space in the heart of Moscow. The park opened in 1928, and it stretches along the scenic embankment of the Moskva River. It covers an area of 300-acres and offers a lovely contrast from the compact city center.
You’ll find all sorts of wonderful attractions, from boat rides to bike rentals to tennis courts and ping-pong tables, and much more! there are an open-air cinema and festive events and concerts scheduled in the summer months. A wide selection of free fitness classes is also offered on a regular basis, including jogging, roller skating, and dancing!
Although many of the options you’ll find here are more suited for outdoor leisure during the summer, you’ll also a selection of winter attractions, including one of Europe’s largest ice rinks for ice-skating!

If you’re trying to decide what to do in Moscow with kids, the park also offers several venues designed specifically for kids. Check out the year-round Green School which offers hands-on classes in gardening and art! You can also feed the squirrels and birds at the Golitsinsky Ponds!
The park is very well maintained and kept clean and the entrance is free of charge, although most individual attractions cost money. There is also Wi-Fi available throughout the park.
With so many attractions, you could easily spend all day here! If you’re only planning a 2 day itinerary in Moscow, make sure to plan your time accordingly and map out all the areas you want to see beforehand!
Day 2 / Stop 3 – The State Tretyakov Gallery
- Why it’s awesome: The gallery’s collection consists entirely of Russian art made by Russian artists!
- Food nearby : Brothers Tretyakovs is located right across the street from the gallery. It’s a wonderfully atmospheric restaurant serving top quality food and drinks!
The State Tretyakov Gallery was founded in 1856 by influential merchant and collector Pavel Tretyakov. The gallery is a national treasury of Russian fine art and one of the most important museums in Russia!
It houses the world’s best collection of Russian art and contains more than 130, 000 paintings, sculptures, and graphics! These works have been created throughout the centuries by generations of Russia’s most talented artists!

The exhibits range from mysterious 12th-century images to politically charged canvases. The collection is rich and revealing and offers great insight into the history and attitudes of this long-suffering yet inspired people!
All pictures are also labeled in English. If you plan to take your time and see everything inside the museum it will take a good 3-4 hours, so make sure to plan your Moscow trip itinerary accordingly! This gallery is a must-see stop for art lovers, or anyone wanting to explore the local culture and history of Russia in a creative and insightful manner!
Insider Tip: When planning your 2 days in Moscow itinerary, keep in mind that most museums in Moscow are closed on Mondays, this includes The State Tretyakov Gallery!
Day 2 / Stop 4 – All-Russian Exhibition Center
- Why it’s awesome: This large exhibition center showcases the achievements of the Soviet Union in several different spheres.
- Food nearby: Varenichnaya No. 1 serves authentic and homestyle Russian cuisine in an intimate and casual setting.
The All-Russian Exhibition Center is a massive park that presents the glory of the Soviet era! It pays homage to the achievements of Soviet Russia with its many different sites found on the property.
The center was officially opened in 1939 to exhibit the achievements of the Soviet Union. It’s a huge complex of buildings and the largest exhibition center in Moscow. There are several exhibition halls dedicated to different achievements and every year there are more than one hundred and fifty specialized exhibitions!

The Peoples Friendship Fountain was constructed in 1954 and is a highlight of the park. The stunning gold fountain features 16 gilded statues of girls, each representing the former Soviet Union republics.
The Stone Flower Fountain was also built in 1954 and is worth checking out. The centerpiece of this large fountain is a flower carved from stones from the Ural Mountains! Along the side of the fountain are various bronze sculptures.
You will find many people zipping around on rollerblades and bicycles across the large area that the venue covers. It’s also home to amusement rides and carousels, making it the perfect place to stop with kids on your Moscow itinerary! Make sure to wear comfortable shoes and allow a few hours to explore all the areas that interest you!
Day 2 / Stop 5 – Bolshoi Theater
- Why it’s awesome: The Bolshoi Theater is a historic venue that hosts world-class ballet and opera performances!
- Cost: Prices vary largely between USD $2.00 – USD $228.00 based on seat location.
- Food nearby: Head to the Russian restaurant, Bolshoi for high-quality food and drinks and excellent service!
The Bolshoi Theater is among the oldest and most renowned ballet and opera companies in the world! It also boasts the world’s biggest ballet company, with more than 200 dancers!
The theater has been rebuilt and renovated several times during its long history. In 2011 it finished its most recent renovation after an extensive six-year restoration that started in 2005. The renovation included an improvement in acoustics and the restoration of the original Imperial decor.
The Bolshoi Theater has put on many of the world’s most famous ballet acts! Tchaikovsky’s ballet Swan Lake premiered at the theater in 1877 and other notable performances of the Bolshoi repertoire include Tchaikovsky’s The Sleeping Beauty and The Nutcracker!

Today, when you visit the theater, you can expect a magical performance from skilled singers, dancers, and musicians with the highest level of technique!
If you don’t have time to see a show, the theater also provides guided tours on select days of the week. Tours are given in both Russian and English and will provide visitors with a more intimate look at the different areas of the theater!
The stage of this iconic Russian theater has seen many outstanding performances. If you’re a fan of the performing arts, the Bolshoi Theater is one of the greatest and oldest ballet and opera companies in the world, making it a must-see attraction on your Moscow itinerary!

Godzillas Hostel
Godzillas Hostel is located in the center of Moscow, just a short walk from all the major tourist attractions and the metro station.
- Towels Included
Cosmonautics Museum | Alexander Garden | Ostankino Tower | Izmaylovo District | Soviet Arcade Museum
Now that we’ve covered what to do in Moscow in 2 days, if you’re able to spend more time in the city you’re going to need more attractions to fill your time. Here are a few more really cool things to do in Moscow we recommend!
Memorial Museum of Cosmonautics
- Hear the timeline of the ‘space race’ from the Russian perspective
- This museum is fun for both adults and children!
- Admission is USD $4.00
The Memorial Museum of Cosmonautics is a museum dedicated to space exploration! The museum explores the history of flight, astronomy, space exploration, space technology, and space in the arts. It houses a large assortment of Soviet and Russian space-related exhibits, and the museum’s collection holds approximately 85,000 different items!

The museum does an excellent job of telling the full story of the exciting space race between the USSR and the US! It highlights the brightest moments in Russian history and humanity and is very interesting and fun for all ages!
If you’re a fan of space or just curious about gaining insight into Russia’s fascinating history of space exploration, make sure to add this to your 3 day itinerary in Moscow!
The Alexander Garden
- A tranquil place to relax near the Red Square
- Green lawns dotted with sculptures and lovely water features
- The park is open every day and has no entrance fee
The Alexander Garden was one of the first urban public parks in Moscow! The garden premiered in 1821 and was built to celebrate Russia’s victory over Napoleon’s forces in 1812!
The park is beautiful and well maintained with paths to walk on and benches to rest on. The park contains three separate gardens: the upper garden, middle garden, and lower garden.

Located in the upper garden, towards the main entrance to the park is the Tomb of the Unknown Soldier with its eternal flame. This monument was created in 1967 and contains the body of a soldier who fell during the Great Patriotic War!
The park stretches along all the length of the western Kremlin wall for about half a mile. Due to its central location in the city, it’ll be easily accessible when you’re out exploring The Red Square.
It provides a bit of relief from the city’s high-energy city streets. Bring a picnic lunch, go for a walk, or just sit and people watch, this is one of the best Moscow sites to wind-down and relax!
Ostankino Television Tower
- Television and radio tower in Moscow
- Currently the tallest free-standing structure in Europe
- Make sure you bring your passport when you visit, you can’t go up without it!
For spectacular views of the city, make sure to add the Ostankino Television Tower to your itinerary for Moscow! This impressive free-standing structure provides stunning views of the city in every direction. The glass floor at the top also provides great alternative views of the city!

It takes just 58 seconds for visitors to reach the Tower’s observation deck by super fast elevator. The tower is open every day for long hours and is a great site in Moscow to check out! There is even a restaurant at the top where you can enjoy rotating views of the city while you dine on traditional Russian cuisine or European cuisine!
The tower is somewhat of an architectural surprise in a city that is not known for skyscrapers! To see the city from a new perspective, make sure to add this stop to your Moscow itinerary!
Izmaylovo District
- The most popular attractions in this district are the kremlin and the flea market
- Outside of the city center and easy to reach via metro
- Most popular during the summer and on weekends
Travel outside the city center and discover a unique area of the city! The Izmaylovo District is a popular destination for locals and tourists alike, and one of the coolest places to see in Moscow! The two main attractions we recommend checking out are the Kremlin and the flea market.
The Izmailovo Kremlin was established as a cultural center and molded after traditional Russian architecture. This colorful complex is home to several single-subject museums, including a Russian folk art museum and a vodka museum!

Next to the Kremlin is the Izmailovo open-air market, which dates back to the 17th century! The market is connected to the Izmailovo Kremlin by a wooden bridge. Pick up all your Russian souvenirs here, including traditional handicrafts, paintings, books, retro toys, and Soviet memorabilia!
You will find many hand-made and hand-painted options available at higher prices, as well as mass-produced souvenir options at lower prices!
Museum of Soviet Arcade Games
- Closed on Mondays
- Filled with old arcade games that visitors get to try out!
- The museum also includes a small cafe and burger shop
For something a little different, check out the Museum of Soviet Arcade Games! The museum features roughly 60 machines from the Soviet era, including video games, pinball machines, and collaborative hockey foosball! The machines inside the museum were produced in the USSR in the mid-1970s.

The best part is, most of the games are still playable! Purchase tickets and try the games out for yourself! The museum also has a neat little screening room that plays old Soviet cartoons and an area with Soviet magazines! This unique attraction is a fun addition to a 3 day itinerary in Moscow, and an attraction that all ages will enjoy!
Whether you’re spending one day in Moscow, or more, safety is an important thing to keep in mind when traveling to a big city! Overall, Moscow is a very safe place to visit. However, it is always recommended that tourists take certain precautions when traveling to a new destination!
The police in Moscow is extremely effective at making the city a safe place to visit and do their best to patrol all of the top Moscow, Russia tourist attractions. However, tourists can still be a target for pickpockets and scammers.
Moscow has a huge flow of tourists, therefore there is a risk for pickpocketing. Simple precautions will help eliminate your chances of being robbed. Stay vigilant, keep your items close to you at all times, and don’t flash your valuables!
If you’re planning a solo Moscow itinerary, you should have no need to worry, as the city is also considered safe for solo travelers, even women. Stay in the populated areas, try and not travel alone late at night, and never accept rides from strangers or taxis without a meter and correct signage.
The threat of natural disasters in Moscow is low, with the exception of severe winters when the temperature can dip below freezing! Bring a good, warm jacket if you visit in Winter.
However, please note that Russian views on homsexuality are far less accepting than those in Western Europe. Likewise, Non-Caucasian travellers may sadly encounter racism in Russia .
Don’t Forget Your Travel Insurance for Moscow
ALWAYS sort out your backpacker insurance before your trip. There’s plenty to choose from in that department, but a good place to start is Safety Wing .
They offer month-to-month payments, no lock-in contracts, and require absolutely no itineraries: that’s the exact kind of insurance long-term travellers and digital nomads need.

SafetyWing is cheap, easy, and admin-free: just sign up lickety-split so you can get back to it!
Click the button below to learn more about SafetyWing’s setup or read our insider review for the full tasty scoop.
Now that we’ve covered all the top things to see in Moscow, we thought we’d include some exciting day trips to other areas of the country!
Sergiev Posad (Golden Ring)

On this 7-hour guided tour, you’ll visit several scenic and historic areas of Russia. Start your day with hotel pick-up as you’re transferred by a comfortable car or minivan to Sergiev Posad. Admire the charming Russian countryside on your drive and enjoy a quick stop to visit the Russian village, Rudonezh!
You’ll see the majestic Saint Spring and the Church of Sergiev Radonezh. You’ll also visit the UNESCO World Heritage Site, Trinity Lavra of St. Sergius, one of the most famous Orthodox sites in Russia!
Lastly, you’ll swing by the local Matreshka market and enjoy a break in a nice Russian restaurant before returning to Moscow!
Day Trip to Vladimir and Suzdal

On this 13-hour trip, you’ll discover old Russia, with its picturesque landscapes and white-stoned beautiful churches! You’ll visit the main towns of the famous Golden Ring of Russia – the name for several cities and smaller towns north-east of Moscow.
Your first stop will be in the town of Vladimir, the ancient capital of all Russian principalities. The city dates back to the 11th century and is one of the oldest and the most important towns along the Ring! Next, you’ll visit Suzdal, a calm ancient Russian town north of Vladimir with only 13,000 inhabitants!
The old-style architecture and buildings of Suzdal are kept wonderfully intact. If you’re spending three days in Moscow, or more, this is a great option for exploring the charming areas outside the city!
Zvenigorod Day Trip and Russian Countryside

On this 9-hour private tour, you’ll explore the ancient town of Zvenigorod, one of the oldest towns in the Moscow region! As you leave Moscow you’ll enjoy the stunning scenery along the Moscow River, and make a few stops at old churches along the way to Zvenigorod.
Upon arrival, you’ll explore the medieval center, including the 14th-century Savvino-Storozhevsky Monastery. Next, you’ll take a break for lunch (own expense) where you’ll have the chance to try out the Russian cuisine! Next, you’ll visit the Museum of Russian Dessert and sip on tea at a Russian tea ceremony.
The final stop of the day is at the Ershovo Estate, a gorgeous place to walk around and enjoy nature!
Day Trip to St Petersburg by Train visiting Hermitage & Faberge

On this full-day tour, you’ll enjoy a a full round trip to St Petersburg where you’ll spend an exciting day exploring another popular Russian city! You’ll be picked up from your hotel in Moscow and be transferred to the train station where you’ll ride the high-speed train ‘Sapsan’ to St Petersburg.
Upon arrival, you’ll start the day by touring the Hermitage Museum and the Winter Palace. Next, you’ll visit the Faberge Museum, where you’ll explore the impressive collection of rare Faberge Eggs! In the afternoon, enjoy a sightseeing boat ride and a traditional 3-course Russian lunch.
If you’re spending 3 days in Moscow, or more, this is an excellent trip to take!
Trip to Kolomna – Authentic Cultural Experience from Moscow

On this 10-hour tour, you’ll escape the city and travel to the historic town of Kolomna! First, you’ll visit the 14th-century Kolomna Kremlin, home to the Assumption Cathedral and an abundance of museums!
Next, enjoy lunch at a local cafe (own expense) before embarking on a tour of the Marshmallow Museum – of course, a marshmallow tasting is provided! Your final stop is the Museum of Forging Settlements, where displays include armor and accessories for fishing and hunting.
Discover this beautiful Russian fairytale city on a private trip, where all of the planning is taken care of for you!

Stash your cash safely with this money belt. It will keep your valuables safely concealed, no matter where you go.
It looks exactly like a normal belt except for a SECRET interior pocket perfectly designed to hide a wad of cash, a passport photocopy or anything else you may wish to hide. Never get caught with your pants down again! (Unless you want to…)
Find out what people want to know when planning their Moscow itinerary.
How many days you need in Moscow?
We recommend that you spend at least two or three days in Moscow to take it all in.
What’s the best month to visit Moscow?
The best time to visit Moscow is over the spring, from March to May as temperatures are mild, crowds are thin and prices are reasonable.
What are some unusual things to do in Moscow?
I mean, queuing up to see an almost 100 year old corpse is pretty unsual! Check out Lenin’s Mausoleum if you fancy it!
What are some fun things to do in Moscow?
The Memorial Museum of Cosmonautics is a fun place to explore the famous space race from the perspective of the ‘other side’!
We hope you enjoyed our Moscow itinerary! We’ve made sure to cover all the Moscow must-sees as well as some unique attractions in the city! Our addition of insider tips, favorite food stops, and day trips from Moscow is an added bonus and will guarantee you make the most out of your exciting Russian vacation!
Immerse yourself in the modern and traditional Russian lifestyle! Get lost in museums, witness awe-inspiring architecture, and indulge in Russian cuisine! Spend the day strolling through all of the charming sites of Moscow, admiring the beautiful scenery and discovering the city’s fairytale-like enchantment!

And for transparency’s sake, please know that some of the links in our content are affiliate links . That means that if you book your accommodation, buy your gear, or sort your insurance through our link, we earn a small commission (at no extra cost to you). That said, we only link to the gear we trust and never recommend services we don’t believe are up to scratch. Again, thank you!

Alya and Campbell

Share or save this post
Leave a Reply Cancel reply
Your email address will not be published. Required fields are marked *
Save my name, email, and website in this browser for the next time I comment.
Notify me of followup comments via e-mail.
The ultimate backpacking bucket list for California
Wilderness as far as the eye can see.
By: The Outbound Collective + Save to a List

Did you know that California is home to over 14 million acres of wilderness. You read that correctly. Over 14 million! Even the most driven explorer with all the time in the world couldn’t hike every trail in California in a single lifetime. But that doesn’t mean you can’t try. If you’re able to carve out the time for one of the classic thru hikes like the JMT or the PCT, then get after it! For those of you who can only make time for a long weekend trip, this list of 50 backpacking trips in California is just what you need to fuel your next adventure to the backcountry.
Northern California
From the rugged Pacific coast to the dense redwood forests to the summit of Mt. Shasta, Northern California has no shortage of diverse backcountry terrain. Tackle the Lost Coast or spend a couple days relaxing in Redwood National and State Parks...you can’t go wrong.
1. Backpack Devil’s Punchbowl, Six Rivers National Forest

Photo: Joshua Contois
8.33-mile out-and-back with about 1660 feet of elevation gain
This adventure offers spectacular views of the rugged Siskiyou mountain range. The range is considered one of the most biodiverse coniferous forests in the world. Plus, you’ll get to pass by a breathtakingly blue glacial lake in the mountains known as Devil’s Punchbowl.
2. Climb Mt. Shasta via Clear Creek Route

Photo: Daniel Sherman
11.43-mile out-and-back with nearly 7615 feet of elevation gain
At a high elevation, this adventure has potential for snow activities like skiing, snowboarding, and glissading. The hike begins with a tall red fir forest. There are plenty of camping areas along the way if you choose to make this an overnighter.
3. Hike to Etna Mountain Summit

Photo: Greg Balkin
6-mile out-and-back with about 800 feet of elevation gain
Make your way to the summit and be rewarded by incredible sunrises and sunsets. At the top, you’ll also delight in a pristine Mt. Shasta backdrop. The final stretch of the hike requires some rock scrambling, but the views are well worth it as well as the solitude.
4. Backpack the Sky High Lakes in the Marble Monutains

Photo: Chaney Swiney
11.88-mile out-and-back with approximately 2070 feet of elevation gain
You might be surprised by the handful of scenic lakes that sit in the Marble Mountains. You'll also be surrounded by forests and caves (unmarked). Dive right into the wilderness and explore the geologically diverse range of peaks and ridges on this hike.
5. Backpack Redwood National and State Parks

Photo: Austin Trigg
4.41-mile loop with about 1043 feet of elevation gain
This adventure offers the unique opportunity to view and explore some of the tallest trees in the world. And far away from light pollution, the area is the perfect spot for some amazing night photography. There are campsites along the creek for you and some buddies to spend the night.
6. Backpack to Canyon Creek Lakes

Photo: Dan Loch
14.35-mile out-and-back with roughly 2605 feet of elevation gain
Look no further if you’ve been craving exploration in some of the most wild and pristine terrain in the West. Trinity Alps boasts over 55 alpine lakes and an abundance of additional rivers, streams, creeks, swimming holes, and camping spots. Note: Wilderness Permits are required, but are free and can be obtained at any of the ranger stations.
7. Backpack the Lost Coast: Mattole to Black Sands Beach

Photo: Whitney Whitehouse
A 25.05-mile point-to-point with about 653 feet of elevation gain
This is an extensive stretch of Northern California’s coastline that does not disappoint with its spectacular coastal vistas. There are campsites and easy access points to the water along the way.
8. Backpack the Stuart Fork Trail to Emerald and Sapphire Lakes

27.06-mile out-and-back hike with approximately 4213 feet of elevation gain
This adventure takes you through pristine Northern California wilderness. You’ll find excellent fishing opportunities, an abundance of wildlife, and beautiful wildflowers in bloom during the warmer months.
Living around the Bay Area is ideal for anyone who wants to live a city life but needs to have quick access to the wild. You can drive anywhere from 1-3 hours from San Francisco and find some truly stunning landscapes. Beach camping, epic summits, and more redwoods await.
9. Backpack to King’s Peak from Shelter Cove

Photo: Aja Pete
30.85-mile loop with nearly 6204 feet of elevation gain
Follow the coastline on this gorgeous hike and camp overnight at Buck Creek. Note that parts of the beach may be impassable at high tide, so time your travels appropriately. Find peace among the sounds of rushing mountain streams and the crashing ocean. You may also get the chance to view otter pups playing in the water!
10. Backpack to Pt. Reyes Coast Campground

Photo: Josiah Roe
4.02-mile out-and-back hike with roughly 633 feet of elevation gain
This is a great hike for ocean lovers. You can spend the night above the coast of Pt. Reyes and later make your way down to the beach and tide pools below.
11. Backpack the Glen Camp Loop via the Palomarin Trailhead

Photo: Jeff Driscoll
15.72-mile loop with approximately 3091 feet of elevation gain
This is the perfect coastal and lush green forest adventure, featuring steep hillsides, gorgeous overlooks, and mountainous terrain.
12. Backpack to Point Reyes Wildcat Camp

Photo: Miranda Leconte
11.19-mile out-and-back with about 1926 feet of elevation gain
This is an ideal backpacking trip to camp out on a wide open meadow situated on a bluff overlooking breathtakingly blue ocean water. Note that permits are required. You’ll also need to make a reservation if you want to spend the night at the Wildcat Camp.
13. Backpack Sam McDonald Park

Photo: Ashley Chang
12.19-mile loop with nearly 2192 feet of elevation gain
This is a great escape into Sam McDonald Park’s redwood forest-- just a quick drive from San Francisco. You’ll need a permit to stay overnight, which you can obtain from the ranger station. Find peace grounded in nature on this forest adventure.
14. Backpack the Bear Valley to Coast Camp Loop

16.18-mile loop with roughly 2818 feet of elevation gain
This is a great adventure for camping enthusiasts who want to spend time among stunning coastal mountains and meadows. If you plan on staying overnight, note that having a permit is required. Keep your eyes peeled for whales just off the coast during the Humpback Whale migration season!
15. Backcountry Camp at Big Basin Sunset Trail Camp

Photo: Christian Arballo
9.46-mile out-and-back with about 2146 feet of elevation gain
This is a beautiful cascading waterfall adventure where you can wander among redwoods and across creeks. Note that Big Basin’s backpacking sites are only open from May 1st to November 1st, so be sure to plan accordingly.
16. Backpack to Redfern Pond

7-mile out-and-back with approximately 1263 feet of elevation gain
This adventure in Gilroy, California is open year-round with thousands of acres of wide open grassy land to explore. There are a number of well-marked trails to set foot on for all skill levels to enjoy. Permits are required.
17. Backpack to Pat Springs

Photo: Max Berger
13.18-mile out-and-back with about 3645 feet of elevation gain
This is a beautiful adventure into the rugged Ventana Wilderness that features campsites overlooking Big Sur and the San Lucia Mountains. Pack ample water, especially if you plan on camping.
18. Backpack the Pine Ridge in Big Sur, North Coast Ridge Loop

Photo: Chris Diantonio
33.45-mile loop with nearly 11388 feet of elevation gain
This is a longer adventure that will give you the opportunity to spend several or more days in the Ventana Wilderness section of Los Padres National Forest located in Big Sur, California. This trip features primitive camping sites, ample water sources, and incredible coastal ridge line views.
19. Backpack to the Ventana Wilderness’ Sykes Hot Springs

Photo: Blake Maitoza
18.96-mile out-and-back with about 7339 feet of elevation gain
This adventure features hot springs situated adjacent to the Big Sur River. Visit in the off-season for more seclusion.
20. Climb Cone Peak in Big Sur, Sea to Sky Route

19.72-mile out-and-back with roughly 7484 feet of elevation gain
Located in Big Sur, California, this adventure is less than 3 miles from the ocean, offering spectacular seaside views. You can also camp near an old fire lookout at the summit to extend your time taking in the surreal scenery.
21. Backpack to Goat Camp in Big Sur

Photo: Andrew Conway
8.03-mile out-and-back with approximately 3320 feet of elevation gain
Take in the immaculate beauty of Big Sur with fewer crowds on this lesser-known trail. Though steep on the way up, the ocean views are a great reward.
The Sierra Mountains
The mighty Sierra are a major draw for people around the world. Early explorers like John Muir and Ansel Adams had obsessions with these mountains and made them famous with their writing and photos. But even the best writers and photographers can’t do these mountains justice...you need to see them for yourself.
22. Backpack to Ropi Lake

Photo: Emily Kent
4.87-mile out-and-back with about 1581 feet of elevation gain
Take an adventure to the serene and secluded Ropi Lake. On the way, you’ll pass by incredible waterfalls with Pyramid Peak providing a top-notch backdrop in the distance.
23. Backpack to Leavitt Lake in Stanislaus National Forest

Photo: Jake Young
7.44-mile out-and-back with nearly 1385 feet of elevation gain
Located on the eastern edge of the Emigrant Wilderness, Levitt Lake is an ideal backpacking opportunity in the Sierra Nevadas. The lake is a great spot for fishing with potential to catch species like brook and rainbow trout.
24. Backpack to the Waterfall Camp in Desolation Wilderness

10.5-mile out-and-back with about 840 feet of elevation gain
This is a breathtaking adventure in Desolation Wilderness featuring over 50 waterfalls! Do this as a day hike or choose to camp overnight. Note that an overnight wilderness permit is required and can be obtained at one of the ranger stations.
25. Backpack to Middle Velma Lake

9.18-mile out-and-back with roughly 2251 feet of elevation gain
Located in the heart of Desolation Wilderness, Middle Velma Lake is the perfect backpacking trip for some solitude and fantastic views of Jakes Peak. It’s a great escape from the usual crowds of South Tahoe.
26. Backpack to Susie Lake in Desolation Wilderness

7.96-mile out-and-back with approximately 1496 feet of elevation gain
This adventure is located in Tahoe, California and features forest, lakes, the Old Glen Alpine Springs Historical Site, and breathtaking mountain views.
27. Backpack to Gilmore Lake in Desolation Wilderness

8.66-mile out-and-back with about 1919 feet of elevation gain
In Desolation Wilderness, soak in the beauty of a stunning alpine lake. Along the way, you’ll also get the chance to see Modjeska Falls, Soda Springs, and the historic Glen Alpine Resort built in 1884.
28. Hike and Climb to Mt. Conness

Photo: Alex Souza
19.03-mile out-and-back with roughly 5400 feet of elevation gain
This is a great adventure for the opportunity to see a series of beautiful small lakes situated among mammoth granite canyon walls. It also features panoramic views of the High Sierras– not a bad place to wake up if you plan on making this a multi-day camping trip!
29. Backpack to Vogelsang and Merced Lake High Sierras Camp

Photo: Julie & Brian
27.07-mile point-to-point with about 4596 feet of elevation gain
Explore the remote high country of Yosemite. Get excited for the unique opportunity to glamp in the mountains at the High Sierra Camps! Right in the secluded wilderness, you’ll be treated with perks like a bed to sleep in and breakfast ready for you in the morning. Note that reservations for the camp are made through a lottery system.
30. Backpack Tuolumne Meadows to Yosemite Valley

Photo: Kevin Abernethy
30.82-mile point-to-point with approximately 6109 feet of elevation gain
Though a long expedition, the work you put in will be well worth it. Along the way, you’ll see several iconic Yosemite landmarks in the secluded backcountry. This is a truly incredible route with stunning scenery at every turn, part of the historic John Muir Trail. This adventure is nothing short of spectacular and a huge accomplishment.
31. Backpack Cathedral Lakes

Photo: Addison Klinke
9.04-mile out-and-back with about 1100 feet of elevation gain
Experience captivating views of Cathedral peak, lush green meadows, and a high alpine lake. It’s a true nature lover's paradise.
32. Backpack atop Donohue Pass

27.56-mile out-and-back with nearly 2953 feet of elevation gain
This adventure allows you to take in sweeping views across the Eastern Sierra all the way down through Lyell Canyon. Spend the night above the tree line and enjoy some spectacular star gazing.
33. Backpack Lower & Upper Relief Valleys and the East Flange Rock

21.6-mile out-and-back with about 3600 feet of elevation gain
Take a trip into Yosemite’s backcountry to explore stunning alpine lakes and peaks like Granite Dome and the East Flange Rock. This is a great adventure for those looking to escape some of Yosemite’s typical crowds.
34. Backpack Sunrise Lakes to Clouds Rest

Photo: Nathaniel Polta
18.93-mile loop with roughly 1775 feet of elevation gain
Do this epic hike for 360 degree views of both Yosemite Valley and Little Yosemite Valley from Clouds Rest. You’ll also be able to see the iconic Half Dome. Be sure to bring plenty of water and snacks for ample energy on this longer expedition.
35. Backpack to Duck Lake

Photo: Sierra Joy
9.29-mile out-and-back with approximately 1880 feet of elevation gain
This is a breathtaking adventure with lakeside camping and swimming opportunities in clear waters. This trek also features beautiful wildflowers, patches of forest, and extensive peak views. Note that to stay overnight you will need a backcountry permit.
36. Backpack Agnew Meadows to Tuolumne Meadows

30.14-mile point-to-point with roughly 4593 feet of elevation gain
This hike between Mammoth Lakes and Yosemite is part of a famous stretch of the John Muir Trail. Though it’ll require several days to complete this stretch of trail, you will find the adventure a rewarding one as you’ll encounter beautiful blue lakes, mountainous terrain, and lush treetops along the way. You’ll want to soak in the sights every step of the way.
37. Backpack Ansel Adams’ Garnet Lake

14.46-mile out-and-back with about 2717 feet of elevation gain
On your way to Granite Lake, enjoy incredible vistas overlooking impressive granite peaks. Night photographers will delight in the low light pollution in this area, making for some stunning night shots!
38. Backpack to Ediza Lake

Photo: Tobin Akehurst
13.54-mile out-and-back with approximately 1804 feet of elevation gain
Take in marvelous sunrises and sunsets at Ebiza Lake– a sight you likely won’t ever forget. If you wish to extend your adventure, take a few days in the area to camp, fish, hike some more, or do some mountaineering! Come prepared for whatever your inner explorer may be craving.
39. Backpack to Crater Lake, Sierra National Forest

Photo: Emily Rudger
8.4-mile out-and-back with roughly 2100 feet of elevation gain
This hike features incredible views of an isolated lake and the expansive mountain ranges of the John Muir Wilderness. Set up camp by the water once at Crater Lake and kick back with some friends or take in the natural beauty of the surroundings in peace and quiet.
40. Backpack from Onion Valley to Mt. Whitney

47.35-mile point-to-point with nearly 11745 feet of elevation gain
This is a nature lover and explorer’s dream. You’ll get to soak in the full majesty of the High Sierras while making your way to the highest peak in the lower 48 states. From mountains to lakes to treetops and grassy fields, you’re sure to see it all! If you’re searching for that on-top-of-the-world feeling… this is the expedition for you! Be sure to secure the appropriate permits in advance to ensure all is set for your trip.
41. Backpack the Rae Lakes Loop

Photo: Kevin Kaminski
39.08-mile loop with roughly 7316 feet of elevation gain
Located in Sierra, California, this adventure takes you through the stunning Sequoia and Kings Canyon National Parks. It’s considered one of the most popular hikes in the Sierras– with good reason. You’ll explore diverse mountainous and forest terrain with incredible views of waterfalls, lakes, and beautiful meadows along the way.
42. Backpack to Mount Silliman, Sequoia NP

Photo: Debra Alison
11.24-mile out-and-back with about 4449 feet of elevation gain
In Sequoia National Park, delight in feeling small among giant Sequoias and Redwoods on your way to the Mount Silliman summit. At the top, you’ll be able to see down the mountain to Twin Lakes.
Southern California
Explore the desert expanse of Joshua Tree and Death Valley National Parks or charge the trails on the sunny California coast. Down south, the water is warmer and beach camping is that much better...not sold yet? Check out these adventures.
43. Backpack to Panamint Dunes

Photo: Sarah Eichstedt
7.23-mile out-and-back with around 935 feet of elevation gain
A secluded gem, this is one of the least visited large sand dunes in Death Valley, making for an exciting opportunity to swerve crowds and connect with the natural landscape in peace. Explore during the day and enjoy some spectacular stargazing at night. Permits are required for overnight stays.
44. Backpack the Boy Scout’s Trail in Joshua Tree

Photo: Ian Buchanan
16.12-mile out-and-back with approximately 1539 feet of elevation gain
On this diverse trail, experience expansive Joshua Tree forests to Mars-like terrain. Backcountry camping is permitted in designated wilderness zones. In addition to hiking and camping, try out rock climbing or bouldering if you’re up for the challenge!
45. Backcountry Camp in Joshua Tree

Photo: Lauren Shusterman
2-mile out-and-back with varied elevation gain depending on desired trail or campsite
This backpacking excursion is a great way to experience the beauty of the desert. Note that it can be easy to lose your way while in the desert, so be sure to prepare ahead of time and use landmarks to help with navigating.
46. Beach Camp on Santa Rosa Island

Photo: Michael Wigle
16-mile out-and-back with about 50 feet of elevation gain
Located in Ventura, California, visit California’s least visited national park for a unique camping experience on a secluded part of Pacific Ocean beach. Expect to see wildlife from Torrey Pines to a rare native fox species. On your way back, don’t forget to check out the sea caves along Santa Cruz’s volcanic north coast.
47. Backpack Mt. Williamson from Shepherd Pass

Photo: Jack Brumbaugh
26.66-mile out-and-back with roughly 10653 feet of elevation gain
Located in Seven Pines, California, climb to the second highest peak in the state! There’s plenty of wildlife, water access, and incredible scenery if you’re prepared to challenge yourself for these rewards! With climbing and rock scrambling involved, know your preparedness and experience level before embarking on this trip.
48. Backpack Eaton Canyon to Idlehour

Photo: Alan Leung
10.99-mile out-and-back with about 3291 feet of elevation gain
In the heart of Pasadena, California, check out a secluded campground where you can listen to the sounds of babbling brooks and wildlife in the background. On your way, take moments to look through breaks in the vegetation to get glimpses of downtown LA and Catalina Island.
49. Backpack the Trans-Catalina Trail

Photo: Drew Robinson
36.67-mile point-to-point with approximately 8189 feet of elevation gain
This adventure is perfect for viewing the entire Santa Catalina Island. You may get to see wildlife like bison and the island fox with a guarantee of beautiful ocean views along the way.
50. Backpack Zaca Ridge

6-10-mile out-and-back with roughly 2200 feet of elevation gain
Located in Los Olivos, California, soak in the great beauty of the San Rafael Wilderness. This is one of the best stargazing spots in Southern California, making it an ideal adventure for night photographers. Visit in early Spring for breathtaking sunsets that span across the Santa Ynez Valley to the ocean.
Add these backpacking trips to your bucket list and let us know how you do. The truth is, this list only scratches the surface of the wealth of amazing backpacking you can find in California. But just because you’ve been told you can’t explore all of California’s wilderness in a lifetime, doesn’t mean you shouldn’t try.
Cover photo: Josiah Roe
We want to acknowledge and thank the past, present, and future generations of all Native Nations and Indigenous Peoples whose ancestral lands we travel, explore, and play on. Always practice Leave No Trace ethics on your adventures and follow local regulations. Please explore responsibly!
Do you love the outdoors?
Yep, us too. That's why we send you the best local adventures, stories, and expert advice, right to your inbox.

How to book an adventure with Native California guides
The Outbound Collective

10 Awesome Places to Snowshoe in California
Sara Sheehy
Winter outings in the Golden State.

Solo Adventuring while Living the Van Life
Michael Wigle
When you're thinking about a solo adventure, look no further than joining the van life!

8 Amazing Private Campsites in California
Finding a secluded and beautiful campsite in California doesn't need to be so tough.

3 Days of Chasing Wildflowers in Southern California
Michael Fricke
When California blooms it is spectacular!
- Local Adventures
- Tours and trips
- Camping Nearby
- Outbound PRO Membership
- Add your property
Mobile Apps

© 2024 The Outbound Collective - Terms of Use - Privacy Policy
- Search Please fill out this field.
- Manage Your Subscription
- Give a Gift Subscription
- Sweepstakes
- Travel Products
- Activity + Adventure
- Camping + Hiking
The 7 Best Backpacking Backpacks of 2024
From weekend trips to long-distance treks, these backpacking backpacks have you covered.
:max_bytes(150000):strip_icc():format(webp)/Kevin-Brouillard-Bio-Photo-e1e6e2d6ae6b4bdfa33d8b1b82bd2921.jpeg "best backpacking weekend trips")
In This Article
Jump to a Section
- Our top picks
- Tips for Buying
- Why Trust T+L
We independently evaluate all recommended products and services. If you click on links we provide, we may receive compensation. Learn more .
Travel + Leisure / Brian Kopinski
I’ve been backpacking in various capacities for over a decade from off-the-grid wilderness treks to hostel hopping around Europe. Whether you’re planning to head out for a day trip , an overnight hike, or extended excursion, choosing the right backpacking backpack is essential to ensure a safe and enjoyable trip. Backpacking backpacks come in a range of designs, from ultralight models for speedy, minimalist hikers to more burly packs suited for lugging heavier loads (or even checking if you're flying).
Besides holding all your equipment, gear, and provisions, a quality pack should be comfortable to carry and fit your frame. When choosing the best backpacking pack for my trips, I consider performance, durability, value, and versatility for different durations and weather conditions. If you’re gearing up for your first backpacking trip or looking to level up with a new pack, check out my favorite options below.
Best Overall
Osprey kestrel 58 pack.
It’s a versatile, full-featured pack made with durable materials that will last for years to come.
This is quite a large and hefty pack that may be too heavy for lighter trips.
For an all-around performer that’s suitable for weekend and long-distance trips in varied climates, the Osprey Kestrel 58 is my top pick along with the women’s specific version: the Osprey Kyte 58L Pack . Osprey backpacks are well-known for their top-notch performance and lasting durability. My first Osprey Kestrel is over a decade old and accompanied me up all 12,244 feet of Indonesia's Mount Rinjani and to every corner of Cambodia during my two-year Peace Corps service. The current model incorporates a revamped back panel: the AirScape system. It offers adjustable torso lengths and breathability while delivering close contact and excellent weight distribution on the lower back.
The Kestrel’s use of 420-denier nylon in the pack body provides exceptional durability against wear and tear, even compared to other Osprey packs. I love that it’s equipped with a detachable rain cover, and how easy the cover is to pull over even fully loaded packs. There’s plenty of options for storage and organization, too. It has five external pockets, trekking pole holders, and daisy chains for adding more gear. I’m a big fan of packs with multiple access points, and the Kestrel offers easy entry from the top and front. To expand my storage options, I typically make use of the sleeping bag straps to hold dirty clothes on longer trips.
The Details: 420-denier nylon and 500-denier high-tenacity nylon | 4.7-4.9 pounds | Size S/M and L/XL | 58 liters | Waterproof
Best Lightweight
Gossamer gear mariposa 60 backpack.
Gossamer Gear
This ultralight pack offers a frame that moves with your gait and a choice of hip belt design for a tailored fit.
It’s water-resistant, not waterproof.
When every ounce counts, the Gossamer Gear Mariposa 60 is an excellent choice for lightening your load on the trail. With a 60-liter capacity, it delivers an impressive weight to storage ratio of roughly 0.54 ounces per liter. The main compartment is spacious, and there are seven exterior pockets for stashing water bottles and trail essentials. The pack is made with robic nylon, which helps save on weight, but doesn’t offer much for waterproofing. However, this can be resolved by adding Gossamer’s waterproof pack liner .
I love that the modular design allows the Gossamer to be configured for optimal weight and fit preferences (for example, the choice of a straight or curved hip belt). The Mariposa’s hip belt, back padding, and aluminum frame can be removed to make the pack even lighter, though this sacrifices comfort and ability to carry the pack fully loaded. There are also load lifters that work with the frame to relieve pressure on the shoulders, if desired.
The Details: Recycled nylon | 2.1 pounds | Size S-L | 60 liters
Best for Beginners
Rei co-op trailmade 60 pack.
It’s a highly adjustable pack with comfortable padding and intuitive organization that new and experienced hikers will appreciate.
The weight is middle of the road for a backpack this size.
The REI Co-op Trailmade 60 Pack is a user-friendly introduction to backpacking. Dialing in the right fit is essential when backpacking, and REI’s adjustable design makes this a seamless process. REI’s Trailmade collection is focused on more inclusive sizing options and affordability for new hikers and backpackers as well. To that end, the Trailmade 60 Pack is designed with an adjustable back length and a range of hip belt sizes. Both the men’s and women’s packs can fit waists and hips between 32 and 58 inches and the torso length is easily tweaked with a Velcro strap. I appreciate that adjustment directions (and packing tips) are printed on the underside of the top lid for even easier set up. The top-loading compartment is easy to use, and the option to configure a separate compartment for a sleeping bag (or dirty clothes) comes in handy on multi-day trips. I’m also a big fan of how accessible the water bottle holders are while wearing the pack.
The Details: Recycled nylon | 3.2-3.7 pounds | 60 liters
Best Organization
Deuter aircontact core 65+10l backpack.
Backcountry
It has multiple access points and numerous exterior and interior pockets.
It only comes in one size.
Having quick and easy access to essential gear saves time and hassle on the trail; not to mention, it makes setting up camp after an arduous day that much easier. The Deuter Aircontact Core Pack 65 + 10 gives backpackers a wealth of storage and functionality (do note that the women’s version of the Aircontact Core is designed as a 60 + 10 backpack). I love that gear can be packed and accessed from the top, front, and bottom of the bag. There’s a total of six exterior pockets, including zippered hip belt pockets, mesh side pockets, front stash pocket, and a zippered top pocket. The pack also features an interior pocket for valuables, trekking pole holders, and hydration system compatibility. While 65 liters of capacity is sufficient for many treks, I appreciate the ease of expanding the collar on the main compartment for an additional 10 liters of storage if needed. Though it only comes in one size, the VariSlide system allows for easy and exact adjustments to your back length for a secure fit. The hip belts and shoulder straps are supportive and adjustable, too, to ensure the pack stays in place
The Details: 235-denier polyamide and 500-denier textured polyamide | 4.9 pounds | One size | Up to 75 liters
Best Ventilation
Gregory katmai 55 pack.
The pack offers excellent air flow and ventilation for staying comfortable on the trail.
The sturdy frame and full set of features add some weight compared to ultralight models.
It’s easy to work up a sweat while backpacking — the Gregory Katmai 55 Pack offers top-notch breathability and ventilation when things heat up. The pack is equipped with Gregory’s FreeFloat 360 suspension system — a highly ventilated back panel that conforms to the shape of the lower back while allowing optimal air flow between you and the pack. I appreciate that the ventilated back panel is also treated with Polygiene Stays Fresh Technology to diminish odor-causing bacteria.
I also love that the pack offers inclusive sizing. The S/M fits waists/hips from 25 to 48 inches and torso lengths from 15 to 19 inches, while the M/L goes up to 53 inches for the waist/hips and 22 inches for torso length. The Katmai is a men’s specific pack, but the Gregory Kalmia 50 Pack is a similar model specifically designed for women.
The Details: 210-denier nylon and 420-denier nylon | 4.6 pounds | Size S/M and M/L | 55 liters | Water-repellent
Best for Heavier Loads
Osprey aether 55 pack.
The customizable fit and suspension system aid in hauling considerably more gear than models of comparable weight and capacity.
It’s on the heavier side if you don’t intend to make use of its hauling capabilities.
Whether planning for a longer trek or carrying gear for others, having the option to haul more can be a major plus. The Osprey Aether 55 Pack (or Osprey Ariel 55 Pack for women) boasts an impressive load range of up to 60 pounds (when fully expanded). To handle heftier loads comfortably, the pack employs a close-to-body carry design. This is accomplished with Osprey’s AirScape injection-molded back panel that fits snug to the body, plus adjustable hip belt and torso length and shoulder straps that can be fine-tuned on the trail as needed. As an avid hiker, I appreciate that much of the weight sits on the hip belt and lumbar area to avoid strain in the shoulders.
Multiple access points and numerous loops and pockets make it easy to keep things organized while piling on lots of gear and provisions as well. When fully loaded, the twin compression straps come in handy for balancing weight and keeping gear in place.
The Details: 420HD nylon pack cloth and 210-denier nylon Diamond | 5 pounds | Size S/M, L/XL | 55 liters
Most Comfortable
Rei co-op flash air 50 pack.
It’s ultra lightweight and adjustable so you can get a tailor-made fit.
The thin materials may not be as durable as other options.
For a lightweight backpack that doesn’t offload the pack weight onto your shoulders, we love the Flash Air 50 Pack for both men and women. The pack weighs less than two pounds, making this a great option for thru-hikers, weekend adventurers, and overnight travelers alike. While this pack is quite minimalistic with few pockets, it does have external pouches large enough to hold your water bottle and other essentials.
We love the light nylon fabric, but it is a bit thin and could snag if caught on branches. We also recommend investing in a raincover if you’re heading off on a longer adventure. But overall, the hip belt and ventilated back panel make this pack an overall comfortable option regardless of your hiking destination and style.
The Details: Ripstop nylon | 1.88 pounds for medium | Size S-L | 50 liters for medium
Tips for Buying a Backpacking Backpack
Be sure to find a proper fit.
Features aside, the best backpack is one that fits you well. Your torso length — a measurement that’s likely not top of mind — is a key determining factor in finding a proper fitting backpack . Thankfully, torso lengths are listed with any reputable backpacking backpack. Your torso length is the distance from where your shoulders and neck meet (the C7 vertebra to get technical) to the point of the lower back that’s aligned with your hip bones.
The fit along the hips and waist is also critical and, thankfully, easier to measure. Simply wrap a tape measure just above where you’d wear a belt to get your hip measurements. While at-home measurements can give a rough idea to narrow your search, trying on a pack is critical before embarking on a trek. Check that the hip belt sits on top of the hips, as this is where most of the pack weight should rest. Shoulder straps should be snug but only carrying a modest amount of weight. If a pack is sitting on the hips correctly and not touching the shoulders, shorten the torso length or change pack size.
Note that many packs offer some level of adjustability for torso length and hip belts. Extra features like load lifters and sternum straps can enhance the fit but be cautious about over-tightening these to avoid transferring too much weight onto the upper body.
Consider overall weight
The trip duration, weather conditions, and necessary gear will have some bearing on how much you need to pack, but a general rule of thumb is that a backpacking backpack should not exceed 20 percent of your weight when fully packed. To strategize your packing, start with the actual weight of the backpack plus truly essential equipment. Carefully planning out how much water, snacks, and food you should bring is best to avoid unnecessary weight. Typically, food amounts to 1.5-2.5 pounds per day per person, and this weight lessens as the trip goes on.
It can take some trial and error to figure out what gear and equipment is essential for your backpacking style and preferences. After each trip, consider which items you used frequently versus sparingly or not at all to fine-tune your backpacking packing list.
Think about breathability
A breathable and well-ventilated backpack is important for comfort and reducing sweat on the trail. If your backpacking trip has limited or no access to potable water (such as deserts and arid environments), cutting down on perspiration can make a big difference. Assess the ventilation in the back panel of any backpack when comparing options.
A good size for a hiking pack depends on your needs, but 10-30 liters is fairly standard for day trip packs. For a weekend backpacking trip or thru-hike, consider leveling up to 30-50 liters.
Most backpacking backpacks use an internal frame system. An external frame may come in handy if carrying larger gear that can’t fit within the backpack, while frameless models are popular with ultralight backpackers carrying only the essentials.
Pack denser and heavier items toward the bottom and middle of the backpack for optimal weight distribution with smaller and lighter items on top. Anything you’ll want quick access to on the trail can go in exterior pockets or the top of the backpack.
Why Trust Travel + Leisure
Kevin Brouillard specializes in outdoor gear and apparel. His work has also been published in TripSavvy, Jetsetter, and Oyster, and he served in the Peace Corps in Cambodia for two years. Kevin used his backpacking and camping experience to curate this list of the best backpacking backpacks.
Love a great deal? Sign up for our T+L Recommends newsletter and we’ll send you our favorite travel products each week.
:max_bytes(150000):strip_icc():format(webp)/TaylorFoxHeadshot-7375be27aedf4b0ea0e0189a4befe7d0.jpeg "best backpacking weekend trips")
Table of contents
Best Backpacking Backpacks of 2024
Some of the links on this page are affiliate links

A backpack is one of the most important pieces of gear you’ll carry, so it really pays to do your homework and find one you’ll love. Getting the perfect fit, the ideal balance of weight and durability, and an organizational design that works for your hiking style is critical.
Our team of outdoor experts has hiked more than 20,000 miles in the past decade to test over 50 backpacking backpacks from big names, like Osprey, Gregory, and REI as well as cottage companies, such as Gossamer Gear and Hyperlite Mountain Gear. We know what features and design elements matter most when you’re on the trail, and we’ll use our experience to help you find the best pack for your specific needs.
Once you’ve settled on your backpack, you’ll need a backpacking tent , sleeping bag , and sleeping pad to round out your core setup.
Quick Picks for backpacking packs
Check out this quick list of the best backpacking backpacks, or continue scrolling to see our full list of favorites with in-depth reviews.
Best backpacking backpack overall: REI Flash 55 Men’s / Women’s ($199)
Best ultralight backpack: Hyperlite Mountain Gear Unbound 40 ($369)
Best backpacking backpack for carrying 35+ lb.: Osprey Atmos AG 65 – Men’s / Aura AG 65 – Women’s ($340)
Lightweight backpack with the best ventilation: Osprey Exos 58 – Men’s / Eja 58 – Women’s ($260)
Most comfortable ultralight backpack: Gossamer Gear Mariposa 60 ($285)
Affordable lightweight pack with a supportive frame: Gregory Focal 48 – Men’s / Facet 45 – Women’s ($230)
Best blend of weight & durability: Hyperlite Mountain Gear Southwest 55 ($379)
Large capacity backpack with a built-in daypack: Osprey Aether Plus 70 – Men’s / Ariel Plus 70 – Women’s ($410)
Excellent value backpack with a customizable fit: Deuter Aircontact Core 65+10 – Men’s / 65+10 SL – Women’s ($250)
We’ve added new findings to the reviews of our long-time favorite backpacks with more details from testing trips, and we’ve updated the list with some new picks:
- We’ve added the Osprey Exos 58 (Men’s) / Eja 58 (Women’s) .
- The ultralight Gossamer Gear Mariposa 60 earns a spot due to its useful pocket arrangement and large capacity.
- We’ve upated the review of our long-time favorite, the HMG Southwest 55 .
- We’ve added Deuter’s highly-adjustable crowd-pleasers, the Aircontact Core 65+10 (Men’s) / 60+10 SL (Women’s) .
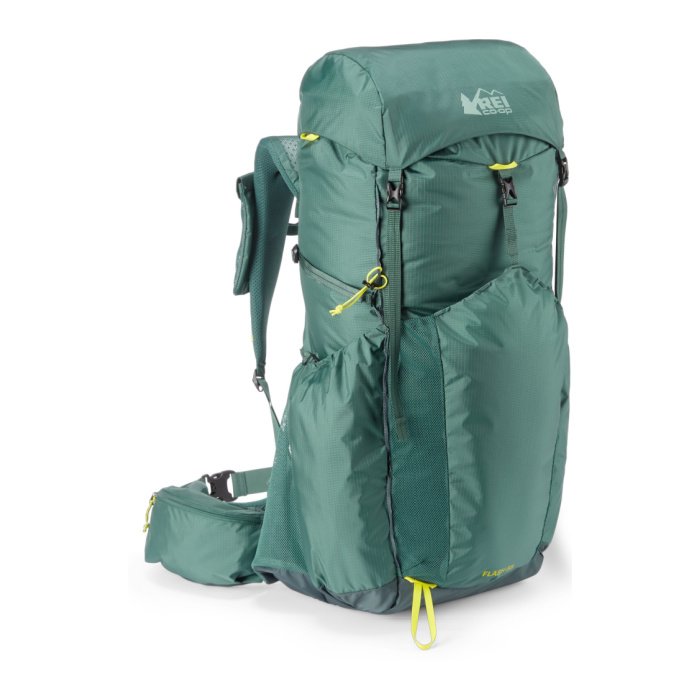
REI Flash 55
Best backpacking backpack overall
Price: $199
Weight: 2 lb. 13 oz.
Volume: 55 L
Max Weight Rec.: 30 lb.
- Less expensive
- Lightweight
- Very comfortable
- Good pocket organization
- Very easy to access water bottles
- Can remove components to reduce weight
- Mesh hipbelt pocket lacks durability
- Bladder clip can snag gear
The REI Flash 55 (Men’s) / (Women’s) costs significantly less than comparable backpacking packs, but it doesn’t skimp on quality or features. This pack is light, versatile, and comfortable, so it’s a great option for lightweight backpackers on a budget.
The Flash 55 has a truly unique element called “Packmod.” This modular system allows you to quickly and easily remove the straps and pockets and reconfigure them into several combinations, or you can leave them at home to save weight. So the Flash easily transitions from a lightweight weekend backpacking pack to a trusty hauler for heavier loads.
We also absolutely love the Flash 55’s forward-facing water bottle pockets. This may seem like a small detail, but if you’ve ever sweat and nearly dislocated your shoulder to reach an upright bottle, you’ll know exactly how big this is.
CleverHiker Senior Gear Analyst, Casey Handley, has taken the Flash 55 on many adventures – including the stunning Timberline Trail around Mt. Hood – and she loves the comfort, low weight, and convenient pockets of this pack. But as a hiker who likes to keep things as light as possible, Casey’s favorite feature is the modular design that allows her to tailor the pack for each hike – taking only what she needs and nothing she doesn’t.
The Flash 55 is the most affordable backpack on our list, but you’ll want to make sure your pack weight is dialed in before choosing it. Hikers carrying more than 30 pounds will likely want to spend a bit more for a bag with a beefier frame, as this pack’s comfort diminishes quickly above that weight. That said, budget-conscious lightweight backpackers who have finely tuned their pack weight should look no further than the Flash 55.
Full review: REI Flash 55
Hyperlite Mountain Gear Unbound 40
Best ultralight backpack
Price: $369
Weight: 1 lb. 13.6 oz.
Volume: 40 L
Max Weight Rec.: 35 lb.
- Practically waterproof
- Very durable for the weight
- Spacious hipbelt pockets
- Spacious front pocket
- Convenient bottom pocket
- Can remove some components to save weight
- Not as padded
- Torso isn't adjustable
The Hyperlite Mountain Gear Unbound 40 is purpose-built for hikers covering long distances and those wanting to keep their pack weight as low as possible without sacrificing convenience. With its plethora of useful pockets, perfect balance of weight and durability, and practically waterproof design, the Unbound has quickly become one of our all-time favorite backpacks.
If you’ve never used a backpack with a bottom pocket before, you’re in for a treat. This stretchy mesh pocket on the underside of the pack keeps frequently needed items – like snacks and sunscreen – accessible without the need to stop and take off your pack. The Unbound also has an innovative front mesh pocket, which can be accessed from the top or through a flap on the bottom. This makes it much easier to store your tent stakes or bathroom bag in a place where they’re quick and easy to find.
The frame – minimal as it may be – is highly effective at transferring weight to the hips. But at the same time, it encourages hikers to keep pack weight low since it’s not as comfy if you exceed about 35 pounds. Carrying a lighter load has a ton of benefits, but simply stated, we find lightweight backpacking is far less exhausting and much more enjoyable. We think it’s easier to stay within this weight limit with a smaller pack, but hikers who need a bit more capacity will love the Unbound 55 .
One of our gear testers took the Unbound 40 on a 300-mile section of the rugged Arizona Trail to see how it performs, and he’s very impressed by the durability and exceptional pocket layout. The fabric of the Unbound held up well to rocks and prickly plants along the path, and the bottom pocket, shoulder pocket, and generous hipbelt pockets made it so that everything he needed was accessible without opening up the pack.
The Unbound is on the expensive side for ultralight packs, but we think it’s priced fairly for its quality and durability. The Dyneema Composite Hybrid (DCH) fabric and taped seams are a big part of what makes the Unbound so expensive, but they’re also the reason this pack is so durable and about as close to waterproof as you can get. We opted for the lighter-weight white Unbound 40 which is constructed with DCH-50, but hikers who are particularly tough on gear – or just want the extra peace of mind – should consider the black Unbound which is made with beefier DCH-150.
For years the HMG Southwest 55 (reviewed below) held the top spot on our Best Backpacking Backpacks list, but we view the Unbound as a very similar backpack with a few notable upgrades. Both packs are exceptionally well-made, lightweight, and reliable, but the Unbound would hands-down be our pick between the two.
Full review: Hyperlite Mountain Gear Unbound 40

Osprey Atmos 65 / Aura AG 65
Best backpacking backpack for carrying 35+ lb.
Price: $340
Weight: 4 lb. 10 oz.
Volume: 65 L
Max Weight Rec.: 50 lb.
- Can comfortably hold heavier loads
- Breathable & well-padded frame
- Above-average durability
- Sturdy frame transfers weight to hips well
- Very comfortable suspension
- Plenty of room for extra/bulky gear
- Lots of organization
The Osprey Atmos AG 65 (Men’s) / Aura AG 65 (Women’s) packs hold 35-50 pounds much more comfortably than any lightweight backpack, and they’re still lighter than many comparable traditional options.
Hikers who are just starting out or who prefer to carry a few extra luxuries will find that the Atmos and Aura have a generous amount of padding and plenty of pockets to organize gear. The inside of these backpacks can be accessed from the side, the bottom, or the top lid, so necessities are always close at hand.
These backpacking packs are also equipped with Osprey’s signature AntiGravity suspension system, which transfers weight to your hips incredibly well and takes the strain off your shoulders and back. If you prefer to prioritize comfort over saving weight, the Atmos and Aura are tough to beat.
That said, if the ample cushioning and structured frame appeal to you, but you want an overall lighter pack – check out the Osprey Atmos LT and Aura LT . These packs omit some of the bells and whistles in favor of weight and monetary savings.

Osprey Exos 58 / Eja 58
Lightweight backpack with the best ventilation
Price: $260
Volume: 58 L
Max Weight Rec.: 40 lb.
- Great price for the quality & features
- Excellent back ventilation
- Hipbelt pockets are a bit small
The Osprey Exos 58 (Men’s) / Eja 58 (Women’s) are long-time favorites of lightweight backpackers – and the CleverHiker team – because of their comfort, well-ventilated back panel, and approachable price.
The tensioned-mesh frames of the Exos and Eja are sturdier than most lightweight pack frames and can carry heavier loads more comfortably. When one of our gear testers used the Exos for a test hike up Misery Ridge in Central Oregon – a relentlessly steep trail – he was very pleased with how well the AirSpeed Suspension ventilated during intense activity on a sunny day. In addition, he noted that the frame and suspension transfer weight to the hips well and can make the load feel a bit lighter than it is.
The latest iteration of the Exos/Eja brings back hipbelt pockets – a component that was sorely missed on the previous iteration – and while we’re happy to have the pockets, they’re very small. When the hipbelt is fastened, the pockets sit tight against your hip bone and make it pretty tough to get larger items in or out. Don’t expect to fit a smartphone inside these pockets, but storing small, commonly used stuff, like chapstick, a lighter, and a snack will work.
That gripe aside, the Exos and Eja are lighter and more affordable than many of the comparable packs on the market. So if you’re looking for the best balance of comfort, weight, capacity, and price you’ve found it with the Exos and Eja.
Full review: Osprey Exos & Eja

- Gossamer Gear Mariposa 60
Most comfortable ultralight backpack
Price: $285
Weight: 1 lb. 15.2 oz.
Volume: 60 L
- Durable for the weight
- Well-padded & comfortable
- Convenient SitLight pad included
- Large, easy-to-reach side pockets
- Front pocket mesh not as durable
- Pocket on top flap is hard to use when pack is full
The Gossamer Gear Mariposa 60 is one of the most padded ultralight backpacks on the market so it’s perfect for lightweight backpackers who prioritize comfort. There are lighter packs out there, but we haven’t come across one that compares to the cushiness of the Mariposa.
The Mariposa is CleverHiker Managing Editor Ben Applebaum-Bauch’s go-to backpack – he took it on his thru-hikes of the PCT , CDT, Pinhoti Trail, and Oregon Coast Trail . He loves its unrivaled balance of low weight, storage capacity, and durability, and he’s put in 6,000+ miles with this bag.
We find that the 60-liter capacity is the sweet spot for a wide array of trips. It’s big enough that we can pack along some extras like a backpacking chair or a hammock on warm-weather trips, but not so big that we struggle to fill it. And with a wide array of useful pockets – a large stretchy outer mesh pocket, roomy hipbelt pockets, and three huge side pockets – you can keep all of your necessities within reach. But if you’re looking for something smaller, the Gossamer Gear Gorilla 50 is pretty much the same pack with a smaller capacity and slightly different side pockets.
There are many little details to love on the Mariposa, but one of our favorites is the removable SitLight pad , which acts as back padding while you hike and a cushy seat around camp. We usually bring a Z-Seat with us backpacking anyway, but having a dedicated pad in the pack that serves dual purposes is even better from a weight and cost standpoint.
The Mariposa has a relatively affordable price point, a perfectly sized capacity, and an adaptable design, so we think many types of backpackers will enjoy this pack. From those just starting out on their lightweight journey to seasoned ultralighters looking for a bump up in comfort from more minimal packs, the Mariposa is a well-rounded option with all the features you need.
Further reading: Gossamer Gear Gorilla 50
Gregory Focal 48 / Facet 45
Affordable lightweight pack with a supportive frame
Price: $230
Weight: 2 lb. 9.6 oz.
Volume: 48 L / 45 L
- Sturdy frame transfers weight well to hips
- Good back ventilation
- Removable top lid
- Outer pocket mesh is less durable
- Torso isn’t adjustable
The Focal 48 (Men’s) / Facet 45 (Women’s) are Gregory’s response to the increasing demand for lightweight backpacking gear. These packs sit solidly in the middle of the lightweight backpack category, but they’re a cut above when it comes to affordability, support, and convenience.
Gregory has been making some big moves with their backpack designs, and we have to say we’re loving the comfort of their modern frames. The Focal and Facet also have a really solid array of pockets – our favorites are the forward-facing water bottle pockets which are easy to reach while on the move. The top lid is removable, the hipbelt pockets are large, and the suspension system is supportive and well-ventilated – these are the main things we like to see in a good backpacking backpack.
Sub-50-liters is a small capacity compared to most other traditional-style backpacks, and you should have a pretty dialed-in kit if you choose to go with these ones. While Gregory offers the Focal and Facet in a larger capacity , we recommend going with the REI Flash 55 above to save money or Gregory’s Paragon 58 / Maven 55 below for more support.
Overall, the Gregory Focal 48 and Facet 45 are solid lightweight packs with great features and a decently affordable price tag. Hikers who have their gear weight around 30 pounds can’t go wrong with these backpacking backpacks.

Hyperlite Mountain Gear Southwest 55
Best blend of weight & durability
Price: $379
Weight: 2 lb. 3.6 oz.
We’ve been hiking with the HMG Southwest 55 (and Southwest 40 ) since 2013, and we love their exceptional blend of low weight, high weather-resistance, and durability. The Southwest packs are some of the lightest framed backpacks on the market, so they’re perfect for hikers wanting to go lighter while maintaining a good level of support.
The DCH fabric of the Southwest is fully waterproof and all the seams are sealed to keep out water, so this pack is ready to hit the trail in any weather. Senior Gear Analyst, Casey Handley, used the Southwest for her very soggy thru-hike of Vermont’s Long Trail , and – despite getting rained on almost every day – everything inside the pack stayed perfectly dry. DCH also has one of the highest strength-to-weight ratios of any backpack, so the Southwest is exceptionally tough for how light it is.
The design of the Southwest is fairly simple, but we find the organization just right for keeping a load of lightweight and compact gear in check. The side water bottle pockets are large and easy to reach, the main opening is wide and makes it easy to pack, and – best of all – the front pocket on the Southwest is absolutely ginormous. The cavernous front pocket is made with a solid swath of DCH fabric instead of mesh like most other packs, so it’s not going to snag and rip as easily as others. It can also accommodate a surprising amount of gear. We use it to keep extra layers easily accessible, isolate wet gear from dry stuff inside the pack body, and store excess food after we’ve been overly ambitious during a resupply.
The Southwest comes in three sizes – 40 liters, 55 liters, and 70 liters – all of which we’ve tested. Most backpackers will likely prefer the Southwest 55 since it strikes a good balance between being large enough for extra bulk when the weather or terrain call for it but also small enough to remain light and stable when fully packed . Ultralight hikers who really have their gear dialed in will love the compact size and low weight of the Southwest 40 . And backpackers heading out on winter excursions should look at the Southwest 70 since it has ample room for accommodating bulky clothing layers and a winter sleeping bag.
Full review: Hyperlite Mountain Gear Southwest

- ULA Circuit
Supportive & durable ultralight backpack
Price: $280
Weight: 2 lb. 5.3 oz.
Volume: 68 L (feels closer to 50 L)
- More comfortable than many other lightweight packs
- Large capacity for the weight
- Well-constructed with details dialed in
- A bit heavier than most ultralight packs
After thru-hiking thousands of miles with the ULA Circuit we can confidently say it’s an exceptionally durable backpack for long distance hiking. If you have your pack weight below 30 pounds the Circuit’s frame will carry your load very comfortably.
CleverHiker Gear Analyst, Heather Eldridge, has used the Circuit for her thru-hikes of the PCT and CDT as well as many small trips. She loves this bag because it has the perfect balance of durability and low weight – making it through multiple thru-hikes of over 2,000 miles each and then still going is no easy feat for an ultralight backpack.
New for 2024, the Circuit now comes with a more durable mesh front pocket, it’s compatible with ULA’s removable Y-strap and bottom strap, and – to be quite frank – it got a much-needed aesthetic makeover.
All the little design elements on the Circuit really make it shine on trail – large, convenient pockets; light, durable fabric; and a minimal, yet highly effective suspension system. The giant hipbelt pockets keep essentials and snacks easily accessible, which are worth their weight in gold for hikers spending long days putting up big miles.
This backpack has an exceptional balance of weight, comfort, and durability, so it’s no wonder the ULA Circuit is consistently called out as a favorite by thru-hikers.

Gregory Paragon 58 / Maven 55
Affordable & supportive midweight backpack
Weight: 3 lb. 7 oz. / 3 lb. 6 oz.
Volume: 58 L / 55 L
- Can comfortably carry heavier loads
- More adjustable than many others
- A bit heavy
The Gregory Paragon 58 (Men’s) / Maven 55 (Women’s) are some of the comfiest midweight packs we’ve used, and they carry heavy loads surprisingly well for their relatively low weight. These packs feature size-adjustable hip belts, so they can fit a larger variety of body shapes than many other packs on our list.
Most packs with this carrying capacity will run you over $300, but the Paragon and Maven come in at a much friendlier price point. We think these are good budget options for backpackers who can dial in the bulk to under 60 liters but still need a sturdy pack capable of hauling up to 50 pounds.
These packs are also reasonably light for how beefy the frame and suspension are. Many packs that can haul 50 pounds weigh a pound or so more than the Paragon and Maven. That said, we find that the comfort noticeably diminishes above 40 or so pounds. While these packs certainly can carry up to 50, we think most hikers will be more comfortable below 45 pounds.
We view the Paragon and Maven as a good middle ground for hikers looking to transition from their 4+ pound expedition packs to a lighter kit. The padding and suspension will feel similar to carrying something larger while the lower capacity of the Paragon and Maven encourages hikers to pare down the weight and bulk of their gear a bit.

Osprey Aether Plus 70 / Ariel Plus 70
Large capacity backpack with a built-in daypack
Price: $410
Weight: 5 lb. 8 oz. / 5 lb. 8.6 oz.
Volume: 70 L
Max Weight Rec.: 60 lb.
- Top lid doubles as removable daypack
- Multitude of features feels “busy”
Sometimes you need a lot of capacity for big trips in remote areas or winter excursions with bulky gear. The Osprey Aether Plus 70 (Men’s) / Ariel Plus 70 (Women’s) are comfortable large-capacity backpacks that carry heavy loads with ease and significantly reduce the burden on your body.
The secret sauce that makes these over-five-pound packs actually feel comfortable is Osprey’s “Fit-on-the Fly” system which allows you to tailor the support to your specific load. The well-padded hip belt of the Aether/Ariel can be adjusted for both the ideal length and angle, so it accommodates a wide range of body shapes. The frame of the pack is also connected to the hipbelt to ensure the load sits close to your back – minimizing shifting that can cause instability in your stride. Similarly, the shoulder harness has custom adjustments that allow you to dial in the wrap and fit, so you can decide where the padding sits and eliminate pinching and pulling from the straps.
One of the more unique features of the Aether/Ariel Plus is the removable daypack lid. We’ve seen a lot of packs incorporate a similar feature over the years, but they often leave something to be desired. However, the Daylid on the Aether/Ariel Plus feels much more akin to something you’d find on our Best Daypacks list. It’s a full 16 liters and features multiple zippered compartments, so it’s perfect for hikes where you want to leave your full pack behind while you bag a summit or explore a side trail.
While the Aether and Ariel Plus are the heaviest and most expensive packs on our list, there’s no better choice for hikers needing a reliable hauler for hefty loads. That said, hikers looking for a similar level of support at a lower cost and weight should check out the popular Aether 65 and Ariel 65 . These packs feature the same Fit-on-the-Fly support system, but they ditch a few convenience features – like the Daylid and U-shaped front zipper access – in favor of a more streamlined build.
- Zpacks Arc Haul Ultra 60
Ultralight pack with excellent back ventilation
Price: $399
Weight: 1 lb. 5.9 oz.
- Comfy if not packed too full
- Hip pockets cost extra
The Zpacks Arc Haul Ultra 60 is a featherweight pack that’s great for thru-hikers and ultralight backpackers carrying base weights around 15 pounds or less.
This pack’s unique arching frame transfers weight well and creates a taut mesh back panel that provides excellent ventilation when not packed too full. Zpacks lists the Arc Haul’s max carry weight at 40 pounds, but we feel its max weight is closer to 30 pounds for a comfortable hike. Any more than that, and the ultralight frame becomes noticeably less supportive.
During a test hike in Oregon’s Eagle Cap Wilderness, CleverHiker Gear Analyst, Heather Eldridge, noted that the roll-top closure on the Arc Haul is very convenient. The collar has a wide opening that makes it easy to get gear in and out, and rolling it down compresses gear nicely to ensure the load stays balanced while hiking.
While we really like the Arc Haul, we wish it was more affordable. The HMG Unbound 40 above costs less and is more durable than the Arc Haul, so we’d steer UL hikers who don’t need the larger volume towards the Unbound instead. That said, the Unbound is a half pound heavier, so you’ll have to decide if saving weight or money is more important to you.
If having the absolutely lightest gear possible is your top priority, the Arc Haul is worth every penny for its comfort, weight, and weather resistance.

Deuter Aircontact Core 65+10 / 60+10 SL
Excellent value backpack with a customizable fit
Price: $250
Weight: 4 lb. 15.4 oz. / 4 lb. 8.7 oz.
Volume: 75 L / 70 L
Max Weight Rec.: 44 lb.
- Less expensive than other large-capacity packs
- Highly adjustable torso
- Mesh pockets aren’t as durable
- A bit tough to access water bottles
- Heavy Lower max carry weight than others with this capacity
The Deuter Aircontact Core 65+10 (Men’s) / 60+10 SL (Women’s) are more affordable than most other packs in this capacity range, so they’re a great deal for hikers who tend to pack on the bulky side. The Aircontact has a nicely contoured frame, cushy lumbar pad, and hip-hugging belt that moves with your body, making it an incredibly comfortable backpack.
You may be wondering what’s up with the “+” in the name of the Aircontact. This pack is designed with an expandable collar that easily cinches out of the way when you have a smaller load or it can be deployed to provide extra storage when you need it. The expandable collar is a fairly common feature on packs nowadays, but the one on the Aircontact is quite generous at 10 liters.
Where this pack falls a bit short for us is in its ability to carry heavy loads. Most backpacks in the 70+ liter range will haul upwards of 50 pounds, but the recommended max weight for the Aircontact is a more modest 44 pounds. If our adventure calls for such a large pack, we’re likely also carrying some considerable weight. Osprey’s Aether and Ariel above are going to be the much better options for hikers carrying loads over 45 pounds.
That said, if you can keep your pack below that 44-pound mark, the Aircontact carries very well. CleverHiker Gear Analyst, Heather Eldridge, took the Aircontact on a multi-day trip through the remote backcountry in Glacier National Park . She kept her pack weight on the lighter side and was very pleased with the carrying comfort for her load.
The Aircontact Core only comes in one size, but it has a large fit range on the torso and ample adjustment points. Make sure you purchase it with enough time to dial in the fit before a big trip.
Granite Gear Crown3
Affordable, comfy & lightweight backpack
Price: $240
Weight: 2 lb. 4 oz.
- Above-average comfort
- Low max weight carry for the size
- Not as comfortable as other large-capacity packs
The affordable Granite Gear Crown3 (Men’s) / (Women’s) has been a popular budget option for years due to its balance of low weight and large capacity. It has a unique, fully adjustable hipbelt for dialing in the perfect fit, and the top lid is removable if you’re looking to save some weight.
The simple, yet comfortable frame of the Crown3 consists of a molded foam pad and a removable plastic sheet. We don’t find this design to be quite as supportive or breathable as some others on our list, but it does a decent job of keeping weight concentrated toward your hips. That said, the Crown3 is ready for long days on the trail as long as you keep your pack weight in check.
At 60 liters, the Crown3 is larger than many other backpacks in its weight class. The extra space can be nice for packing bulkier gear without having to fight to fit it in the pack, but you’ll need to keep the Crown’s relatively low weight capacity for the size in mind. There are plenty of good compression points on this pack for hikes where you won’t be filling all 60 liters.
With its large capacity but relatively low weight, we view this pack as a good in-between for those who are new to lightweight backpacking and may need a little more space than most ultralight packs offer. However, hikers who are still working to get the overall weight of their kit down may prefer the more supportive Osprey Exos/Eja 58 above for their more supportive design.
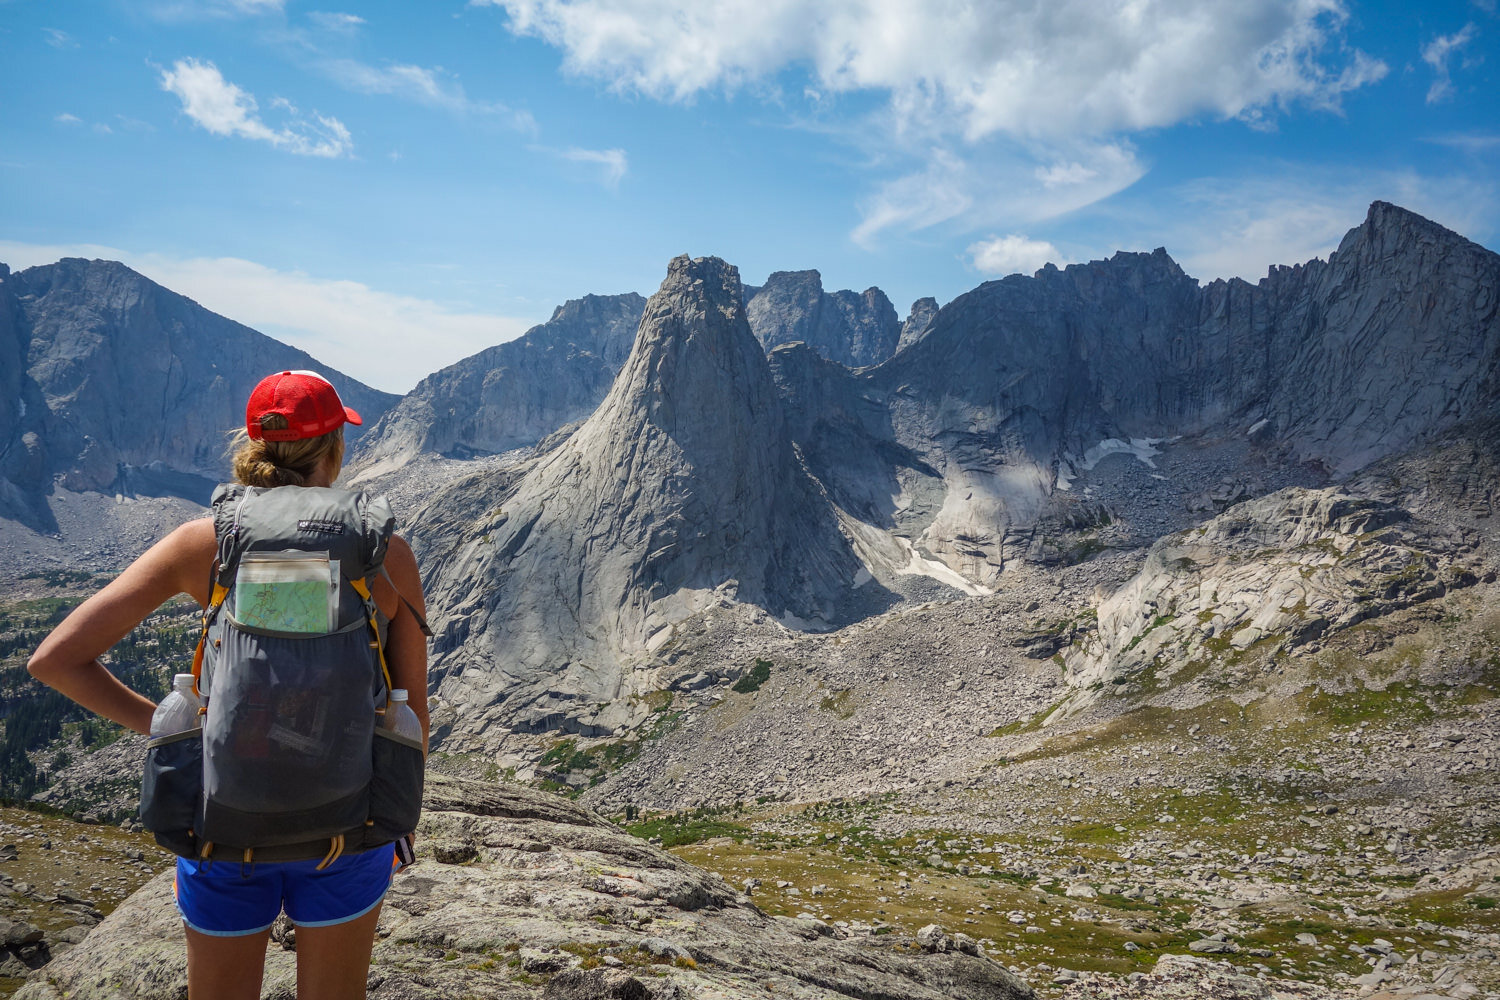
Product Comparison Table
What’s most important to you in a backpacking backpack.
A high-quality backpacking backpack can be expensive, but we assure you it’s worth it to get a pack that will be comfortable to wear for long periods, will last for thousands of miles, and has useful pockets for keeping your things organized. We recommend spending a bit more if you’re able as it will be cheaper than replacing a worn out or ill-fitting backpack in the long run. You can expect quality craftsmanship and performance from all of the backpacking backpacks on this list.
Best budget backpacking backpacks: :
- REI Flash 55 (Men’s) / (Women’s)
- Gregory Focal 48 (Men’s) / Facet 45 (Women’s)
- Granite Gear Crown3 (Men’s) / (Women’s)
- Deuter Aircontact Core 65+10 (Men’s) / 60+10 SL (Women’s)
- Osprey Exos 58 (Men’s) / Eja 58 (Women’s)
- Gregory Paragon 58 (Men’s) / Maven 55 (Women’s)
Best mid-range backpacking packs :
- Osprey Atmos AG 65 (Men’s) / Aura AG 65 (Women’s)
Best high-end backpacking packs :
- HMG Unbound 40
- HMG Southwest 55
- Osprey Aether Plus 70 (Men’s) / Ariel Plus 70 (Women’s)
Your backpacking pack will be one of the four heaviest items you carry – tent , backpack, sleeping bag , sleeping pad – so this is a great place to save weight. We consider weight one of the most important specs for backpacking gear. The lighter your backpack , the more comfortable it will be, the more miles you’ll be able to hike, and the more enjoyable your trip will be.
That’s not to say heavier backpacking backpacks are bad though. If you regularly carry loads of 40+ pounds or you’re hard on gear, a beefier backpacking backpack will likely be more comfortable and durable for you. Heavier backpacks also usually have larger capacities, so they’re great for extended trips in remote areas and winter hiking.
Best ultralight backpacking backpacks :
Best lightweight backpacking backpacks :, best heavy-duty backpacks :.
- Osprey Atmos AG 65 (Men’s) / Osprey Aura AG 65 (Women’s)
- Gregory Paragon 58 (Men’s) / Maven 55 (Women’s)
- Osprey Aether Plus 70 (Men’s) / Osprey Ariel Plus 70 (Women’s)
Many lightweight backpackers carry a 40-50L pack, even for a thru-hike. If you like to bring along extra luxury items or you know you’ll be hauling a lot of clothing , food, and/or water, you might want to choose a pack with a little more volume for flexibility. And if you plan to use your backpacking pack for winter trips, consider bumping up your capacity even more to accommodate heavier, bulkier gear.
Best 40-50L backpacks :
Best 50-60l backpacks :, best 65l+ backpacks :.
The lighter your overall pack weight, the less frame you’ll need. Many of the backpacking backpacks we recommend have simple frames that will be comfortable for carrying loads up to 35 lb. If you prefer to carry heavier loads, choose a full-frame backpacking pack that can comfortably support more weight.
Best full-frame backpacking backpacks :
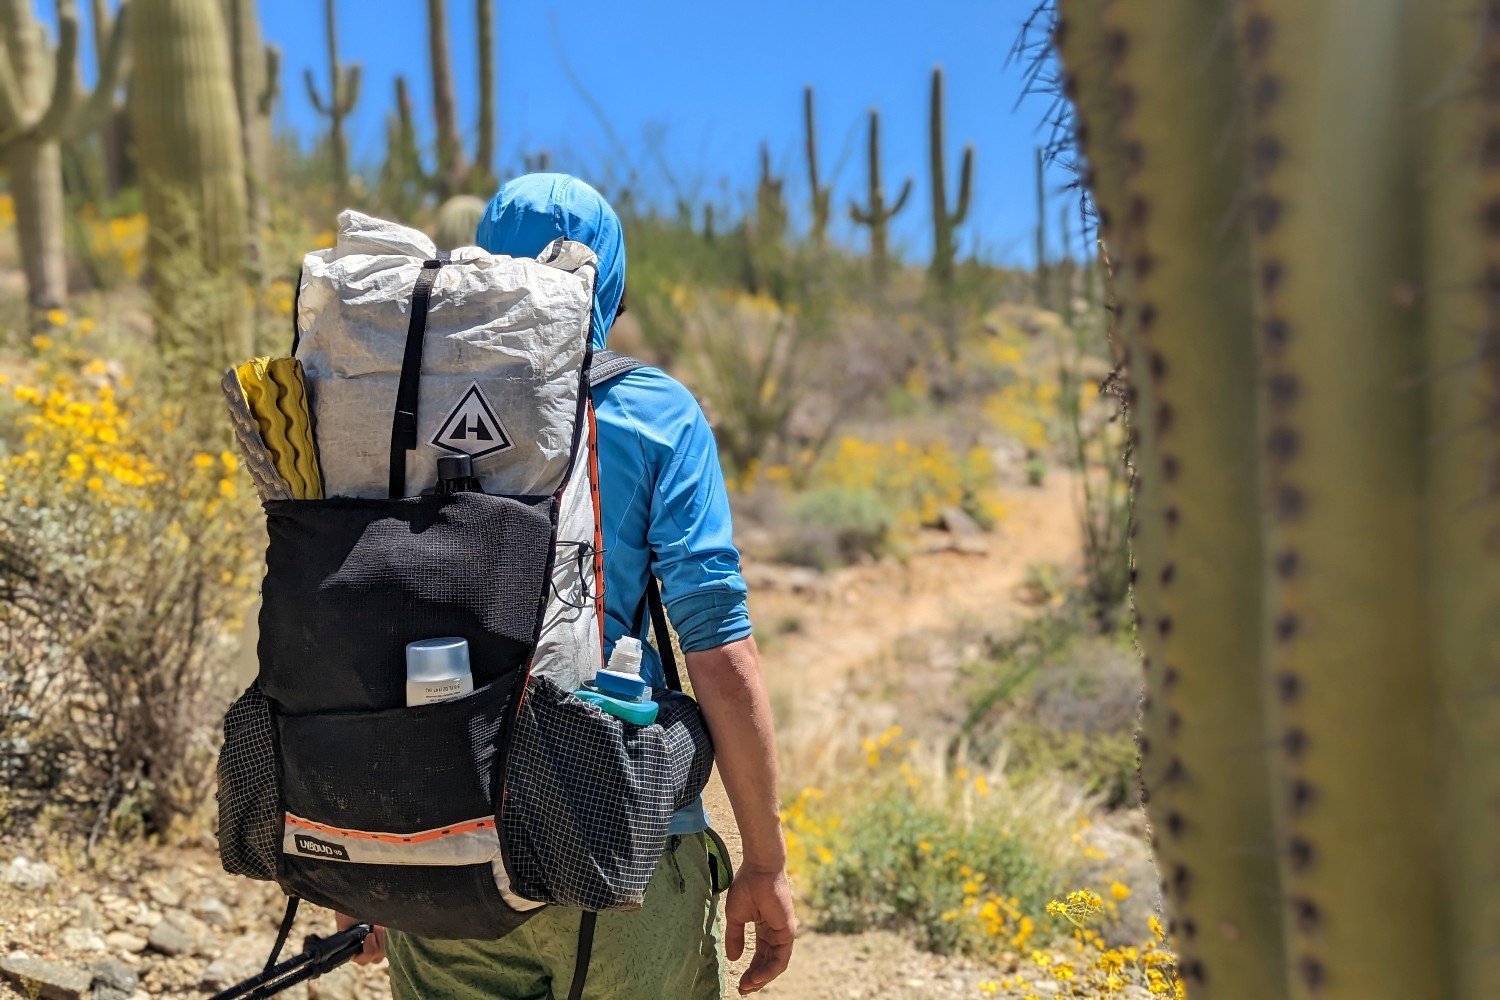
Hyperlite Mountain Gear Unbound 40 – Photo credit: Casey Handley (CleverHiker.com)
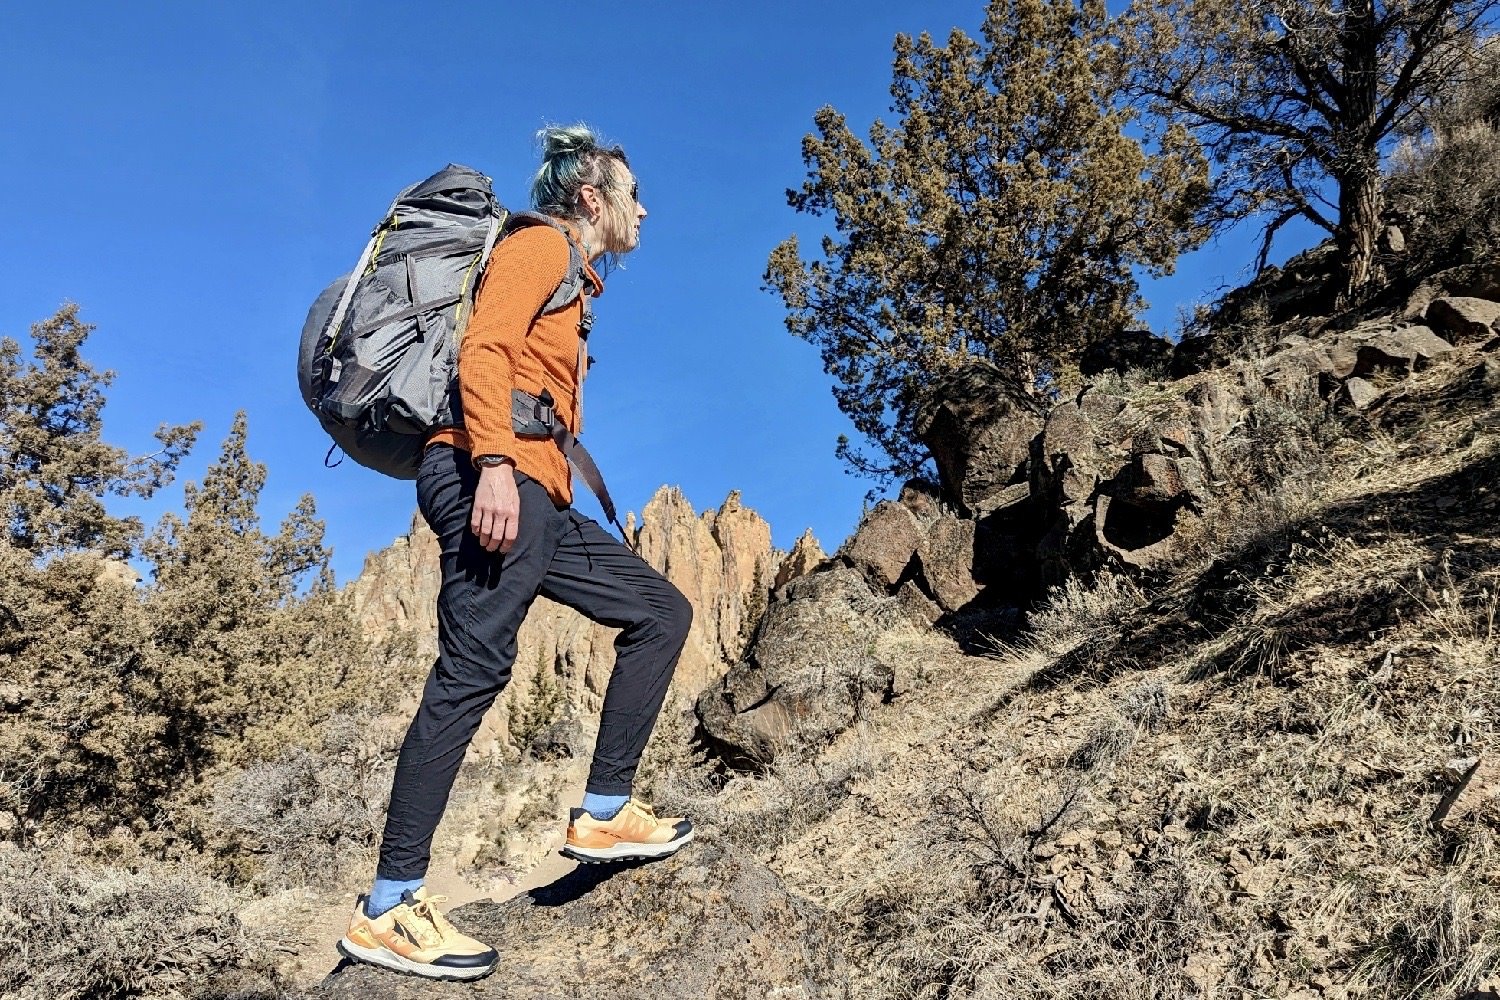
REI Flash 55 – Photo credit: Casey Handley (CleverHiker.com)
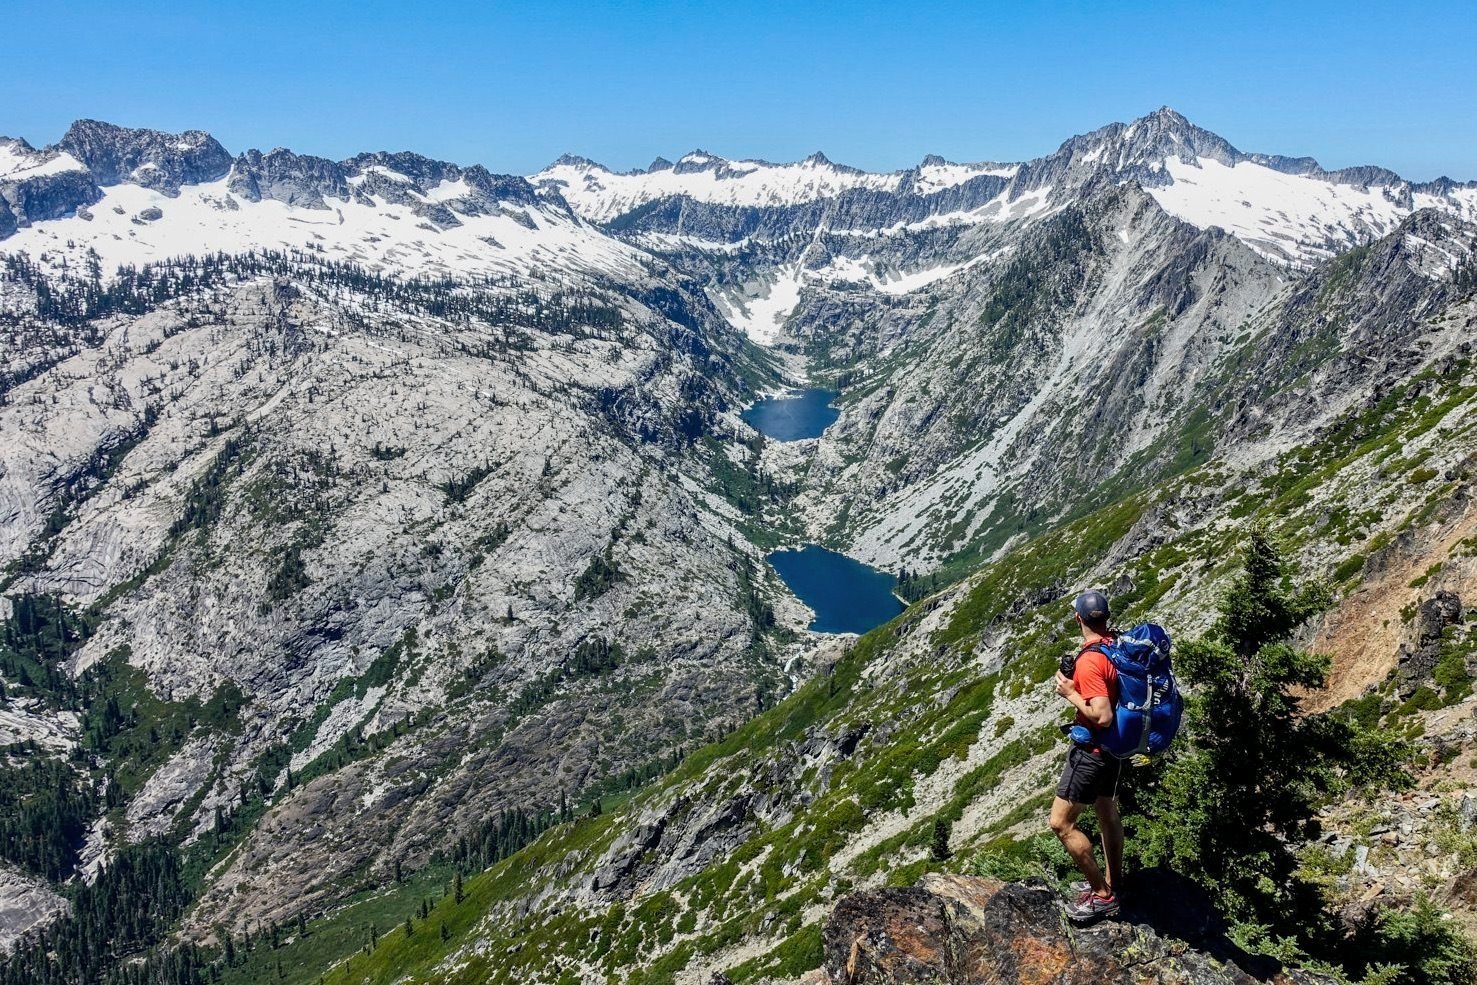
Osprey Exos – Photo credit: Dave Collins (CleverHiker.com)
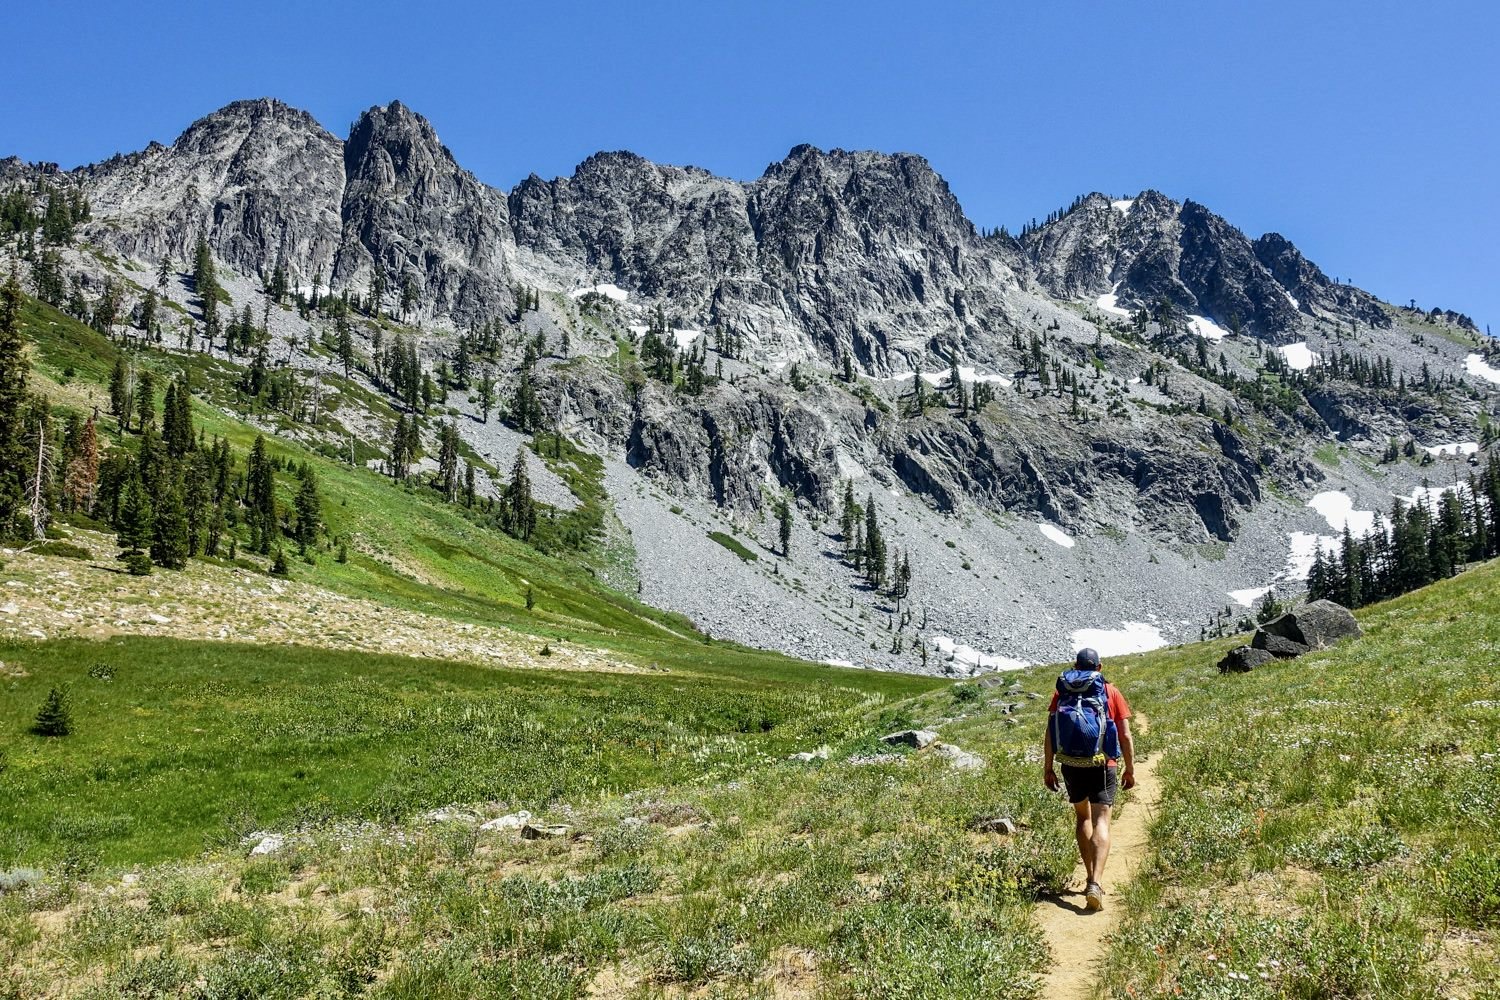
Osprey Eja 48 – Photo credit: Heather Eldridge (CleverHiker.com)
Critical Backpack Considerations
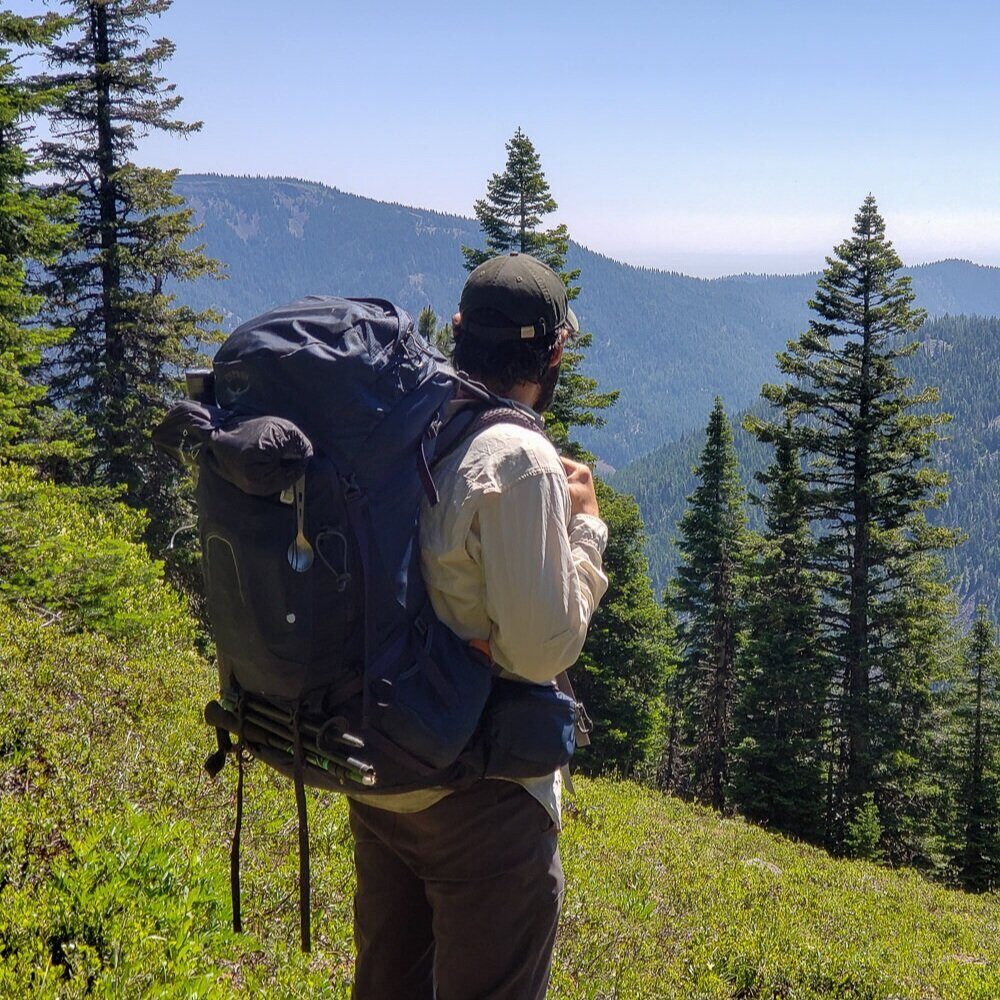
A backpack doesn’t have to be complex to be exceptional. It’s often the companies that keep design elements simple and streamlined that make the best lightweight backpacks. At the end of the day, your backpack is just a sack to carry other gear comfortably. So don’t feel the need to overdo it with a ton of excess compartments, pouches, zippers, clips, and straps.
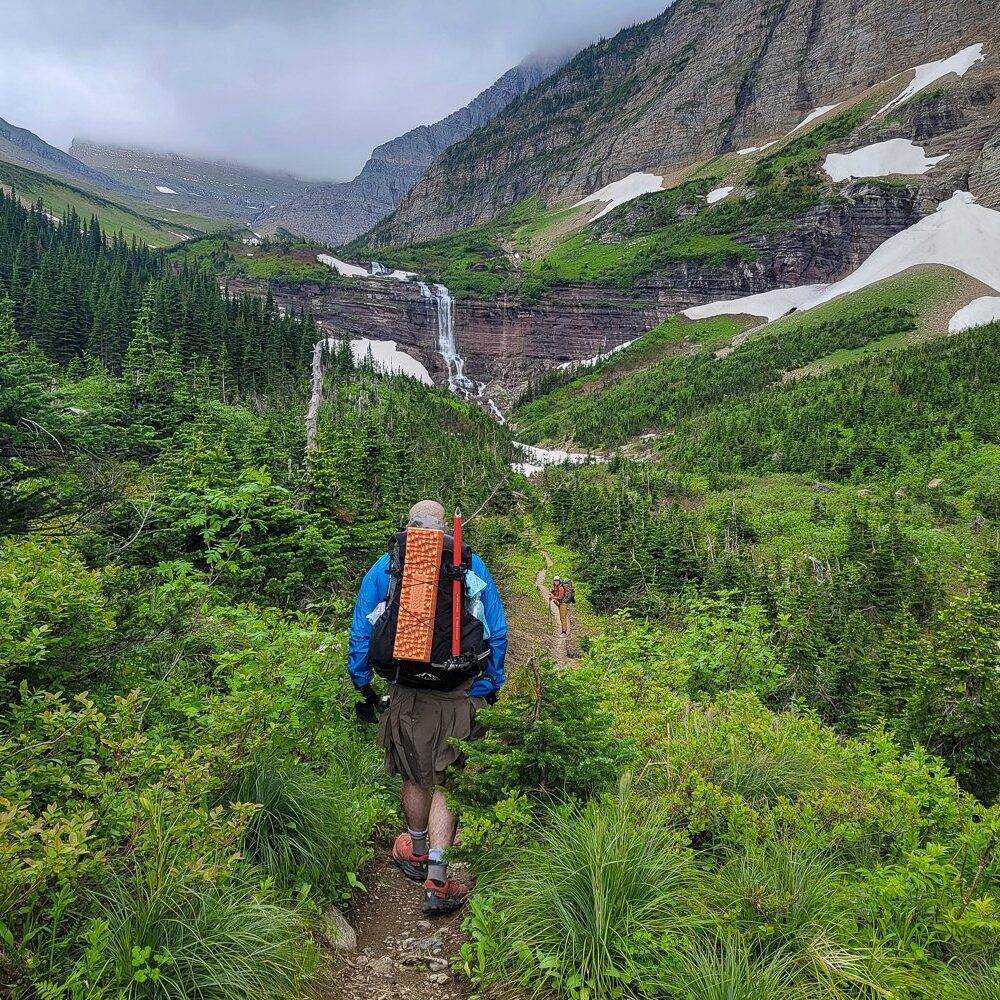
Most lightweight backpacks are made from one of two materials: Ripstop Nylon or Dyneema Composite Fabric (formerly cuben fiber). In general, DCF is lighter and more water resistant, but also more expensive. Both materials are durable and highly functional for backpacks.
Fit is one of the most important factors for a backpack, but it’s also one of the toughest features to pin down until you have a backpacking backpack fully loaded and on your back.
The packs we recommend are well known for their comfort and we’ve tested them extensively in the field. Measure your torso length and hip belt size before ordering and you should be good to go.
BUYING ONLINE
Check the seller’s return policy before you buy, but you can almost always return an unused backpacking pack within a certain time frame after purchasing.
We recommend buying your top choice, trying it on at home, and returning or exchanging if it doesn’t fit quite right. We’ve been buying lightweight backpacks online for years and we’ve yet to have any problems.
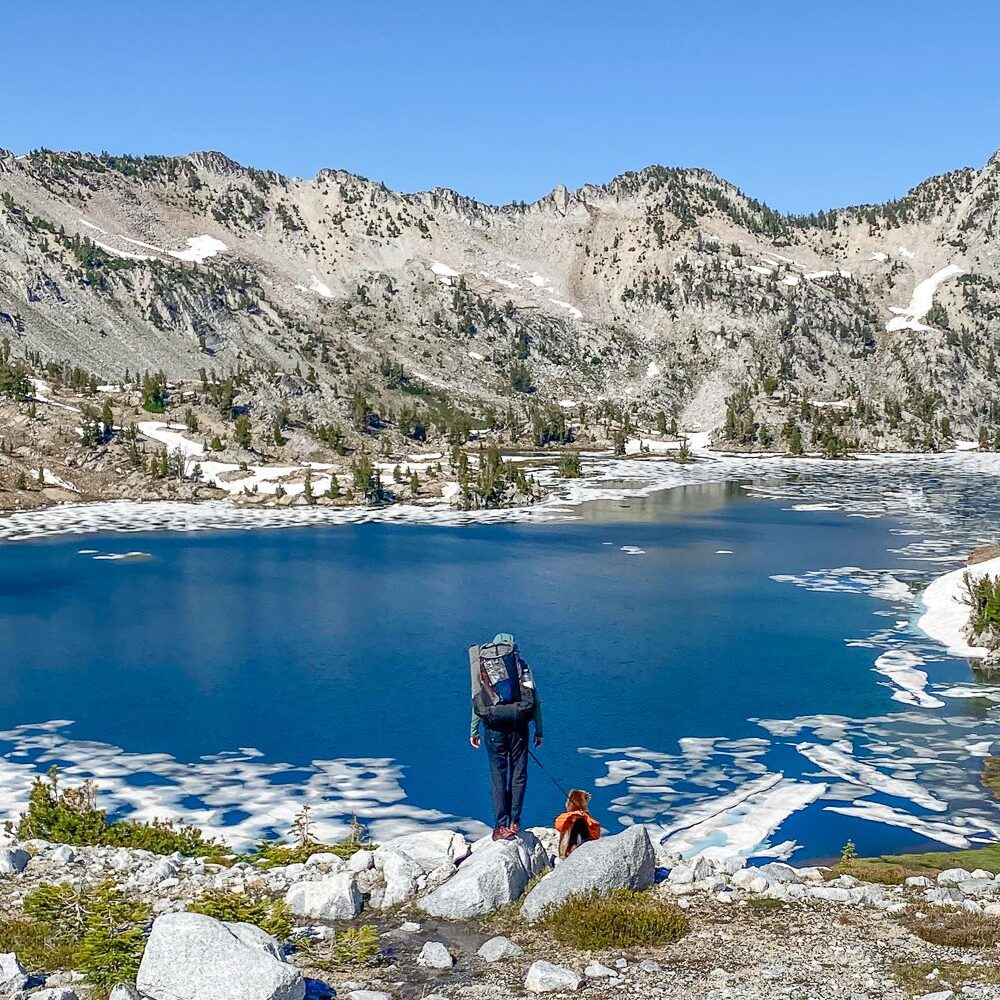
Key Design Features
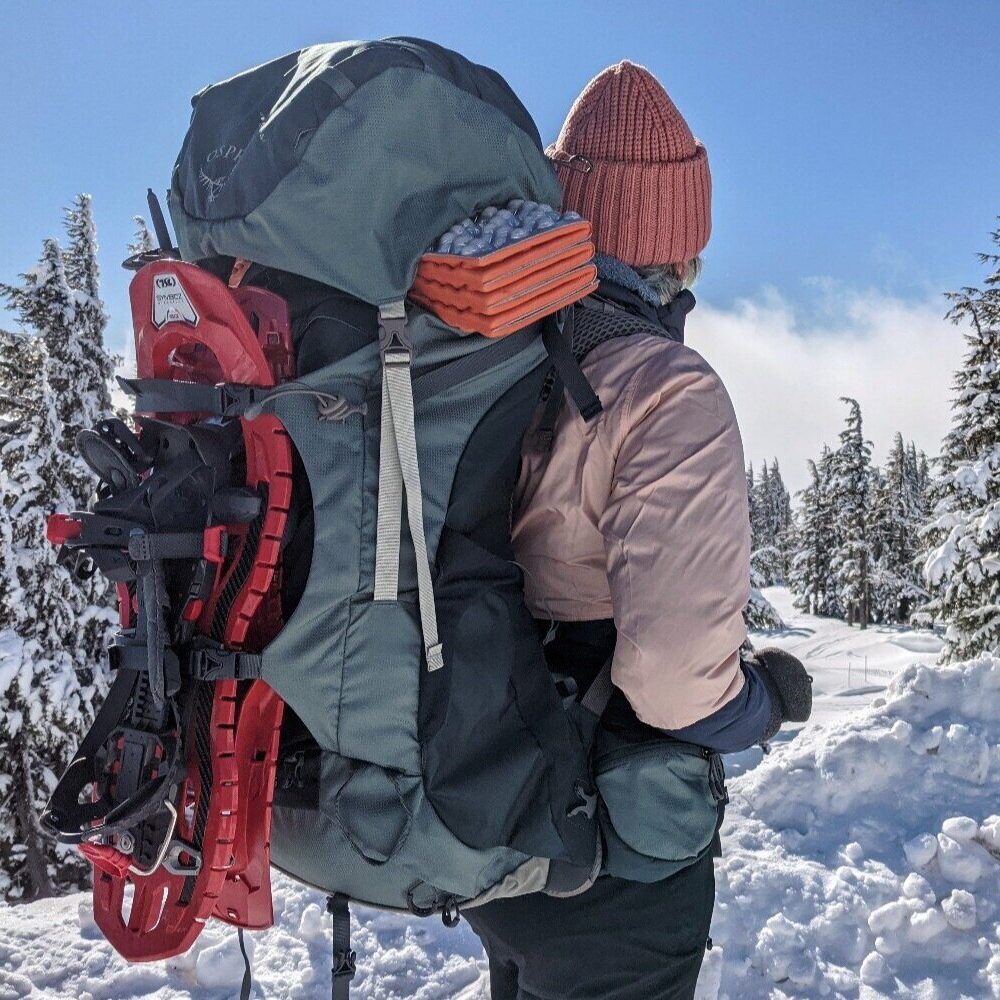
FRONT MESH / STRETCH POCKET
Most lightweight backpacking packs have a large mesh or stretch material pocket on the front (the side facing hikers behind you). This feature comes in very handy on the trail. It’s great for gear you want to stow quickly or keep easily accessible, like a rain jacket or water purifier. It’s also good for airing out wet gear.
MAIN COMPARTMENT
Most lightweight backpacks have one top-loading compartment for storing the majority of your gear. That’s really all you need.
Extra compartments and zippers add unnecessary weight and complexity. Pack items you won’t need until camp ( tent , sleeping bag / pad , stove ) in the bottom of your backpack and you’ll be set.
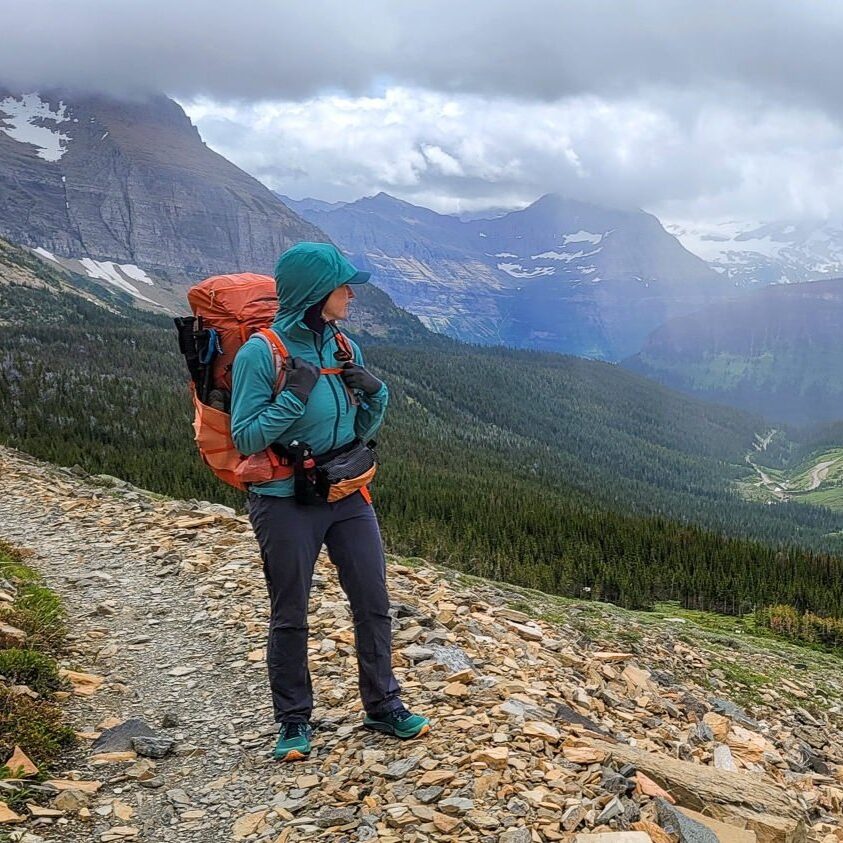
A good hip belt is a critical feature of any backpacking pack. Your hip belt will hold most of the weight of your pack on your hips, which keeps your shoulders from tiring. Hip belts should be comfortable and transfer weight without slipping. Every backpacking backpack on this list has a solid hip belt.
SHOULDER STRAPS
Shoulder straps will hold a significant amount of your pack weight as well. You’ll want them to have comfortable padding and be well spaced to avoid chafing and odd pressure points. Every backpacking backpack on this list has comfortable shoulder straps.
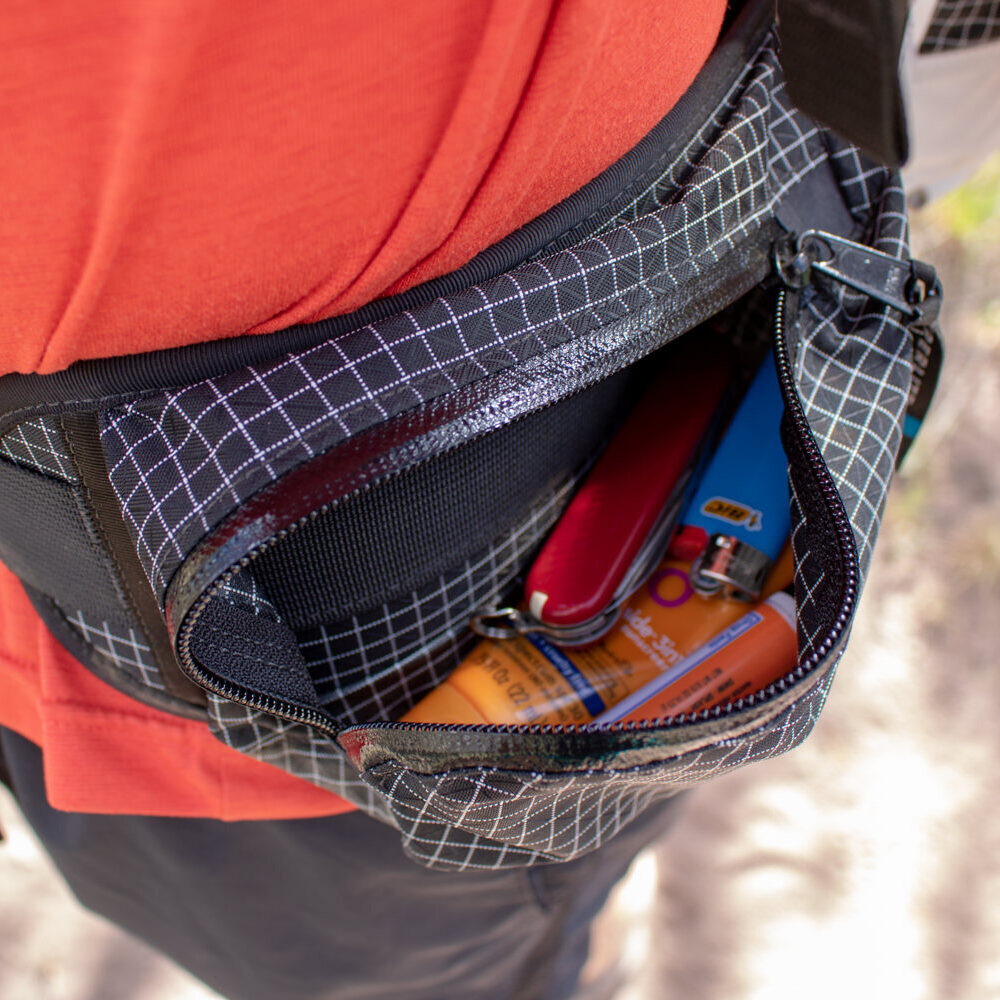
HIP BELT POCKETS
With a lightweight backpacking pack, you won’t need to take breaks nearly as often, so you’ll want to have certain items easily accessible, like snacks, sunscreen, lip balm, camera, etc. Most of the backpacks we recommend have built-in hip belt pockets, but if they don’t come standard, we recommend buying the aftermarket hip belt pockets that fit your pack.
SHOULDER POUCH
We’re also fond of using shoulder strap pouches on our backpacking backpacks. We mainly use them for easy camera access while we hike. A couple backpacks we recommend come with shoulder pouches, but most don’t. So you might consider an aftermarket shoulder pouch if it sounds like a good fit for you.
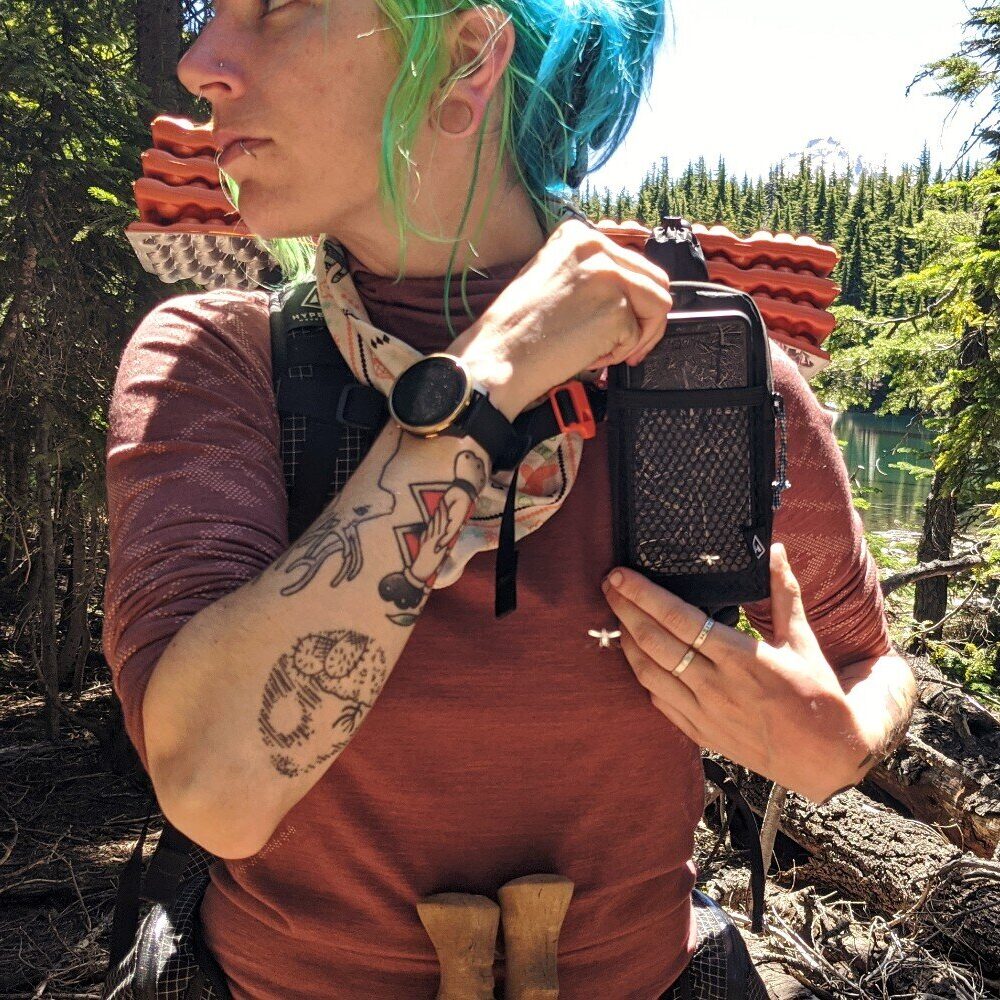
WATER BOTTLE HOLSTERS
Hydration is key in the backcountry, so your water bottles should always be easy to access. It’s shocking to us when we test packs that won’t allow us to grab a water bottle while hiking. That’s just not acceptable.
WATERPROOFING
In general, it’s not a good idea to fully rely on any backpack for waterproofing. Even seam-sealed backpacking packs made from waterproof materials will develop small leaks over time, so we always recommend protecting important items (sleeping bag, clothes, electronics, etc.) in waterproof stuff sacks or plastic bags inside your pack.
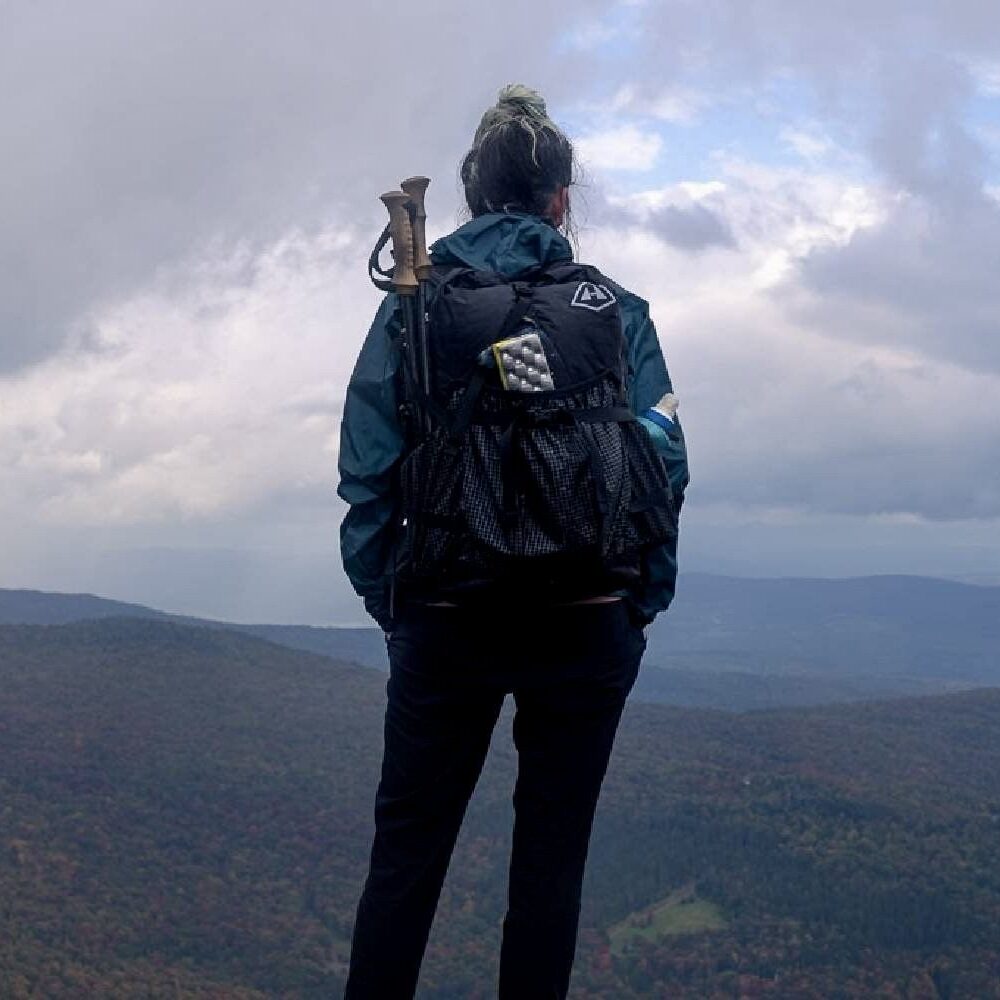
HYDRATION PORTS
If you prefer drinking from a water bladder while hiking, a backpacking backpack without a hydration port could be a dealbreaker. We’re not huge fans of water bladders, so this isn’t a big deal for us, but most of the packs we recommend do have hydration sleeves and ports.
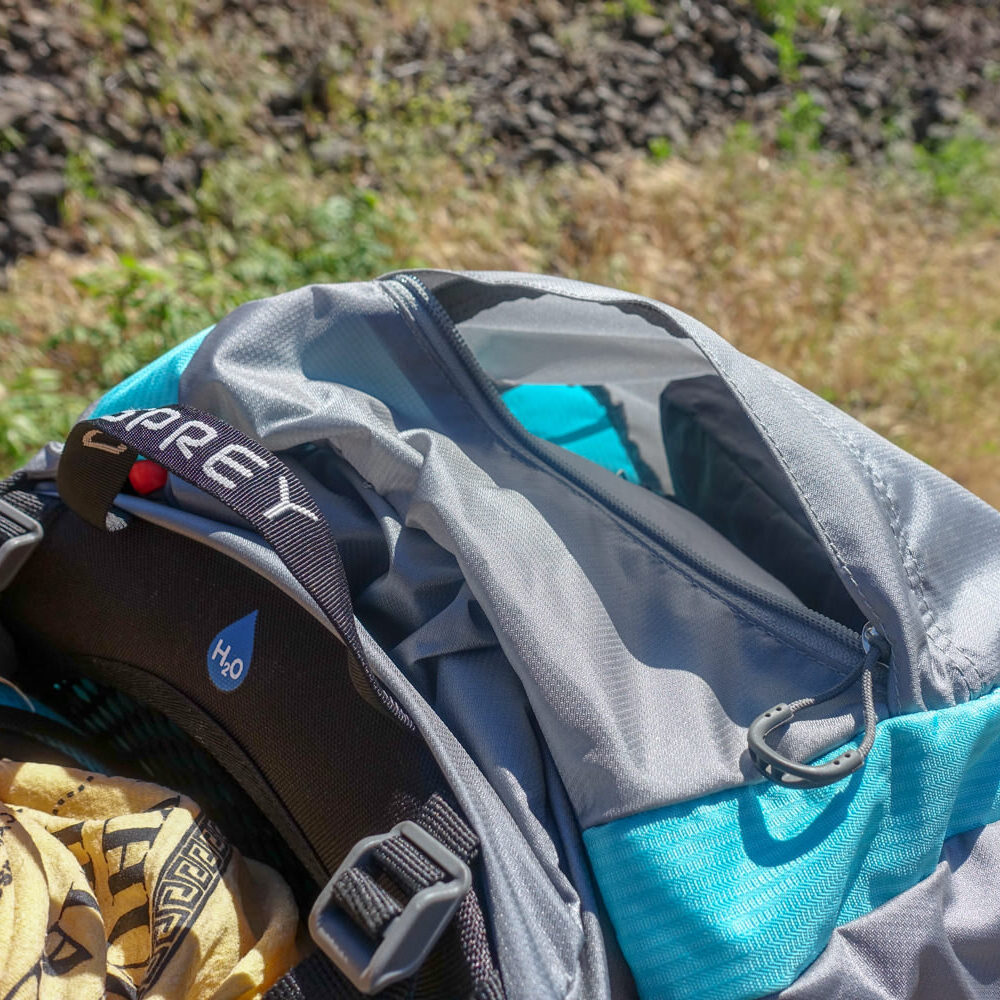
Many lightweight backpacks don’t have a top lid these days in order to reduce weight. Instead, they use roll-top closures, clips, and straps to keep gear secure, which is very effective. We do recommend a couple of backpacking packs with top lids, but if you don’t have one, you probably won’t miss it.
STERNUM STRAP
Sternum straps are included on most backpacks these days. They give you the option to connect your shoulder straps across your chest for a more secure feel. It’s a nice touch when the sternum strap has an elastic section for a little give and the clip has an emergency whistle built in.
LOAD LIFTER STRAPS
Load lifter straps can be used to pull the tops of your shoulder straps towards the backpack. This will take some of the downward pressure off your shoulder straps and transfer it to the front of your shoulders and chest. Many lightweight backpacks don’t have load lifter straps these days and they’re not really necessary if you’re carrying a light load.
TREKKING POLE & ICE AXE LOOPS
Trekking pole and ice axe loops are a nice touch. They make it easy to stow your sticks when you’re not using them. We find that we use ours quite often and many of the bags we recommend come with them built in.
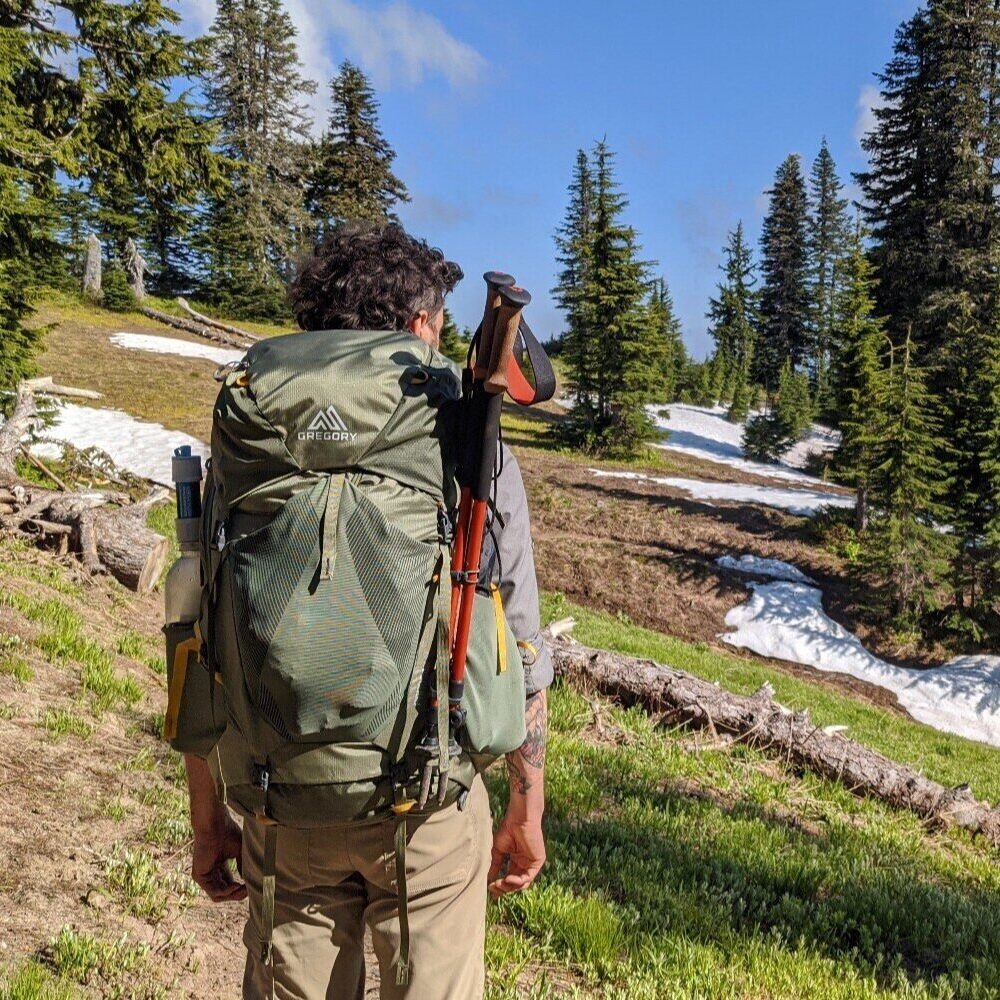
Honorable Mentions
The following backpacking backpack has a lot of good things going for it and it might just be the one for you:
REI Traverse 60 & Women’s 60
The Traverse is affordable for its capacity, and it features ample padding and support for loads up to about 45 pounds. We like the front-facing water bottle pockets and the front zipper that provides access to the main compartment.
While we do appreciate some of the convenience features of the Traverse – like the top lid that converts to a daypack and the ability to customize where the compression straps sit – this pack is considerably heavier than other 60-liter bags. For notably less weight and the same price (or less), you could get the Gregory Paragon 58/Maven 58 or Granite Gear Crown3 from our main list.
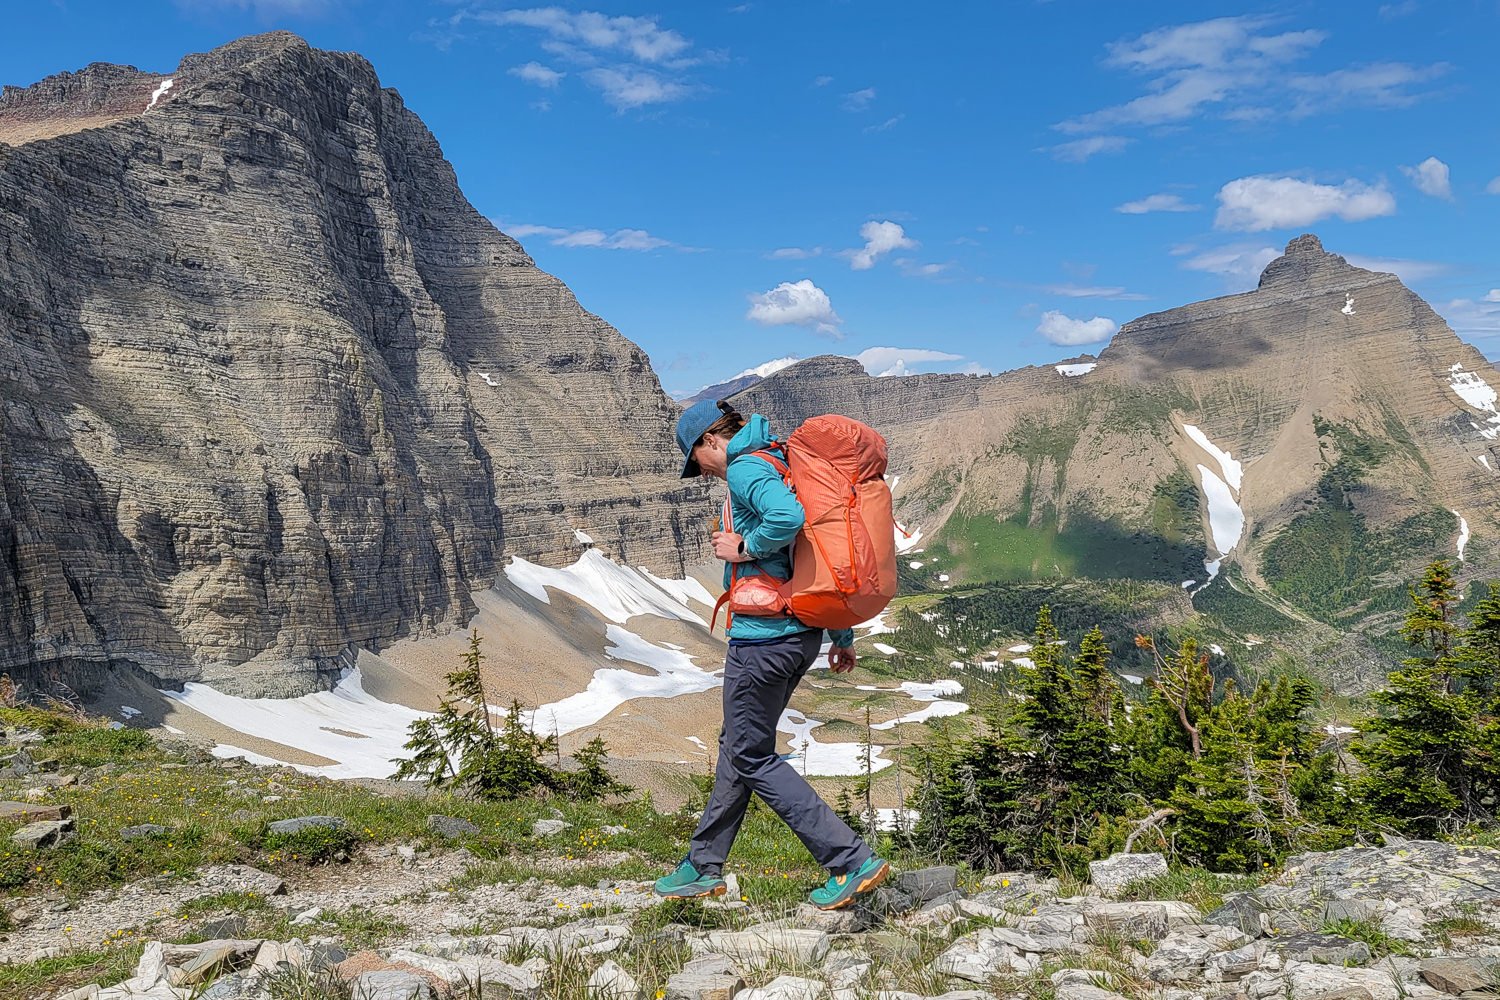
Why trust us?
We understand how tough it is to find trustworthy gear advice, and that’s one of the main reasons we built CleverHiker. We live for outdoor adventure, and we take these guides very seriously.
- Our recommendations are completely independent and based on hands-on experience.
- We test outdoor gear for a living – we’ve logged over 20,000 trail miles and 1,000 nights in the wilderness.
- Our team has thru-hiked some of the most iconic long trails, including the Continental Divide Trail, Pacific Crest Trail, Appalachian Trail, Colorado Trail, Long Trail, Oregon Coast Trail, Arizona Trail, Pinhoti Trail, Superior Hiking Trail, as well as extensive peak bagging, and international treks.
- We field test every product we recommend, which is sadly not the norm.
- We travel to industry trade shows to stay up-to-date on product innovations.
- We continuously update our guides throughout the year and when new products launch.
- We treat recommendations to our readers as if they were for our family and friends.
- We’re lifelong learners and we’re always open to feedback. If you think we’ve missed a worthy product or got something wrong, we’d love to know about it.
Need More Backpacking Equipment Advice?

10 Best Backpacking Stoves of 2024

10 Best Backpacking Tents of 2024

10 Best Backpacking Sleeping Bags of 2024

10 Best Backpacking Sleeping Pads of 2024

10 Best Ultralight Tents of 2024

10 Best Backpacking & Camping Hammocks of 2024

10 Best Fanny Packs for Hiking of 2024

10 Best Hiking Daypacks of 2024

10 Best Duffel Bags of 2024

10 Best Travel Backpacks of 2024

10 Best Backpacking Quilts of 2024

10 Best Backpacking Chairs of 2024
Get the best content from cleverhiker & around the backpacking world.
Social media is great, but our bi-weekly newsletter is a much better way to stay in the know.
Sign up to get our curated emails with the best content from CleverHiker and around the backpacking world. You’ll be turned on to new videos, trip reports, gear reviews, inspiring outdoor stories and much more. So get in the mix!
No products in the basket.

The best things to do and places to visit in Moscow, Russia
Updated On 14th October, 2021
While Moscow isn’t always at the top of everyone’s Europe bucket list , it’s certainly one of the best places to visit in Europe if you’re looking for a more alternative adventure! In this blog post I plan on sharing some of the free things to do in Moscow, as well as the best places to visit in Moscow, so that you can enjoy some of the best things to do in Russia!
Moscow, the capital of Russia, sits in the European part of the country. It’s an incredibly beautiful city, which I personally found to be more beautiful than Saint Petersburg (which is often people’s preference). The capital is certainly a lot busier, and less laid back than Saint Petersburg , but it’s a much more colourful and vibrant city, full of stunning and unique architecture.
Visiting famous landmarks such as The Kremlin and St Basil’s Cathedral, enjoying some of the green space in Gorky Park, watching a ballet in the Bolshoi Theatre… these are just a few reasons that you should visit Moscow! On top of that, because of visa restrictions (we’ll get onto that later), it’s also one of the most unique destinations in Europe.
There is a common misconception that Moscow is a dangerous city, but now that I’ve visited, I don’t believe this to be true. I would say the same rules apply here as to other large cities: avoid walking in dark areas alone at night, keep an eye on your belongings on public transport, and be streetwise. There’s no reason to avoid visiting this energetic city and miss out on these amazing things to do in Moscow!
It would take months if you wanted to truly explore Moscow because it’s a huge city, but I’m going to share some of my favourite things to do in Moscow and places to visit in Moscow so that you can prepare for your upcoming adventure! Even if you’re only there for a few days, you should be able to fit in these highlights from my trip.
Other blog posts you might be interested in...
- The best things to do in St Petersburg
- A 2-week Norway road trip
- A complete guide to Helsinki
- A complete guide to Tallinn
- Europe: the ultimate travel guide
- The best capital cities to visit in Europe
- The best things to do in Europe: the ultimate Europe bucket list
Where is Moscow?
If you’re wondering ‘Where is Moscow, Russia?’ then you’ve come to the right place! Moscow in in west Russia, the European part, and it’s the capital city.
How do you get to Moscow?
Getting a visa for moscow:.
To get into Russia, you need to get a visa. The processing time is approximately 20 days, and you’ll need to have your fingerprints taken at a visa centre in London , Edinburgh or Manchester. You can find out more about getting a visa for Russia here.
Getting to Moscow:
Once you’ve got your visa, the easiest way to get to Moscow from the UK is by flying. Direct flights between London and Moscow take just under four hours, and with an airport layover you’re looking at a 6-7 hour trip. You can also fly in from many other major European and international cities.
Top tip: Check out flights to and from Copenhagen on Skyscanner here.
Check out how to pack a weekend away in a carry-on suitcase here.
16 best places to visit in Moscow...
1. st basil’s cathedral.
The most iconic building in Russia and one of the most iconic buildings in the world. St Basil’s Cathedral is one of the best places to visit in Moscow, if not the best!
St Basil’s is situated on Red Square, where you’ll also find many other popular places to visit in Moscow. In my opinion this still stands out against them all. There’s something about the multi coloured domes against the Moscow skyline that I found quite spectacular.
Although I’d already been in Russia for several days, it wasn’t until I was at this amazing piece of architecture that I really felt I was in Russia.
The cathedral was built by order of Ivan the Terrible, and apparently after the architect completed it, Ivan blinded him so that he could never build anything more beautiful. Whether or not this story is true, it certainly adds a bittersweet feeling as you stand admiring the beauty of St Basil’s Cathedral.
Inside is a museum displaying many historic items once used at the cathedral, which costs 700 rubles to enter. In my opinion it’s worth the entry fee, as simply seeing the ornate interior walls is a spectacle in itself.

2. The Kremlin
This historic fortress that sits on Red Square is probably the largest landmark and one of the most popular places to visit in Moscow. It’s the official residence of the President, although he doesn’t actually live there. It’s been rebuilt many times since it was first constructed in 1147 out of wood, before Ivan III the Great ordered it to be made from stone, which is the Kremlin you’ll recognise today.

This place is huge, and there’s quite a lot to see. The first problem I had was finding where the entrance was. Even though I had a pre-booked ticket, I was then told I still had to visit the ticket office to exchange it for another ticket. I also needed my passport, so make sure you have yours if you plan to visit the Kremlin. After a lengthy queue I finally had a ticket I could use to enter the Kremlin, and had to go through security. The security here is thorough, so make sure you don’t take too much in with you. I had my pockets full, and it was a nightmare emptying them and explaining each item, before I was finally allowed in. Once inside you can pay for extra tickets to visit the various museums, however there’s also quite a lot to see simply on the grounds if you don’t want to spend too much.
See more tips for travelling on a budget here.
There’s so much to see here, including The Assumption Cathedral, Ivan the Great Bell Tower Complex, the Grand Kremlin Palace, the Armoury Chamber and Diamond Fund. There is also the Tsar Cannon (a huge artillery cannon), and the Tsar Bell. The Tsar Bell is the largest bell in the world. An incident with a fire and water being poured over the bell caused it to crack and for a slab to break off from it, which can now be seen propped up next to it.

As you walk around the grounds you’ll hear the sound of whistles. The guards patrolling the area will blow a whistle at anyone walking where they shouldn’t. Even if it’s just on the grass, or towards more restricted areas. This can sometimes be funny to watch, as often the tourists will be in a world of their own whilst a guard is blowing a whistle at them. Sometimes a guard will be stood face to face with a tourist angrily blowing their whistle before the tourist realises they need to get back onto the main path.
This is perhaps one of the more unusual places to visit in Moscow! Gum is a huge department store situated on Red Square. It’s an interesting department store to walk around, with several levels, although the shops inside are certainly quite pricey. It’s a beautiful building when it’s lit up at night, and it seems to fit in nicely amongst the other famous sights on Red Square. Even if you don’t plan to buy anything here, one of the best things to do in Moscow is to take a quick look inside, although bear in mind there are usually security checks before entering.
4. State Historical Museum
The large crimson building on Red Square is now the State Historical Museum. It was originally the first pharmacy in Russia, and later a University before finally becoming the museum it is today.
Unfortunately I didn’t go inside as my time was limited and there was so much else I wanted to see, but if you have the time I think it would be one of the best things to do in Moscow. There are items dating back to the 6th century, and maybe even further. There’s also a library inside storing many ancient manuscripts and the largest coin collection in Russia.

5. Bolshoi Theatre
Bolshoi means big in Russian, so it roughly translates to large theatre. The Bolshoi Theatre is one of the foremost ballet companies in the world. The exterior of the building is an impressive sight, one of the most beautiful places to visit in Moscow, and it’s certainly worth admiring from the outside. There are guided tours of the interior, but if you really want to experience the theatre, one of the best things to do in Moscow is to watch a ballet here.
I was torn between booking a seat, but the ballets were very expensive. I’d have liked to have seen “Swan Lake”, (as at least I may have recognised some of the music). Unfortunately there were no performances on the days I was in Moscow, so I decided to pass. But if I return to Russia, then watching a ballet will be on my list of things to do.

6. Sparrow Hills
If you want a good view of the city, then Sparrow Hills is one of the best places to visit in Moscow. It’s a bit of a trek outside of the centre, but if you have the time then it offers an escape from the hustle and bustle of the busy city. There’s a viewing platform here which gives you fantastic panoramic views of Moscow.
Nearby you’ll see the magnificent Moscow State University building, which is one of the seven sisters of Moscow.
7. Seven Sisters
Whilst in Moscow, you’ll no doubt notice these magnificent soviet skyscrapers dotted around the city. At the time of construction they were the tallest buildings in Europe, Moscow State University being so until 1997. There are, as the name suggests, seven in total, which are: Hotel Ukraina, Kotelnicheskaya Embankment Apartments, the Kudrinskaya Square Building, the Hilton Moscow Leningradskaya Hotel, the Ministry of Foreign Affairs, Moscow State University, and the Red Gates Administrative Building.
If you visit Sparrow Hills, then you’ll come across Moscow State University, but I’m certain as you explore the city, you’ll see more of these giants against the Moscow skyline. One of the best things to do in Moscow is to see if you can locate all seven as you wander round the city!

8. Nikolskaya Street
The start of this street is found by Red Square. It’s one of the most prominent pedestrianised streets in Moscow, filled with shops, restaurants and bars, so one of the best places to visit in Moscow if you’re looking for a bite to eat or some souvenirs!
What makes this street extra special are the thousands of bright lights in the sky above. After dark it looks simply magical with the many colourful lights overhead as you walk beneath them. One of the best things to do in Moscow is to visit Nikolskaya Street after dark and see them for yourself. It almost feels like Christmas in London!
There is another street nearby which also features similar lights, “Kuznetskiy Most”, which is also quite beautiful, but I thought “Nikolskaya Street” was ever slightly more impressive.

9. Izmailovo Kremlin and Izmaylovskiy Bazar
Did you know that The Kremlin in Red Square is not the only Kremlin in Moscow? Kremlin actually means a type of fortress, so there are many in Russia.
The Izmailovo Kremlin is a fairly new addition to the city, having been built in 2007 as a cultural centre. With its multitude of colours and historic style, it has a real fairytale feel to it. There are several small museums here for you to explore, devoted to subjects such as Russian folk art, vodka and bread (yes, bread). Visiting these is definitely one of the more unique things to do in Moscow!
It’s a little way out of the centre, but it’s an interesting place to visit in Moscow to see something a little bit different, and it won’t be as overcrowded with tourists.
Next to the Izmailovo Kremlin is the best market in Moscow for souvenirs. You’ll find good and poor quality items, but you’ll certainly pick up a bargain if you take your time and haggle for a good price. Many of the items here you’ll get for half the price you would in souvenir shops in the city centre. It’s here that I picked up several Matryoshka dolls for a very good price. I think I’d have paid more than double, or possibly even triple if I’d have bought them elsewhere.

10. Izmailovsky Park
Not too far from Izmailovo Kremlin you’ll find this huge park, one of the prettiest places to visit in Moscow. It’s easy to get lost here, so try to make sure you keep track of where you entered if you plan to go back the same way. There’s a lot to see in this park, a round pond, ferris wheel, playgrounds and sports grounds, shooting galleries, cinemas and a skate park.
There are often festivals, concerts and exhibitions at the park, on top of firework displays and dance parties.
The main reason I chose to visit the park was to find the painted trees. A local artist “Yevgenia Khlynina” has been painting on trees in this park, and one of the best things to do in Moscow is to explore the park looking for them. One of the most famous pieces of hers is the “Hedgehog in the Fog” from a famous soviet cartoon.

11. Gorky Park
The most famous park in Moscow is named after the writer “Maxim Gorky”. Although it’s likely you’ve heard it mentioned in the song “Wind of Change” by “The Scorpions”.
There’s lots to do and see in the park with sports facilities and exhibitions. During the summer months this is one of the best places to visit if you’re looking for things to do in Moscow; there are often open air concerts and an open air cinema. There are many statues and sculptures in the park, including a small sculpture park area which features many interesting pieces.
One piece of advice: don’t visit Gorky Park or any other parks on 2nd August if you’re in Russia. 2nd August is Paratrooper day, which usually encourages a lot of drinking in the park, which is not always very welcoming.

12. Arbat Street
One of the oldest and busiest streets in Moscow, and the most famous pedestrian street in the city. Arbat is one of the most popular places to visit in Moscow. There are several shops including many dedicated to souvenirs, but although these will have a good range of goods, they will be quite expensive . You may see street performers and buskers, and there are often poets reciting famous works, if not their own works.
It’s within walking distance from the Kremlin, which should only take around 10 minutes.
There are actually two streets with this name, Old Arbat Street and New Arbat Street. Old Arbat Street is where you’ll find the pedestrianised area. New Arbat Street is a separate street which runs alongside a main road, filled with many bars and restaurants.

13. Metro station art
The best way to get around Moscow is by using the metro, and the metro is a tourist attraction in itself.
Although I obviously didn’t visit every metro station, I believe that every single station is unique in its own beautiful way. Many of the stations I passed through were impressive, quirky or simply jaw dropping. You’ll more than likely pass through many of them on the way to other sights, but I’d recommend the following: Komsomolskaya, Novoslobodskaya, Mayakovskaya, Teatralnaya, Arbatskaya, Prospekt Mira and Ploschad Revolutsii (be sure to pet the dog statue for good luck).
There are of course many others for you to explore, but these are the ones I considered to be some of the most impressive places to visit in Moscow (even if they’re only metro stations!).

VDNKh is an exhibition centre with many monuments and museums. Now that it’s combined with the Botanical Garden and Ostankino Park, one of the best things to do in Moscow is to spend the day at this recreational centre enjoying a mix of nature and culture. The most popular museum in the complex which you shouldn’t miss on your trip to Moscow is the Museum of Cosmonautics.
15. Lenin's Mausoleum
Despite requesting to be buried with his mum in St Petersburg, it is at the foot of the Kremlin on Red Sqaure that you will find Lenin’s Mausoleum, where Vladimir Ilych Lenin has been frozen in time since 1924. It’s only open for a few hours a few times per week. Photography is not allowed, and you should line up on the western corner of the square (near Alexander Garden) to wait you turn to see the embalmed body.
16. Novodevichy Convent
Novodevichy Convent, on the UNESCO World Heritage List, is one of the most beautiful places to visit in Moscow. Located south west of the centre you’ll find this stunning monastery. Inside you’ll find a cathedral and several churches, surrounded by high walls and 12 towers.
Where are your favourite places to visit in Moscow?
What about the best things to do in Moscow? Anything you’d add?
Love as always and happy adventuring…

I’m Spike! Solo traveller, cultural explorer and world adventurer! With 57 countries under my belt, I live and breathe travel. I never plan to stop exploring new destinations and experiencing new cultures.
Did you find this post helpful? I’d love you to share it for me.
Pin and save this blog post for later…

IT’S LOVELY TO MEET YOU
I’M MOLLIE AND I STARTED THIS BLOG BACK IN 2013 WHEN I HEADED OUT ON MY FIRST BACKPACKING ADVENTURE.
I’D LOVE TO SHARE THE JOURNEY WITH YOU, WE’VE GROWN A LOT SINCE THEN!

Shop the google map legends
Search by adventure type, active travel, backpacking, budget travel, love and relationships, once in a lifetime, packing tips, solo travel, weekend getaways, where's mollie newsletter, travel shop, search by destination, other posts that you may like....

The 15 best London markets that you should visit

Canyoneering in Badian, Cebu, Philippines

Brand new cover is LIVE & New Zealand footage ♡

The best things to do on the central NSW Coast, Australia

How to save money on your Swiss and French alps roadtrip

15 New Year Journal Prompts for 2025

A complete guide to budgeting for backpacking Australia
")
The best things to do in Wales

10 ways to save money on your city break to Copenhagen
Privacy overview.

Travel Itinerary For One Week in Moscow: The Best of Moscow!
I just got back from one week in Moscow. And, as you might have already guessed, it was a mind-boggling experience. It was not my first trip to the Russian capital. But I hardly ever got enough time to explore this sprawling city. Visiting places for business rarely leaves enough time for sightseeing. I think that if you’ve got one week in Russia, you can also consider splitting your time between its largest cities (i.e. Saint Petersburg ) to get the most out of your trip. Seven days will let you see the majority of the main sights and go beyond just scratching the surface. In this post, I’m going to share with you my idea of the perfect travel itinerary for one week in Moscow.
Moscow is perhaps both the business and cultural hub of Russia. There is a lot more to see here than just the Kremlin and Saint Basil’s Cathedral. Centuries-old churches with onion-shaped domes dotted around the city are in stark contrast with newly completed impressive skyscrapers of Moscow City dominating the skyline. I spent a lot of time thinking about my Moscow itinerary before I left. And this city lived up to all of my expectations.

Travel Itinerary For One Week in Moscow
Day 1 – red square and the kremlin.
Metro Station: Okhotny Ryad on Red Line.
No trip to Moscow would be complete without seeing its main attraction. The Red Square is just a stone’s throw away from several metro stations. It is home to some of the most impressive architectural masterpieces in the city. The first thing you’ll probably notice after entering it and passing vendors selling weird fur hats is the fairytale-like looking Saint Basil’s Cathedral. It was built to commemorate one of the major victories of Ivan the Terrible. I once spent 20 minutes gazing at it, trying to find the perfect angle to snap it. It was easier said than done because of the hordes of locals and tourists.
As you continue strolling around Red Square, there’s no way you can miss Gum. It was widely known as the main department store during the Soviet Era. Now this large (yet historic) shopping mall is filled with expensive boutiques, pricey eateries, etc. During my trip to Moscow, I was on a tight budget. So I only took a retro-style stroll in Gum to get a rare glimpse of a place where Soviet leaders used to grocery shop and buy their stuff. In case you want some modern shopping experience, head to the Okhotny Ryad Shopping Center with stores like New Yorker, Zara, and Adidas.

Read Next: Things To Do on Socotra
To continue this Moscow itinerary, next you may want to go inside the Kremlin walls. This is the center of Russian political power and the president’s official residence. If you’re planning to pay Kremlin a visit do your best to visit Ivan the Great Bell Tower as well. Go there as early as possible to avoid crowds and get an incredible bird’s-eye view. There are a couple of museums that are available during designated visiting hours. Make sure to book your ticket online and avoid lines.
Day 2 – Cathedral of Christ the Saviour, the Tretyakov Gallery, and the Arbat Street
Metro Station: Kropotkinskaya on Red Line
As soon as you start creating a Moscow itinerary for your second day, you’ll discover that there are plenty of metro stations that are much closer to certain sites. Depending on your route, take a closer look at the metro map to pick the closest.
The white marble walls of Christ the Saviour Cathedral are awe-inspiring. As you approach this tallest Orthodox Christian church, you may notice the bronze sculptures, magnificent arches, and cupolas that were created to commemorate Russia’s victory against Napoleon.

How to Get a Decent Haircut in a Foreign Country
Unfortunately, the current Cathedral is a replica, since original was blown to bits in 1931 by the Soviet government. The new cathedral basically follows the original design, but they have added some new elements such as marble high reliefs.
Home to some precious collection of artworks, in Tretyakov Gallery you can find more than 150,000 of works spanning centuries of artistic endeavor. Originally a privately owned gallery, it now has become one of the largest museums in Russia. The Gallery is often considered essential to visit. But I have encountered a lot of locals who have never been there.
Famous for its souvenirs, musicians, and theaters, Arbat street is among the few in Moscow that were turned into pedestrian zones. Arbat street is usually very busy with tourists and locals alike. My local friend once called it the oldest street in Moscow dating back to 1493. It is a kilometer long walking street filled with fancy gift shops, small cozy restaurants, lots of cute cafes, and street artists. It is closed to any vehicular traffic, so you can easily stroll it with kids.
Day 3 – Moscow River Boat Ride, Poklonnaya Hill Victory Park, the Moscow City
Metro Station: Kievskaya and Park Pobedy on Dark Blue Line / Vystavochnaya on Light Blue Line
Voyaging along the Moscow River is definitely one of the best ways to catch a glimpse of the city and see the attractions from a bit different perspective. Depending on your Moscow itinerary, travel budget and the time of the year, there are various types of boats available. In the summer there is no shortage of boats, and you’ll be spoiled for choice.

Travel Itinerary for One Week in Beijing
If you find yourself in Moscow during the winter months, I’d recommend going with Radisson boat cruise. These are often more expensive (yet comfy). They offer refreshments like tea, coffee, hot chocolate, and, of course, alcoholic drinks. Prices may vary but mostly depend on your food and drink selection. Find their main pier near the opulent Ukraine hotel . The hotel is one of the “Seven Sisters”, so if you’re into the charm of Stalinist architecture don’t miss a chance to stay there.
The area near Poklonnaya Hill has the closest relation to the country’s recent past. The memorial complex was completed in the mid-1990s to commemorate the Victory and WW2 casualties. Also known as the Great Patriotic War Museum, activities here include indoor attractions while the grounds around host an open-air museum with old tanks and other vehicles used on the battlefield.
How I Planned My Trip to Vietnam
The hallmark of the memorial complex and the first thing you see as you exit metro is the statue of Nike mounted to its column. This is a very impressive Obelisk with a statue of Saint George slaying the dragon at its base.
Maybe not as impressive as Shanghai’s Oriental Pearl Tower , the skyscrapers of the Moscow City (otherwise known as Moscow International Business Center) are so drastically different from dull Soviet architecture. With 239 meters and 60 floors, the Empire Tower is the seventh highest building in the business district.
The observation deck occupies 56 floor from where you have some panoramic views of the city. I loved the view in the direction of Moscow State University and Luzhniki stadium as well to the other side with residential quarters. The entrance fee is pricey, but if you’re want to get a bird’s eye view, the skyscraper is one of the best places for doing just that.
Day 4 – VDNKh, Worker and Collective Farm Woman Monument, The Ostankino TV Tower
Metro Station: VDNKh on Orange Line
VDNKh is one of my favorite attractions in Moscow. The weird abbreviation actually stands for Russian vystavka dostizheniy narodnogo khozyaystva (Exhibition of Achievements of the National Economy). With more than 200 buildings and 30 pavilions on the grounds, VDNKh serves as an open-air museum. You can easily spend a full day here since the park occupies a very large area.

Places to Visit in Barcelona That Aren’t Beaches
First, there are pavilions that used to showcase different cultures the USSR was made of. Additionally, there is a number of shopping pavilions, as well as Moskvarium (an Oceanarium) that features a variety of marine species. VDNKh is a popular venue for events and fairs. There is always something going on, so I’d recommend checking their website if you want to see some particular exhibition.
A stone’s throw away from VDNKh there is a very distinctive 25-meters high monument. Originally built in 1937 for the world fair in Paris, the hulking figures of men and women holding a hammer and a sickle represent the Soviet idea of united workers and farmers. It doesn’t take much time to see the monument, but visiting it gives some idea of the Soviet Union’s grandiose aspirations.
I have a thing for tall buildings. So to continue my travel itinerary for one week in Moscow I decided to climb the fourth highest TV tower in the world. This iconic 540m tower is a fixture of the skyline. You can see it virtually from everywhere in Moscow, and this is where you can get the best panoramic views (yep, even better than Empire skyscraper).

Parts of the floor are made of tempered glass, so it can be quite scary to exit the elevator. But trust me, as you start observing buildings and cars below, you won’t want to leave. There is only a limited number of tickets per day, so you may want to book online. Insider tip: the first tour is cheaper, you can save up to $10 if go there early.
Day 5 – A Tour To Moscow Manor Houses
Metro Station: Kolomenskoye, Tsaritsyno on Dark Green Line / Kuskovo on Purple Line
I love visiting the manor houses and palaces in Moscow. These opulent buildings were generally built to house Russian aristocratic families and monarchs. Houses tend to be rather grand affairs with impressive architecture. And, depending on the whims of the owners, some form of a landscaped garden.
During the early part of the 20th century though, many of Russia’s aristocratic families (including the family of the last emperor) ended up being killed or moving abroad . Their manor houses were nationalized. Some time later (after the fall of the USSR) these were open to the public. It means that today a great many of Moscow’s finest manor houses and palaces are open for touring.

20 Travel Tips I’ve Learned From Travelling The World
There are 20 manor houses scattered throughout the city and more than 25 in the area around. But not all of them easily accessible and exploring them often takes a lot of time. I’d recommend focusing on three most popular estates in Moscow that are some 30-minute metro ride away from Kremlin.
Sandwiched between the Moscow River and the Andropov Avenue, Kolomenskoye is a UNESCO site that became a public park in the 1920’s. Once a former royal estate, now it is one of the most tranquil parks in the city with gorgeous views. The Ascension Church, The White Column, and the grounds are a truly grand place to visit.
You could easily spend a full day here, exploring a traditional Russian village (that is, in fact, a market), picnicking by the river, enjoying the Eastern Orthodox church architecture, hiking the grounds as well as and wandering the park and gardens with wildflower meadows, apple orchards, and birch and maple groves. The estate museum showcases Russian nature at its finest year-round.
12 Stunning National Parks and Regional Parks In France
If my travel itinerary for one week in Moscow was a family tree, Tsaritsyno Park would probably be the crazy uncle that no-one talks about. It’s a large park in the south of the city of mind-boggling proportions, unbelievable in so many ways, and yet most travelers have never heard of it.
The palace was supposed to be a summer home for Empress Catherine the Great. But since the construction didn’t meet with her approval the palace was abandoned. Since the early 1990’s the palace, the pond, and the grounds have been undergoing renovations. The entire complex is now looking brighter and more elaborately decorated than at possibly any other time during its history. Like most parks in Moscow, you can visit Tsaritsyno free of charge, but there is a small fee if you want to visit the palace.

How To Stop Procrastinating When Trip Planning
Last, but by no means least on my Moscow itinerary is Kuskovo Park . This is definitely an off-the-beaten-path place. While it is not easily accessible, you will be rewarded with a lack of crowds. This 18th-century summer country house of the Sheremetev family was one of the first summer country estates of the Russian nobility. And when you visit you’ll quickly realize why locals love this park.
Like many other estates, Kuskovo has just been renovated. So there are lovely French formal garden, a grotto, and the Dutch house to explore. Make sure to plan your itinerary well because the estate is some way from a metro station.
Day 6 – Explore the Golden Ring
Creating the Moscow itinerary may keep you busy for days with the seemingly endless amount of things to do. Visiting the so-called Golden Ring is like stepping back in time. Golden Ring is a “theme route” devised by promotion-minded journalist and writer Yuri Bychkov.
Having started in Moscow the route will take you through a number of historical cities. It now includes Suzdal, Vladimir, Kostroma, Yaroslavl and Sergiev Posad. All these awe-inspiring towns have their own smaller kremlins and feature dramatic churches with onion-shaped domes, tranquil residential areas, and other architectural landmarks.
Two Weeks In Thailand: The Perfect 14-Day Itinerary
I only visited two out of eight cities included on the route. It is a no-brainer that Sergiev Posad is the nearest and the easiest city to see on a day trip from Moscow. That being said, you can explore its main attractions in just one day. Located some 70 km north-east of the Russian capital, this tiny and overlooked town is home to Trinity Lavra of St. Sergius, UNESCO Site.

You Will Also Like: 3-Day London Itinerary
Sergiev Posad is often described as being at the heart of Russian spiritual life. So it is uncommon to see the crowds of Russian pilgrims showing a deep reverence for their religion. If you’re traveling independently and using public transport, you can reach Sergiev Posad by bus (departs from VDNKh) or by suburban commuter train from Yaroslavskaya Railway Station (Bahnhof). It takes about one and a half hours to reach the town.
Trinity Lavra of St. Sergius is a great place to get a glimpse of filling and warming Russian lunch, specifically at the “ Gostevaya Izba ” restaurant. Try the duck breast, hearty potato and vegetables, and the awesome Napoleon cake.
Day 7 – Gorky Park, Izmailovo Kremlin, Patriarch’s Ponds
Metro Station: Park Kultury or Oktyabrskaya on Circle Line / Partizanskaya on Dark Blue Line / Pushkinskaya on Dark Green Line
Gorky Park is in the heart of Moscow. It offers many different types of outdoor activities, such as dancing, cycling, skateboarding, walking, jogging, and anything else you can do in a park. Named after Maxim Gorky, this sprawling and lovely park is where locals go on a picnic, relax and enjoy free yoga classes. It’s a popular place to bike around, and there is a Muzeon Art Park not far from here. A dynamic location with a younger vibe. There is also a pier, so you can take a cruise along the river too.

How to Save Money While Traveling in Europe
The Kremlin in Izmailovo is by no means like the one you can find near the Red Square. Originally built for decorative purposes, it now features the Vernissage flea market and a number of frequent fairs, exhibitions, and conferences. Every weekend, there’s a giant flea market in Izmailovo, where dozens of stalls sell Soviet propaganda crap, Russian nesting dolls, vinyl records, jewelry and just about any object you can imagine. Go early in the morning if you want to beat the crowds.
All the Bulgakov’s fans should pay a visit to Patriarch’s Ponds (yup, that is plural). With a lovely small city park and the only one (!) pond in the middle, the location is where the opening scene of Bulgakov’s novel Master and Margarita was set. The novel is centered around a visit by Devil to the atheistic Soviet Union is considered by many critics to be one of the best novels of the 20th century. I spent great two hours strolling the nearby streets and having lunch in the hipster cafe.
Conclusion and Recommendations
To conclude, Moscow is a safe city to visit. I have never had a problem with getting around and most locals are really friendly once they know you’re a foreigner. Moscow has undergone some serious reconstruction over the last few years. So you can expect some places to be completely different. I hope my one week Moscow itinerary was helpful! If you have less time, say 4 days or 5 days, I would cut out day 6 and day 7. You could save the Golden Ring for a separate trip entirely as there’s lots to see!
What are your thoughts on this one week Moscow itinerary? Are you excited about your first time in the city? Let me know in the comments below!
JOIN MY FREE WEEKLY NEWSLETTER!
Email Address *
YOU WILL ALSO LIKE

10 Dishes You Must Try When Going To Moscow

15 Fantastic and Easy Day Trips Close to Moscow

When Is the Best Time To Visit Russia
24 comments.

Ann Snook-Moreau
Moscow looks so beautiful and historic! Thanks for including public transit information for those of us who don’t like to rent cars.

MindTheTravel
Yup, that is me 🙂 Rarely rent + stick to the metro = Full wallet!

Mariella Blago
Looks like you had loads of fun! Well done. Also great value post for travel lovers.
Thanks, Mariella!

I have always wanted to go to Russia, especially Moscow. These sights look absolutely beautiful to see and there is so much history there!
Agree! Moscow is a thousand-year-old city and there is definitely something for everyone.

Tara Pittman
Those are amazing buildings. Looks like a place that would be amazing to visit.

Adriana Lopez
Never been to Moscow or Russia but my family has. Many great spots and a lot of culture. Your itinerary sounds fantastic and covers a lot despite it is only a short period of time.
What was their favourite thing about Russia?

Gladys Parker
I know very little about Moscow or Russia for the\at matter. I do know I would have to see the Red Square and all of its exquisite architectural masterpieces. Also the CATHEDRAL OF CHRIST THE SAVIOUR. Thanks for shedding some light on visiting Moscow.
Thanks for swinging by! The Red Square is a great starting point, but there way too many places and things to discover aside from it!

Ruthy @ Percolate Kitchen
You are making me so jealous!! I’ve always wanted to see Russia.

Moscow is in my bucket list, I don’t know when I can visit there, your post is really useful. As a culture rich place we need to spend at least week.

DANA GUTKOWSKI
Looks like you had a great trip! Thanks for all the great info! I’ve never been in to Russia, but this post makes me wanna go now!

Wow this is amazing! Moscow is on my bucket list – such an amazing place to visit I can imagine! I can’t wait to go there one day!

The building on the second picture looks familiar. I keep seeing that on TV.

Reesa Lewandowski
What beautiful moments! I always wish I had the personality to travel more like this!

Perfect itinerary for spending a week in Moscow! So many places to visit and it looks like you had a wonderful time. I would love to climb that tower. The views I am sure must have been amazing!
I was lucky enough to see the skyline of Moscow from this TV Tower and it is definitely mind-blowing.

Chelsea Pearl
Moscow is definitely up there on my travel bucket list. So much history and iconic architecture!
Thumbs up! 🙂

Blair Villanueva
OMG I dream to visit Moscow someday! Hope the visa processing would be okay (and become more affordable) so I could pursue my dream trip!
Yup, visa processing is the major downside! Agree! Time and the money consuming process…
Save my name, email, and website in this browser for the next time I comment.
- Privacy Overview
- Strictly Necessary Cookies
My website uses cookies so that I can provide you with the best user experience possible. Cookie information is stored in your browser and performs functions such as recognising you when you return to my website and helping me to understand which sections of Mind The Travel you find most interesting and useful.
You can adjust all of your cookie settings by navigating the tabs on the left hand side.
Strictly Necessary Cookie should be enabled at all times so that I can save your preferences for cookie settings.
If you disable this cookie, I will not be able to save your preferences. This means that every time you visit my website you will need to enable or disable cookies again.
How to spend a perfect weekend in Moscow
Feb 11, 2020 • 5 min read
Moscow enjoyed the status of capital for most of Russia’s history, except for a relatively brief period (about two hundred years), when the Tsar and the government relocated to St Petersburg . But the Bolsheviks moved the capital back to Moscow in 1918, and today it’s an extremely diverse city. It can easily take a couple of weeks to see all of its sights, but if you've only got a weekend to explore, here's how to have two perfect days in Moscow.

Start your weekend in Moscow by acquainting yourself with top-notch Russian cuisine at Grand Cafe Dr Zhivago . Located on the first floor of the historical hotel National and overlooking the Kremlin, it’s definitely one of the best breakfast spots in the city. Try millet porridge with crawfish, pearl barley porridge with oxtail or traditional cottage cheese with raisins and candied fruit.
Set aside at least half a day for Russian capital’s major attractions: the Red Square and the Kremlin . To reach the Kremlin, cross the street from Dr Zhivago and walk through the Alexander Garden to the main entrance at the Kutafya Tower . Check out all the cathedrals, including Archangel cathedral with all the tsars’ tombs and Uspensky cathedral with medieval icons. Pause to look at the famous Tsar Bell and climb Ivan the Great Bell Tower to enjoy some great views.

Exit and walk to the Red Square through the Alexander Garden, where, if lucky, you can see the change of guard. If you’re feeling hungry, stop by the food court at Okhotny Ryad shopping complex to pick up a snack.
The Red square is dominated by four buildings of equal historical importance: the Kremlin's most famous Spasskaya (Saviour) Tower , with a clock and fourteen bells that chime national anthem four times a day (6am, noon, 6pm, midnight), St Basil's Cathedral , Moscow's best-known symbol with its multi-colored domes, Lenin’s Mausoleum , the resting place of the leader of the 1917 October revolution, and GUM , Moscow's oldest department store, topped with a glass roof, designed by one of Russia's most celebrated architects, Vladimir Shukhov.
A guide to shopping in Moscow
Right behind the St Basil’s it is the relatively new Zaryadye Park , designed by Diller Scofidio + Renfro, famous for its work on the High Line in New York City. Zaryadye showcases flora from all the climate zones of Russia, which is the largest country in the world. The floating bridge at the edge of the park is one of the biggest selfie magnets in Moscow, providing spectacular views of the river and the city skyline as the background.
Another Zaryadye attraction is a glass pavilion that hosts restaurant Voskhod (Sunrise) – a perfect spot for your lunch or early dinner. Voskhod focuses on dishes from all fifteen former Soviet Union republics and its inside looks like a Soviet-made spaceship with great views of the Moscow river. Try Azeri home-made pasta or trout from Lake Sevan in Armenia.
After all that walking and exploring you need some quality downtime and what better way to spend it than relaxing for a couple of hours at the famous Sanduny traditional Russian hot bath. Make sure to get a massage with birch sticks!
You might still have time to go to Winzavod Center – a creative cluster with galleries housed at a former wine factory. Galleries like XL , pop/off/art and Ovcharenko always have something on, most likely a cutting-edge Russian contemporary art exhibition. Finish the evening hanging out at one of the best Moscow bars – try socialites’ paradise Noor Electro , co-joined with one of Moscow’s avant-garde theatres or Powerhouse Moscow , located in a 19th-century mansion, which is famous for live indie and jazz band performances. Both serve great food, too.

Power up for a busy day ahead at one of Moscow’s trendiest coffee/breakfast spots, Nude . Located in the upscale, well-heeled neighborhood of Patriarch’s Ponds, Nude offers a wide range of breakfast dishes, including scrambled eggs, toast, porridge and banana bread. Book ahead as it might be busy on a weekend morning.
After checking out the Patriarch's Ponds, which features prominently in Mikhail Bulgakov’s perennial novel The Master and Margarita , devote the rest of the morning and early afternoon to exploring Moscow’s best museums. Depending on your tastes, pick one of the following: Tretyakov Gallery for traditional Russian art, from medieval icons to the early 20th century; New Tretyakov for 20th century and contemporary art as well as great temporary exhibitions; Pushkin Museum for one of the greatest collections of Impressionist and post-Impressionist art in the world; and the Garage Museum for some eye-opening modern-art exhibitions.

Whichever museum or gallery you choose, be sure to go to LavkaLavka for lunch, certainly one of the best places to try new Russian cuisine, which is a contemporary reading of centuries-old recipes. It’s one of the few places to try polugar , which is, allegedly, what Russians called vodka in the 19th century.
When you talk about Russian culture, literary giants usually pop into mind: the likes of Leo Tolstoy, Fyodor Dostoevsky and Anton Chekhov. There are plenty of literary museums in Moscow, but if you had to pick one, visit Tolstoy Estate Museum , located just opposite the headquarters of Yandex, the Russian equivalent of Google. Every little detail has been restored just the way it looked when Tolstoy lived here in the 1880s–90s.
Leave some time for exploring the Moscow Metro : every station is an architectural masterpiece in its own right. Our favorites include Mayakovskaya, Komsomolskaya and Kievskaya. Later, unwind at one of dozens of Moscow’s craft beer places . Try Jawsspot , named after one of the leading breweries in Russia, Jaws from the Urals region, which also serves decent pizza and salads.
You might also like:
Why food markets in Moscow are having a moment Russia for first-timers: dos and don’ts Russia's best drinks and where to try them
Explore related stories

Sustainable Travel
Jul 18, 2023 • 5 min read
How one writer followed the Silk Road from Khiva to Bukhara to Samarkand in Uzbekistan – all by train.
Jul 3, 2023 • 3 min read

Dec 29, 2021 • 7 min read

Oct 24, 2021 • 4 min read

Sep 24, 2021 • 6 min read

Sep 20, 2021 • 5 min read

Mar 16, 2021 • 9 min read

Mar 1, 2021 • 9 min read

Oct 12, 2020 • 6 min read

Jun 18, 2020 • 5 min read
IMAGES
VIDEO
COMMENTS
Rocky Mountains. Pawnee And Buchanan Pass Loop: The premier backpacking trip in the Indian Peaks Wilderness. Devils Thumb + Kings Lake Loop: The best single night backpacking trip in the Indian Peaks Wilderness. Fancy Pass, Missouri Lakes Loop: Hike this popular loop in the Holy Cross Wilderness. Four Pass Loop: Colorado's most coveted ...
From Southeastern classics like Roan Mountain, to New England treasures like a hut-to-hut trip in the Presidentials, to epic and challenging trails in the Tetons, here are some of America's greatest backpacking trips. 1. Pictured Rocks National Lakeshore. 19 miles, 1-2 days, Easy. The view of Grand Portal Point from a distance (along the North ...
4. Mount Sterling Loop Trail (Via Low Gap)—Great Smoky Mountains National Park, Tennessee Length: 28.5 miles Elevation Change: 8,110 feet Days: 4-5 Trailheads: Low Gap Trailhead, Big Creek Trailhead Situated in the country's most visited national park, the Mount Sterling Loop Trail offers an intermediate-level backpacking trip to the peak of one of the tallest points in the park.
Distance: 221 miles. Difficulty: 4. The John Muir Trail's 211 miles from Yosemite Valley to the highest summit in the Lower 48, 14,505-foot Mount Whitney in Sequoia National Park, has often been described as "America's Most Beautiful Trail"—and hyperbolic as it sounds, it's hard to argue against that lofty claim.
Photo: Shutterstock. Why you should go: get all the glory of hiking the Appalachian Trail without having to walk the full 2,180 miles. Location: 100-Mile Wilderness, Maine Distance: 93 miles (weirdly not 100) Elevation gain: 15,000 feet Type: point-to-point Recommended number of nights: 7 to 10 The Appalachian Trail is hiked by hundreds of thru-hikers every year.
Days required: 3 to 5 days. Permit required: Yes. Childs' favorite Colorado weekend backpacking adventure is the Four Pass Loop, a traverse through the towering pines and peak-reflecting lakes ...
The Smokies | Tennessee & North Carolina. Backpacking through the Smokies is truly otherworldly. Photo by Kirk Thornton. For Appalachian Trail thru-hikers, the 72 miles of A.T. within the Smokies represents one of the most revered sections of the entire 2,200 mile route. For weekend (and weeklong) warriors, this stretch represents one of the ...
Difficulty: difficult. Hit this 32.4-mile out-and-back in the Maze District for an ambitious, insiders-only trek through hidden grottos and redrock pinnacles on a, well, maze of faint trails. Start from the Golden Stairs trailhead (4WD only), and hike along the Standing Rock jeep road to Mother and Child Pinnacles.
Tahoe Rim Trail, California and Nevada. (Courtesy Tahoe Rim Trail Assoc.) At 165 miles, the Tahoe Rim Trail is a gorgeous long-distance route around the ridgeline of the Lake Tahoe Basin that most ...
Weekend trip: Porcupine Mountains Wilderness Loop, Michigan (21.2 miles) There's a lot to love about hiking the Porkies: the views of Lake Superior, the picturesque inland lakes and streams, and one of the finest old-growth hardwood forests in the country. The Porcupine Mountains are some of the oldest in the world at 2 billion years old ...
Coyote Gulch is one of " The 5 Southwest Backpacking Trips You Should Do First .". Mark Fenton on the Tonto Trail above the Colorado River in the Grand Canyon. Click on the photo to get my e-guide to this trip.
2. Shining Rock Wilderness, North Carolina. Mileage: 22 miles roundtrip | Length: 4 days | Elevation Gain/Loss: 2,300 feet with backpacking packs (plus 1,700 ft with a day pack) The Shining Rock Wilderness in the Blue Ridge Mountains of North Carolina is one of the most spectacular East Coast backpacking destinations.
Clothes - for a weekend alpine trip I will typically pack a fleece jacket, down jacket, and rain jacket for outerwear. Then always my wool base layers, one warm pair of socks for sleeping, and a pair of leggings or hiking pants (I love the fit of these sustai nable ones ). Don't be afraid to rewear clothes, socks, sports bras, etc!
Length: ~40 miles; Days needed: 3-5 days (most people complete the loop in 4 days); Location: Mount Hood Area, OR; Best time to hike: End of July to late September; Difficulty: Strenuous; The Timberline Trail around Mt. Hood is one of Oregon's most iconic and scenic trails. This 40-mile loop is a fantastic way to experience the immense size and beauty of Mt. Hood.
EPIC MOSCOW Itinerary! (2024) Moscow is the heart of Mother Russia. Just the mention of this city conjures images of colorful bulbous pointed domes, crisp temperatures, and a uniquely original spirit! Moscow has an incredibly turbulent history, a seemingly resilient culture, and a unique enchantment that pulls countless tourists to the city ...
7.96-mile out-and-back with approximately 1496 feet of elevation gain. This adventure is located in Tahoe, California and features forest, lakes, the Old Glen Alpine Springs Historical Site, and breathtaking mountain views. 27. Backpack to Gilmore Lake in Desolation Wilderness.
For a weekend backpacking trip or thru-hike, consider leveling up to 30-50 liters. What is the standard backpacking frame type? Most backpacking backpacks use an internal frame system.
Mileage: 16.4 miles, one-way (2-4 days) Elevation Gain: 3000 feet. A hiker travels through a section of old burn. Photo by trip reporter mikemahanay. This section of the Pacific Crest Trail has a reputation for not being very scenic because it's flat and clear-cut, but that is simply not the case.
Best backpacking backpack for carrying 35+ lb.: Osprey Atmos AG 65 - Men's / Aura AG 65 - Women's ($340) Jump to Review. Lightweight backpack with the best ventilation: Osprey Exos 58 - Men's / Eja 58 - Women's ($260) Jump to Review. Most comfortable ultralight backpack: Gossamer Gear Mariposa 60 ($285) Jump to Review.
1. St Basil's Cathedral. The most iconic building in Russia and one of the most iconic buildings in the world. St Basil's Cathedral is one of the best places to visit in Moscow, if not the best! St Basil's is situated on Red Square, where you'll also find many other popular places to visit in Moscow.
Day 6 - Explore the Golden Ring. Creating the Moscow itinerary may keep you busy for days with the seemingly endless amount of things to do. Visiting the so-called Golden Ring is like stepping back in time. Golden Ring is a "theme route" devised by promotion-minded journalist and writer Yuri Bychkov.
Morning. Start your weekend in Moscow by acquainting yourself with top-notch Russian cuisine at Grand Cafe Dr Zhivago. Located on the first floor of the historical hotel National and overlooking the Kremlin, it's definitely one of the best breakfast spots in the city. Try millet porridge with crawfish, pearl barley porridge with oxtail or ...