Remove Safari virus warning scam from iPhone/Mac

Here is a hands-on summary of the Safari virus warning, a multi-pronged pivot of numerous online scams targeting Mac and iPhone users for years.
Threat actors who boil their schemes down to ensnaring users of Apple products couldn’t possibly pass by Safari, the browser pre-installed on millions of hugely popular devices. Until recently, gadgets running iOS and iPadOS hadn’t even allowed for switching to another default browser. The latest Safari version for the Mac is more visually attractive than the predecessors and delivers awesome privacy extras. While these bells and whistles are good news for the average user, they are a call to action from a seasoned attacker’s twisted perspective. Amid all the exploitation opportunities in the present-day crooks’ handbook, the Safari virus warning stands out due to its prevalence and wicked efficiency. It underlies a series of online scams whose goals run the gamut from injecting malware to stealing Apple IDs and other sensitive credentials.

Safari virus warning scams are booming across the iPhone ecosystem
An example of the attack chain on an iPhone is a Safari warning that says the device is infected with a virus and the user needs to take immediate action to take care of the alleged predicament. It is manifested as a pop-up that appears on a dubious website the user visits out of curiosity or in the aftermath of clicking a fishy link. In some scenarios, a script stealthily injected into a legitimate site is to blame for redirecting the browser to a faux alert page. When the victim taps Close, the alert may vanish for a while and then reappear, or Safari will further forward the Internet traffic to a dodgy resource that provides fraudulent cleaning recommendations. The page may promote a security app that’s spyware in disguise. It could as well instruct the user to enter their Apple ID and password in a fake form that mimics the authentic sign-in page.

One more widespread type of this hoax in the mobile context is a Safari alert stating that the iPhone is infected with 6 viruses. To pressure the user, the warning goes on to say that the infection may brick the device, damage the SIM, and wipe all contacts unless removed. As is the case with the above-mentioned attack vector, the follow-up steps will try to dupe the victim into slipping up by providing personal information or installing a rogue app that will open a backdoor into the system so that the malefactor can access it at a later point. A particularly adverse situation occurs if the scammer obtains access to the Find My service to remotely lock the device. If this trick pans out, the attacker may mishandle the custom lock screen feature to display a ransom note and extort the user.

A spoofed warning that says, “ Your iPhone Has Been Hacked ” is yet another common type of the fraudulent Safari alert. It relies on a similar logic, attempting to hoodwink the would-be victim into disclosing account credentials or dialing a phone number to contact a pseudo-technician who will try to wheedle out personally identifiable information.
The Mac facet of the Safari virus warning
There are plenty of such scams with a Mac flavor, too. In a long-running tech support fraud campaign, malicious actors use landing pages that say, “ Your system is infected with 3 viruses ”. Unlike the previously mentioned iPhone hoaxes, the purpose of this one is restricted to contaminating a computer with a scareware application. The alert contains a “Scan Now” button that, when clicked, triggers a page mimicking a security audit of the target system and recommending a fake cleaner to address the purported infestation with malware like Tapsnake, CronDNS, or Dubfishicv. The warning page includes a logo of the AppleCare Protection Plan to give victims a false sense of legitimacy. Another prolific Mac scam saying, “ Zeus Virus Detected ” bears a resemblance to this one, except that it mainly tries to coerce victims into contacting impostor support agents over the phone.

Special Offer Safari virus warning scam may re-infect your Mac multiple times unless you delete all of its fragments, including hidden ones. Therefore, it is recommended to download Combo Cleaner and scan your system for these stubborn files. This way, you may reduce the cleanup time from hours to minutes. Download Now Learn how ComboCleaner works . If the utility spots malicious code, you will need to buy a license to get rid of it.
Macs are also being shelled with a variant of the Safari virus warning that promotes a booby-trapped version of the Adobe Flash Player. Although the software in question is obsolete now in 2021 and is no longer supported by the publisher, cybercriminals continue to piggyback on its past fame to spread adware and phony Mac maintenance tools. The counterfeit Flash Player update alerts pop up for one of the following reasons: if a corresponding script is triggered on a malicious or compromised website the user visits; or if a browser hijacker has previously cropped up in the system and is causing incessant redirects to untrustworthy pages that display the sketchy update recommendation.

If a Mac user falls for this trivial stratagem, they unknowingly permit a strain of malware to infiltrate the system. The resulting payload will install a pest such as a Safari redirect virus or an app that pretends to detect numerous performance issues and security threats. In the latter case, the user runs the risk of wasting money on a cleaning service they don’t actually need. When it comes to this hoax, a rule of thumb is to distrust software update prompts generated by a web page.
Regardless of the specific spin-off of the Safari virus warning fraud, the right response is two-fold. Ignoring what these browser-borne alerts say is half the battle. In other words, do not follow the steps listed in these dialogs or engage in any form of interaction other than closing them. Secondly, if the pop-ups or browser redirects keep occurring, this is a telltale sign of malware already running in the system. This situation won’t sort itself out unless the harmful code is purged. Depending on the affected device, the steps below should pull the plug on the unwanted browser activity.
Safari virus warning manual removal for iPhone and iPad
As per the anatomy of this hijack, settings of the web browser hit by the virus should be restored to their default values. The steps for performing this procedure are as follows:
Safari troubleshooting on iPhone / iPad
- Go to Settings and select Safari on the menu

- Confirm by tapping Clear History and Data . Check if the problem with Safari has been fixed. In the event the iPhone / iPad virus popups are still there, proceed to next step.

Safari virus warning manual removal for Mac
The steps listed below will walk you through the removal of this malicious application. Be sure to follow the instructions in the specified order.

As an illustration, here are several examples of LaunchAgents related to mainstream Mac infections: com.pcv.hlpramc.plist , com.updater.mcy.plist , com.avickUpd.plist , and com.msp.agent.plist . If you spot files that don’t belong on the list, go ahead and drag them to the Trash.

Get rid of Safari virus warning in the browser on Mac
To begin with, the web browser settings taken over by the Safari virus warning scam should be restored to their default values. Although this will clear most of your customizations, web surfing history, and all temporary data stored by websites, the malicious interference should be terminated likewise. The overview of the steps for completing this procedure is as follows:
Remove Safari virus warning (Mac)

- Restart Safari
Get rid of Safari virus warning using Combo Cleaner removal tool
The Mac maintenance and security app called Combo Cleaner is a one-stop tool to detect and remove Safari virus warning virus. This technique has substantial benefits over manual cleanup, because the utility gets hourly virus definition updates and can accurately spot even the newest Mac infections.
Furthermore, the automatic solution will find the core files of the malware deep down the system structure, which might otherwise be a challenge to locate. Here’s a walkthrough to sort out the Safari virus warning issue using Combo Cleaner:
Download Combo Cleaner
By downloading any applications recommended on this website you agree to our Terms and Conditions and Privacy Policy . The free scanner checks whether your Mac is infected. To get rid of malware, you need to purchase the Premium version of Combo Cleaner.
- Open the app from your Launchpad and let it run an update of the malware signature database to make sure it can identify the latest threats.

- Once you have made doubly sure that the malicious app is uninstalled, the browser-level troubleshooting might still be on your to-do list. If your preferred browser is affected, resort to the previous section of this tutorial to revert to hassle-free web surfing.
Was this article helpful? Please, rate this.
iOS update reveals a trio of now-patched security vulnerabilities
Apple patches more than 60 macos vulnerabilities in one fell swoop, authentication required.
You must log in to post a comment.
How to Remove Fake “Apple Security Alert” in 3 Simple Steps
- Preliminary Step. Remove Suspicious Extensions and Reset Your Web Browser’s Default Settings
- Step 1. Identify the Fake Apple Security Alert Malware With Your Antivirus (And Don’t Make the Problem Worse!)
Step 2. Remove the Apple Security Alert Infection and Delete Any Other Infected Files
Step 3. keep your device from getting re-infected, 3 best antivirus programs for removing the fake apple security alert, frequently asked questions.
- Best Antiviruses for Removing the Fake Apple Security Warning in 2024 — Final Score:
Short on time? Here’s how to remove the Apple Security Alert scam from your devices:
- 1. Preliminary Step. Remove any suspicious extensions from your web browser and reset your browser’s default settings.
- 2. Install an Antivirus and Run a Full Disk Scan. Download and install a comprehensive antivirus program. Intego is best for Mac users, with an excellent malware scanner, real-time malware protections, and a smart firewall. For iOS users, I recommend Norton , which includes web browser protections and other iOS-exclusive security tools.
- 3. Remove Viruses & Malware. Your antivirus will quarantine any malware it finds after the scan is finished. Check each file in the quarantine folder and remove any malware.
- 4. Stay Protected. Keep your antivirus software installed to protect you from further malware infections, use a secure VPN when browsing, and be vigilant about malicious websites.
The Apple Security Alert pop-up message is a browser-based scam aimed at tricking users into giving scammers access to their personal and financial information.
Apple will never issue security alerts through your web browser, so if you’re seeing this fake message on your device, chances are you’ve clicked on a dangerous link or unknowingly installed malware such as a PUP (potentially unwanted program).
Whether you’re a Mac or iOS user, you’ll need to close your browser, check for (and uninstall) any dangerous browser extensions, and install a quality antivirus to find and remove any malware on your device — and to prevent the issue from recurring in future. Intego is the best software for Mac users, and Norton is best for iOS users. Editors' Note: Intego and this site are in the same ownership group.
30-Days Risk-Free — Try Intego Now
Preliminary Step. Remove Suspicious Extensions and Reset Your Web Browser’s Default Settings
These steps vary depending on whether you’re using macOS or iOS, and which macOS browser you are using. Click the option relevant to you:
- Remove Suspicious Extensions and Reset Your Safari Browser on macOS.
- Remove Suspicious Extensions and Reset Your Chrome Browser on macOS.
- Remove Suspicious Extensions and Reset Your Firefox Browser on macOS.
- Remove Suspicious Extensions and Reset Your Safari Browser on iOS.
Remove Suspicious Extensions and Reset Your Safari Browser on macOS

- Click the Extensions tab at the top of the Preferences window.

- Now completely close and restart your Safari browser. If this stops the Apple Security Alert from appearing, you don’t need to reset Safari. Proceed to Step 1 to install an antivirus and run a malware scan of your device , to be sure there’s no lingering malware installed on your system.
However, if the Apple security alert is still appearing, reset Safari by following these next steps:
- From the same Preferences window, select the Privacy tab.
- Click Manage Website Data, then Remove All .

You now need to enable the develop menu and empty your caches. To do so, follow these steps:
- Select the Advanced tab at the top of the Preferences window.

Finally, you need to clear your browsing history. To do so, follow these steps:
- Go to History on the Safari menu, then select Clear History.

- Once you’ve done this, close and restart your browser. You’ve now completely reset Safari, and you can proceed to Step 1 to identify any viruses .
Remove Suspicious Extensions and Reset Your Google Chrome Browser on macOS
First check for any suspicious extensions.
- Open Google Chrome, and click on the “puzzle” icon in the top right-hand corner of the browser window.

- A window will open showing all current extensions. Identify any that are suspicious, and click Remove.

- Now completely close and restart your Chrome browser. If this stops the Apple Security Alert from appearing, you don’t need to reset Chrome. Proceed to Step 1 to install an antivirus and run a malware scan of your device, to be sure there’s no lingering malware installed on your system.
However, if the Apple Security Alert is still appearing, reset Chrome by following these next steps:
- Open Chrome, and click on the 3 vertical dots in the top right-hand corner of the browser window.

- Click on the 3-dot icon, and click on Settings.

- Once you’ve done this, close and restart your browser. You’ll have now completely reset your Chrome browser settings. Now proceed to Step 1 to identify any viruses .
Remove Suspicious Extensions and Reset Your Firefox Browser on macOS
- Open Firefox, and click on the 3 horizontal lines in the top right-hand corner of the browser window.

- A new window will open showing all enabled extensions. Identify any suspicious extensions, click on the 3 dots to the right hand side, and click Remove.

Now completely close and restart your Firefox browser. If this stops the Apple Security Alert from appearing, you don’t need to reset Firefox. Proceed to Step 1 to install an antivirus and run a malware scan of your device , to be sure there’s no lingering malware installed on your system.
However, if the Apple Security Alert is still appearing, reset Firefox by following these next steps:
- Open Firefox, and click on the “3-lines” icon in the top right-hand corner of the browser window.
- In the menu that appears, click on Help.

- A new window will appear. Click on Refresh Firefox… on the top right of the page.

- Click on the 3-lines icon, and click on History.

- Once you’ve done this, close and restart your browser. You’ll have now completely reset your Firefox browser. Now proceed to Step 1 to identify any viruses .
Remove Suspicious Extensions and Reset Your Safari Browser on iOS
- Open the Settings app and tap Safari .
- Find and tap on Extensions .

- If the extension is tied to an app, you then need to find the app on your iOS home menu and uninstall it. To uninstall an app, you need to long-press it, and then tap Remove app.

If this stops the Apple Security Alert from appearing on your iOS device, you don’t need to reset Safari. You can install an antivirus and skip to Step 3 . However, if the issue persists, reset Safari on your iOS device by following these next steps:
- Open the Settings app and find and click on Safari.
- Tap Clear History and Website Data .

Doing this will delete all of your history and cookies. However, it should also stop you from redirecting to the Apple Security Alert. You can now install an antivirus and skip to Step 3 .
Step 1. Identify the Fake Apple Security Alert Malware With Your Antivirus (And Don’t Make the Problem Worse!)
IMPORTANT: Only follow Step 1 if you’re trying to fix the Apple Security Alert on macOS. If you’re trying to fix the Apple Security Alert on iOS, skip to Step 3 .
In order to identify any malware that may have infected your device, you need to install a secure antivirus program, and then run a full system scan. Doing this will not only find and remove the malware causing your web browser to redirect to the Apple Security Alert, but it will also find and remove any other malware that may be installed on your Mac that you aren’t aware of. I recommend using Intego — it’s the best antivirus for Mac computers in 2024 .

During a full disk scan, your antivirus’s malware scanner will look at every file on your Mac and identify any malicious files and programs. If your antivirus finds malware, it will move it into a secure quarantine folder. Even if you recognize files appearing in the infected file list while the scan is running, wait until your antivirus tells you the scan is finished — if you cancel the scan early, chances are you’ll be leaving other malware on your computer.
A full disk scan can often take up to 4 hours, so sit tight and let it run fully. You may want to schedule the scan for when you’re not using your Mac, just in case it causes any slowdown.
Once your antivirus software has finished its scan, it will alert you that it’s finished and automatically take you to your secure quarantine folder. At this stage, every malware threat on your device — including the Apple Security Alert — will be quarantined. You can now proceed to Step 2.
Editors' Note: Intego and this site are in the same ownership group.
Your antivirus software will have identified any malware on your device and moved it into a secure quarantine folder. It will then invite you to look through this folder, and delete all the quarantined files.
For most users, I’d recommend trusting your antivirus and deleting every file it has quarantined. However, advanced users may want to look more closely at each file to see if there are any false positives — safe files that malware scanners sometimes incorrectly flag as dangerous. If you find any false positives, you can whitelist these rather than delete them. However, only whitelist files you fully trust. If you’re not 100% sure whether you trust a file, contact your antivirus’s customer support team, and they’ll be able to tell you whether you should delete it or not.

Once you’ve deleted every dangerous file in the quarantine folder, restart your Mac. While it’s tempting to skip this step, you shouldn’t. There might be malware running in your Mac’s system memory, and restarting your Mac will make sure you’re able to catch it. Once you’ve restarted your Mac, run a second full disk scan to find any malware that your first scan missed. The second scan is usually faster than the first scan since most antivirus programs (including Intego ) can recognize recently scanned files. It’ll only look at new files or files that have been recently modified.
Hopefully, there won’t be any new malware threats once the second malware scan finishes. If that’s the case, you can proceed to Step 3.
However, if your antivirus identifies more malware threats during the second scan, you need to remove them and continue to repeat Steps 1 and 2 until every malware threat has been removed from your Mac.
You’ve already had the fake Apple Security Alert scam appear on your device, so you now know how easy it is to accidentally click on a dangerous link or unknowingly download malware.
Every day, new malware is released. There’s also an ever-increased risk of identity theft, being a victim of data harvesting, and having hackers intercept your data on public Wi-Fi networks.
That said, there are many things that you can do to easily protect yourself and stay safe online in 2024. The below steps will show you how.
Keep Your Apps and OS Up-To-Date
When Apple finds any vulnerabilities in its macOS and iOS software, they release patches to fix those issues and vulnerabilities. If you don’t stay up to date with the latest versions of macOS and iOS, you won’t benefit from these fixes, meaning your devices are wide open to known-about vulnerabilities. Hackers often take advantage of this and use these vulnerabilities to hack systems that are still using older versions of software — this is known as an exploit attack.
It’s therefore very important to always update to the latest operating system, and keep your drivers updated. Luckily, this is very easy to do.
To update macOS, open the Apple menu, click System Preferences, then click Software Update. You’ll either see an option to update or upgrade your Mac (depending on how big the update is). Click on the available option, and then click the option that says Automatically keep my Mac up to date.

To update iOS, open the Settings app, tap General, followed by Software Update. Tap either Download or Install Now . You should also see a section that says Automatic Updates. Tap on this and switch on Download iOS Updates. Then, toggle on Install iOS updates.

It’s also vital any apps you’ve downloaded from the Apple App Store are kept up-to-date.
To update macOS apps, open the App Store, click Updates (located in the sidebar), then click Update All. Once done, open the App Store’s preferences from the main menu bar, and turn on Automatic Updates.
To update iOS apps, open the App Store, tap on your profile (located at the top of the screen), then tap Update all. Then, open your iPhone’s Settings app, tap App Store, and turn App Updates on so that your iOS can update automatically.
Don’t Download Suspicious Files
The vast majority of malware comes via seemingly legitimate software downloads or is attached to deceptive emails. So being vigilant to what you click on and download is the easiest way to keep your devices from getting infected.
Unless you’re an advanced user, you should only download apps from the official Apple App Store. You should also never download email attachments unless you know who the sender is and are expecting an email attachment from them. Also, be careful of phishing emails disguising themselves as trusted businesses or contacts. Always check the sender’s full email address (rather than only their displayed name) and contact the business or sender directly if you’re unsure.
Some antiviruses can also scan emails and files in real time, before you download them onto your Mac — so make sure you have a quality antivirus with real-time protection running (Intego is best for Macs). Since Apple doesn’t let you scan iOS devices, you need to be a little more careful and use a bit of common sense when browsing the web. That said, some iOS antiviruses like Norton offer good web protection that can block you from visiting dangerous websites.
Secure Your Wireless Network and IoT Devices
Avoid connecting to wireless networks unless you know they’re secure. If you must connect to a public network (for example, in an airport), ensure you have a secure VPN running to protect your data from hackers. ExpressVPN is an excellent choice for Mac users.
Similarly, make sure your home network is secured behind a strong password. You can check by opening your Mac’s Wi-Fi menu and seeing if there’s a padlock symbol next to your home connection. If there’s no padlock symbol, you need to log into your router and secure your wireless network with a strong password. If you aren’t sure how to do this, either type your router’s model number into Google and look for the instructions, or contact your internet provider’s customer support.

Make sure you use a complex password that isn’t possible to guess. Password managers like 1Password can generate super-secure passwords that hacking tools won’t be able to crack, as well as store them for you in a secure and easily accessible password vault. This is the best way to keep all your accounts securely protected, without any risk of forgetting your passwords.
Ensure the security of your Internet of Things (IoT) devices, such as indoor CCTV cameras, smart watches, doorbell cameras, and smart speakers. Search for your IoT model online or refer to the product guide to learn how to assign a password to it. Afterwards, use a password manager such as 1Password to generate (and keep) secure passwords.
Download a Secure Antivirus Program
The most important thing you can do is download and set up a reliable antivirus solution. While there are many options for Mac and iPhone devices, only a few deliver as promised, and some may not offer good enough protection in 2024. Check out our lists of the best antiviruses for Mac and the best antiviruses for iOS to make an informed decision before choosing your antivirus.
Intego comes highly recommended for Mac users, based on my personal experience. Created specifically for Mac computers, it features a powerful malware engine. During my tests on a MacBook Pro, it scanned my device in under an hour and detected all the Mac-specific malware samples. Intego’s real-time protection also performed flawlessly, successfully blocking all simulated ransomware attacks.
Intego also has:
- Secure firewall — Monitors in and outbound network traffic and blocks any dangerous or unauthorized connections.
- System cleaner and optimizer — Removes duplicate files and junk from your Mac to save you hard drive space and keep your device performance-optimized.
- Parental controls — Advanced parental control software that includes a huge range of features for keeping your kids safe online.
If you’re an iOS user, I recommend Norton. It offers excellent web protection, among some other really good features:
- Secure VPN (virtual private network) — Masks your IP address and stops hackers from intercepting your data on public Wi-Fi networks.
- Wi-Fi Scanner — Scans your Wi-Fi network for privacy issues and warns you if you’re connecting to an unsecure network.
- SMS spam filter — Scans your messages and filters any that contain dangerous and fraudulent links.
Editors' Note: ExpressVPN and this site are in the same ownership group.
Quick summary of the best antiviruses for removing the fake Apple security alert:
- 🥇 1. Intego — Top choice for macOS with flawless malware detection and a comprehensive set of extras.
- 🥈 2. TotalAV — User-friendly internet security suite with great web security features.
- 🥉 3. Norton 360 — Top-notch malware scanner with great web protection for iOS devices.
What does Apple Security Alert mean?
The Apple Security Alert message is a fake alert that is in fact a browser-based scam. It is designed to steal your data and trick you into giving away your personal and financial information.
Apple never issues security alerts through web browsers, so if you’re seeing this message, you can be certain that it is a scam. Whatever you do, don’t follow any of the instructions on the message — whether it’s to click on a link, call a number, or download software. You need to simply close your browser, and then follow our steps to ensure your device is protected.
Does Apple send security alert emails?
Apple only sends security alert emails if someone logs into your Apple account and you have 2FA enabled. If this is the case, the email will be from [email protected]. If you’ve received any variation of this email, it’s a phishing email, and you should report it as such to your email provider.
Don’t download any attachments in the malicious email, or click on any links. Intego for Mac includes an email scanner that can check your inbox for any malware, so it’s good to have this running every time you access your email. If you suspect you have malware on your device, follow our above steps to scan your device and remove any threats.
How to remove the Apple Security Alert message?
To remove the Apple Security Alert pop-up, first close your web browser, then follow our above steps to ensure your device is secure.
In many cases, just closing your browser will be enough, and the message won’t reappear. However, after you’ve closed your web browser, it’s a good idea to check for any suspicious browser extensions and reset your browser settings. You should also download and install a secure antivirus to check for any malware, such as adware or other potentially unwanted programs (PUPs), that may be behind the fake Apple Security Alert message.
Best Antiviruses for Removing the Fake Apple Security Warning in 2024 — Final Score:

About the Author
Leave a comment.
How to Remove Apple Security Alert Scam From iOS and macOS

- If you’re experiencing unwanted pop-ups, performance drops, or your browser redirecting to strange sights, you may have malware.
- Cybercriminals will send out emails portraying themselves as Apple.
- Apple will notify you of important information through very specific channels.

If you find you need to remove the Apple Security Alert scam from iOS or macOS, you may want to know there’s an easy solution to this problem. This fake alert can produce phony pop-up messages suggesting you need to take action with Apple. Falling victim to cyber criminals or malicious software is never fun, so let’s take a look at fake security alerts, how to avoid them, and how you can get rid of them.
Is the Apple Security Warning Real?
If you are receiving an Apple Security warning pop-up, it is absolutely fraudulent. It is possible that you are receiving this pop-up due to a malicious actor or a malware attack. Apple does not send security warnings to any of its devices, iPhone and Macs included. Do not click on these fake pop-ups, and do not follow their instructions.
How Can I Remove Apple Security Alert Scam From My iPhone?
Before moving on, consider these simple solutions before going to the more advanced methods:
- Check for an iOS update: Go to Settings > General > Software Update. Check the App Store for updates as well by selecting the App Store and then your Profile Icon.
- Remove any suspicious apps or unwanted programs: You can do this by long-pressing them from the Home Screen and selecting Remove App. Select Delete App and confirm your decision.
- Consider using an antivirus software: Note that this usually entails linking your iPhone to your computer. Check out five of the best antivirus solutions for iPhones.
- Avoid shady websites and do your best not to click suspicious links.
Clear Browser History and Data
If you are receiving an Apple Security Alert Scam, clearing your browser history and data may just do the trick. I’ll take a look at three of the most popular browsers: Safari, Chrome, and Firefox.
- For Safari, go to your iPhone’s Settings app.

- While under Safari’s Settings, you may also want to ensure the following are enabled: Block Pop-Ups , Fraudulent Website Warning and Prevent Cross-Site Tracking .
- For Firefox : Go to the hamburger menu (three horizontal lines) and select Settings > Data Management > Clear Private Data .
- Google Chrome : Go to the three dots at the bottom of the browser and select Clear Browsing Data . Choose the data you want to remove and confirm.
How Can I Remove Apple Security Alert Scam From My Mac?
Before moving on to the more advanced solutions, consider the following:
- Check for an update to macOS: Go to System Settings > General > Software Update . Make sure your browser and other apps are up-to-date as well.
- Clear your browser cache and history : You can view our guide for the three most popular browsers here .
- Consider an antivirus : Using antivirus software will prevent future scams and viruses from damaging your Mac. We always recommend Intego Internet Security because of its latest protection features that block all digital threats. You can also take a look at the best Mac antivirus software that don’t cause slowdowns .
Remove Suspicious Browser Extensions
One of the first things you should consider is checking for and removing any nefarious browser extensions that may be lurking in your browsers. Fortunately, this is rather easy, and I will look at the three most popular browsers: Chrome, Firefox and Safari.
Time needed: 3 minutes
Remove extensions from Safari, Chrome and Firefox following these methods:

- For Google Chrome : Open the app and go to More Tools > Extensions . Click any suspicious extensions and then select Remove . Confirm your decision.
- For Firefox : Open the app, then select the menu icon (three horizontal lines). Then navigate to Settings > Add-ons and themes . Remove any suspicious extensions by clicking the three dots next to the name and selecting Remove .
How Will Apple Notify Me of Suspicious Activity?
Apple will notify you of suspicious activity via email or iMessage notification depending on what you have associated with your Apple ID. Remember, however, that Apple does not send Apple Security Alert pop-up messages. However, you may see a Threat Notification at the top of the page when you sign into appleid.apple.com.
How Do I Know if My Apple Email is Real?
The best way to know if an Apple email is real is by checking the email address. Official Apple emails end in “@email.apple.com”. Anything else is a scam and should be avoided . Popular examples of a fraudulent email address can be something bogus like “@applesupportservices.com”.
As cyber criminals get craftier by the day, staying safe from various types of malware online can be a challenge. Fortunately, the vast majority of the time, avoiding scam pop-ups, malicious links and suspicious files will help you stay clean.
Remember, security software does exist if you need extra peace of mind concerning security flaws and browser hijackers. However, Apple’s built-in security measures play a large role in keeping your machine free of malicious programs.
If you have any experience with this security alert scam, let us know your thoughts and ideas in the comments.
One thought on “ How to Remove Apple Security Alert Scam From iOS and macOS ”
No matter how many people you teach, they still fall for the tricks of scammers.
Leave a Reply Cancel reply
You must be logged in to post a comment.
This site uses Akismet to reduce spam. Learn how your comment data is processed .
- Nick deCourville
- Helldivers 2
- Dragon’s Dogma 2
- Wuthering Waves
- Genshin Impact
- Counter Strike 2
- Honkai Star Rail
- Lego Fortnite
- Stardew Valley
- NYT Strands
- NYT Connections
- Apple Watch
- Crunchyroll
- Prime Video
- Jujutsu Kaisen
- Demon Slayer
- Chainsaw Man
- Solo Leveling
- Beebom Gadgets
iPhone Virus Warning: How to Remove Fake Apple Security Alerts
How to Get Rid of Fake Apple Security Alerts on iPhone (2022)
Safely get rid of fake security alerts on ios and ipados, 1. close the malicious tabs right away.
- Bring up the control center (swipe down from the top corner of the screen or swipe up from the bottom edge of the screen) and then tap the airplane mode icon to turn it on.

- Next, open Safari and then tap the Tabs icon at the bottom right corner of the screen. After that, tap on the “X” button at the upper right corner of the specific tab to close it.

2. Delete Shady Website Cookies
- Head over to the Settings app on your iPhone or iPad -> Safari -> Advanced.

- Now, tap Website Data . Next, tap on Edit at the top right corner of the screen.

- Next up, select the specific cookie you want to get rid of and hit the Delete button. Do not forget to tap Done at the top right to confirm the action.

3. Block All Safari Popups
- Navigate to the Settings app on your iPhone or iPad -> Safari and then make sure that the toggle next to Block Pop-ups is turned on.

4. Block Fraudulent Website Warnings
Safari comes with a built-in feature that allows you to block fraudulent website warnings. Therefore, make sure to take advantage of this security feature to keep the fake website warnings at a fair distance.
- To get going, open the Settings app on your iPhone or iPad -> Safari and then ensure that the toggle next to Fraudulent Website Warning is enabled.

5. Use Reader Mode to Keep Unwanted Ads and Popups Away
- Open Safari on your iPhone or iPad -> navigate to the webpage where you want to enable the Reader Mode.
- Next, tap on the aA button at the bottom of the screen and choose Show Reader.

- Go to the Settings app on your iPhone or iPad -> Safari . After that, scroll down to the Settings for Websites section and tap Reader .

- Next, turn on the toggle for All Websites .

6. Block Shady Websites
- Head into the Settings app on your iPhone or iPad -> Screen Time -> Content & Privacy Restrictions.

- Now, ensure that the toggle for Content & Privacy Restrictions is turned on. Then, tap Content Restriction and select Web Content .

- Next, choose the Limit Adult Content option. Under the Never Allow section, tap Add Website and then paste the link of the site that you want to block.

Going forward, these websites will be blocked on your device. Later, if you ever want to make changes, return to this very Screen Time setting and then do the needful.
- With iOS 15 or later, you can install Safari extensions to further enhance the functionality of the stock web browser. Safari extensions like popup blockers can help you take on annoying popups with ease.
Report Fake Security Alerts to Apple
Keep fake apple security alerts away from your iphone or ipad.

Rajesh Mishra
An old school bibliophile who turned a tech nerd out of obsession. When he is not digging into hacks and tracking down stories that are breaking the internet, you may find him reciting poems.
Add new comment

Recommended
Apple’s security flaw warning: what it means and what you need to do.
- View Author Archive
- Email the Author
- Get author RSS feed
Contact The Author
Thanks for contacting us. We've received your submission.
Thanks for contacting us. We've received your submission.
Apple is urging users to update their iPhones, iPads and Mac computers after the company sounded the alarm about a serious security flaw that could allow hackers to take over their devices.
The tech giant warned Wednesday that Mac computers could be breached by “maliciously crafted web content” and said it was “aware of a report that this issue may have been actively exploited.”
Apple released software updates that it says fix the exploits and warned users to download them as soon as possible.
Here’s what Apple’s warning means, which devices are affected and what users should do.

‘Full access to device’
Apple said that it found two flaws within Webkit — which powers Safari and other apps — as well as the kernel, which is a computer program at the center of the operating system. The vulnerabilities are believed to be related and could essentially give hackers full access to iPhones, iPads and Macs, the company warned.
Rachel Tobac, CEO of SocialProof Security, warned on Twitter that the flaws could give “effectively give attackers full access to device.”
Given the massive amount of data stored on Apple devices, such as bank account information, private photos and digital versions of ID documents , users who don’t update their devices could be at serious risk.
Tobac urged everyone to update their devices by the end of the day and added that especially vulnerable people such as activists, journalists and others who could be targeted by nation-state hackers should update immediately.
The U.S. Cybersecurity and Infrastructure Security Agency likewise urged Americans to “apply the necessary updates as soon as possible.”
“ An attacker could exploit one of these vulnerabilities to take control of an affected device,” the federal agency warned.

Which Macs, iPads, iPhones are vulnerable?
Apple said that anyone with an iPhone released since 2015, an iPad released since 2014 or Mac that runs the OSx Monterey operating system should update their devices.
For iPhones, the affected devices are the iPhone 6, iPhone 6s Plus, iPhone SE, iPhone 7, iPhone 7 Plus, iPhone 8, iPhone 8 Plus, iPhone X, iPhone XS, iPhone XS, iPhone XS Max, iPhone XR, iPhone 11, iPhone 11 Pro, iPhone 11 Pro Max, iPhone 12, iPhone 12 Mini, iPhone 12 Pro, iPhone 12 Pro Max, iPhone 13, iPhone 13 Mini, iPhone 13 Pro and the iPhone 13 Pro Max.
For iPads, the update list consists of all iPad Pros, iPad Airs from the 2nd generation or newer, iPad Minis from the 3rd generation onward and standard iPads from the 5th generation or newer.
For Macs, all devices running the OSx Monterey operating system should be updated. That consists of iMacs from late 2015 or later, iMac Pros from 2017 or later, MacBook Air and MacBook Pro laptops from 2015 or later, Mac Pros from 2014 or later, Mac minis from late 2014 or later and MacBooks from 2016 or later.

Some later iPod models could also be affected, Apple said.
This software issue has gotten more attention on social media and in the news than previous vulnerabilities, potentially because of Apple’s warning that it could have already been exploited by hackers. Another kernel security flaw that Apple patched in March received far less attention despite being similarly serious.
Apple spokesperson Scott Radcliffe declined to comment beyond initial notices the company published about the vulnerabilities.
Apple shares fell 1.2% to $172.06 around mid-day on Friday amid a broader slump in the markets. The tech-heavy Nasdaq Composite Index was down 2.0%.

How to update
iPhone and iPad owners can update their software by going to the settings application, tapping “general” and then tapping “Software Update.” If they see a new software update available, they should tap “install now.” Apple is urging users to update certain devices by the end of the day.Apple is urging users to update certain devices by the end of the day.
Mac owners should click on the Apple logo in the top lefthand corner of their desktop screen. They should then click on “About this Mac,” then click “Software Update” to check for available updates. If a new software update is available, they should click “update now.”
Additional reporting by Katherine Donlevy

Advertisement
How to manage privacy and security settings in Safari on iPhone and iPad

Browsing on the internet is something most of us do just about every day, but there is always a slight element of danger, whether it's viruses, identity theft, or getting spoiled for Game of Thrones (DAMN IT).
If you want to have more control over your privacy and security while using Safari on your iPhone or iPad, here's how!
How to prevent cross-site tracking
How to block all cookies in safari, how to request that websites don't track you, how to get warnings about fraudulent websites, how to allow or deny camera and microphone access, how to see if websites have apple pay set up, how to clear your history and website data, how to remove all website data.
Ever been looking at shoes and then shoe ads suddenly pop up on your Facebook feed? That's cross-site tracking and it's a way of monitoring your online behavior to better cater advertising toward you. If you don't like that, then you can turn it off in Safari like this:
- Launch Settings from your Home screen.
- Tap Safari . You'll have to scroll down to find it.
- Tap the switch next to Prevent Cross-Site Tracking . It's down under Privacy & Security .

Cookies are bits of your information that websites store in order to perhaps customize your experience in future or to save login information so that you don't have to constantly input your email address, for example. If you don't want Safari sites to save any of your info, then you can block all cookies like this:
- Tap the switch next to Block All Cookies . It's down under Privacy & Security .

Adding to the above-mentioned cross-site tracking information, you can also get Safari to send requests to websites asking them not to track your behavior. This is added padding in cross-site tracking prevention.
- Tap the switch next to Ask Websites Not To Track Me . It's down under Privacy & Security .

Safari can detect when websites are suspicious or may appear fraudulent, and if you enable the setting, you can get a warning before visiting those sites. You can also just hit "Ignore" if you know the site is legit.
- Tap the switch next to Fraudulent Website Warning . It's down under Privacy & Security . Green is on.

Some websites may want access to your camera and microphone — sites like Facebook — and Safari would therefore need that access. You can completely deny it like this:
Master your iPhone in minutes
iMore offers spot-on advice and guidance from our team of experts, with decades of Apple device experience to lean on. Learn more with iMore!
- Tap the switch next to Camera & Microphone Access . It's down under Privacy & Security .

Safari can automatically check to see if the site you're visiting supports Apple Pay. Here's how to enable it:
- Tap the switch next to Check for Apple Pay . It's down under Privacy & Security .

If you've been looking up J-Law's nudes or scheming on Xmas gifts for the wife and she also uses your phone, you can clear your Safari browsing history, which will also clear out your browsing data like cookies, login information, and more.
- Tap Clear History and Website Data .
- Tap Clear History and Data in the pop-up.

If you want to keep your browsing history but want to remove your data from Safari, you can just delete website data, which will remove cookies, login details, and more.
- Tap Advanced at the bottom of the page.

- Tap Website Data .
- Scroll to the bottom and tap Remove All Website Data .
- Tap Remove Now .

Let us know in comments below!

○ iOS 14 Review ○ What's new in iOS 14 ○ Updating your iPhone ultimate guide ○ iOS Help Guide ○ iOS Discussion
Mick is a staff writer who's as frugal as they come, so he always does extensive research (much to the exhaustion of his wife) before making a purchase. If it's not worth the price, Mick ain't buying.
Apple Intelligence might be late to the party, but it's another shining example of why Apple believes doing things right is better than being first and doing them wrong
I do not trust Apple Intelligence to prioritize my notifications...yet
WhatsApp takes aim at Apple Intelligence with new AI-generated avatars powered by Meta AI
Most Popular
- 2 Russian iPhone App Store removes multiple VPN apps following Kremlin demands
- 3 7 things we learned about the iPhone 16 this week
- 4 Prime Day 2024 — is it the best time to buy Apple devices for back to school?
- 5 Epic Games Store on iPhone rejected by Apple twice over button design, claims Fortnite maker
iPhone User Guide
- iPhone models compatible with iOS 17
- R ' class='toc-item' data-ss-analytics-link-url='https://support.apple.com/guide/iphone/iphone-xr-iph017302841/ios' data-ajax-endpoint='https://support.apple.com/guide/iphone/iphone-xr-iph017302841/ios' data-ss-analytics-event="acs.link_click" href='https://support.apple.com/guide/iphone/iphone-xr-iph017302841/ios' id='toc-item-IPH017302841' data-tocid='IPH017302841' > iPhone X R
- S ' class='toc-item' data-ss-analytics-link-url='https://support.apple.com/guide/iphone/iphone-xs-iphc00446242/ios' data-ajax-endpoint='https://support.apple.com/guide/iphone/iphone-xs-iphc00446242/ios' data-ss-analytics-event="acs.link_click" href='https://support.apple.com/guide/iphone/iphone-xs-iphc00446242/ios' id='toc-item-IPHC00446242' data-tocid='IPHC00446242' > iPhone X S
- S Max' class='toc-item' data-ss-analytics-link-url='https://support.apple.com/guide/iphone/iphone-xs-max-iphcd2066870/ios' data-ajax-endpoint='https://support.apple.com/guide/iphone/iphone-xs-max-iphcd2066870/ios' data-ss-analytics-event="acs.link_click" href='https://support.apple.com/guide/iphone/iphone-xs-max-iphcd2066870/ios' id='toc-item-IPHCD2066870' data-tocid='IPHCD2066870' > iPhone X S Max
- iPhone 11 Pro
- iPhone 11 Pro Max
- iPhone SE (2nd generation)
- iPhone 12 mini
- iPhone 12 Pro
- iPhone 12 Pro Max
- iPhone 13 mini
- iPhone 13 Pro
- iPhone 13 Pro Max
- iPhone SE (3rd generation)
- iPhone 14 Plus
- iPhone 14 Pro
- iPhone 14 Pro Max
- iPhone 15 Plus
- iPhone 15 Pro
- iPhone 15 Pro Max
- Setup basics
- Make your iPhone your own
- Take great photos and videos
- Keep in touch with friends and family
- Share features with your family
- Use iPhone for your daily routines
- Expert advice from Apple Support
- What’s new in iOS 17
- Turn on and set up iPhone
- Wake, unlock, and lock
- Set up cellular service
- Use Dual SIM
- Connect to the internet
- Sign in with Apple ID
- Subscribe to iCloud+
- Find settings
- Set up mail, contacts, and calendar accounts
- Learn the meaning of the status icons
- Charge the battery
- Charge with cleaner energy sources
- Show the battery percentage
- Check battery health and usage
- Use Low Power Mode
- Read and bookmark the user guide
- Learn basic gestures
- Learn gestures for iPhone models with Face ID
- Adjust the volume
- Silence iPhone
- Find your apps in App Library
- Switch between open apps
- Quit and reopen an app
- Multitask with Picture in Picture
- Access features from the Lock Screen
- Use the Dynamic Island
- Perform quick actions
- Search on iPhone
- Get information about your iPhone
- View or change cellular data settings
- Travel with iPhone
- Change sounds and vibrations
- Use the Action button on iPhone 15 Pro and iPhone 15 Pro Max
- Create a custom Lock Screen
- Change the wallpaper
- Adjust the screen brightness and color balance
- Keep the iPhone display on longer
- Use StandBy
- Customize the text size and zoom setting
- Change the name of your iPhone
- Change the date and time
- Change the language and region
- Organize your apps in folders
- Add, edit, and remove widgets
- Move apps and widgets on the Home Screen
- Remove or delete apps
- Use and customize Control Center
- Change or lock the screen orientation
- View and respond to notifications
- Change notification settings
- Set up a Focus
- Allow or silence notifications for a Focus
- Turn a Focus on or off
- Stay focused while driving
- Customize sharing options
- Type with the onscreen keyboard
- Dictate text
- Select and edit text
- Use predictive text
- Use text replacements
- Add or change keyboards
- Add emoji and stickers
- Take a screenshot
- Take a screen recording
- Draw in documents
- Add text, shapes, signatures, and more
- Fill out forms and sign documents
- Use Live Text to interact with content in a photo or video
- Use Visual Look Up to identify objects in your photos and videos
- Lift a subject from the photo background
- Subscribe to Apple Arcade
- Play with friends in Game Center
- Connect a game controller
- Use App Clips
- Update apps
- View or cancel subscriptions
- Manage purchases, settings, and restrictions
- Install and manage fonts
- Buy books and audiobooks
- Annotate books
- Access books on other Apple devices
- Listen to audiobooks
- Set reading goals
- Organize books
- Create and edit events in Calendar
- Send invitations
- Reply to invitations
- Change how you view events
- Search for events
- Change calendar and event settings
- Schedule or display events in a different time zone
- Keep track of events
- Use multiple calendars
- Use the Holidays calendar
- Share iCloud calendars
- Camera basics
- Set up your shot
- Apply Photographic Styles
- Take Live Photos
- Take Burst mode shots
- Take a selfie
- Take panoramic photos
- Take macro photos and videos
- Take portraits
- Take Night mode photos
- Take Apple ProRAW photos
- Adjust the shutter volume
- Adjust HDR camera settings
- Record videos
- Record spatial videos for Apple Vision Pro
- Record ProRes videos
- Record videos in Cinematic mode
- Change video recording settings
- Save camera settings
- Customize the Main camera lens
- Change advanced camera settings
- View, share, and print photos
- Use Live Text
- Scan a QR code
- See the world clock
- Set an alarm
- Change the next wake up alarm
- Use the stopwatch
- Use multiple timers
- Add and use contact information
- Edit contacts
- Add your contact info
- Use NameDrop on iPhone to share your contact info
- Use other contact accounts
- Use Contacts from the Phone app
- Merge or hide duplicate contacts
- Export contacts
- Get started with FaceTime
- Make FaceTime calls
- Receive FaceTime calls
- Create a FaceTime link
- Take a Live Photo
- Turn on Live Captions in a FaceTime call
- Use other apps during a call
- Make a Group FaceTime call
- View participants in a grid
- Use SharePlay to watch, listen, and play together
- Share your screen in a FaceTime call
- Collaborate on a document in FaceTime
- Use video conferencing features
- Hand off a FaceTime call to another Apple device
- Change the FaceTime video settings
- Change the FaceTime audio settings
- Change your appearance
- Leave a call or switch to Messages
- Block unwanted callers
- Report a call as spam
- Connect external devices or servers
- Modify files, folders, and downloads
- Search for files and folders
- Organize files and folders
- Set up iCloud Drive
- Share files and folders in iCloud Drive
- Use an external storage device, a file server, or a cloud storage service
- Share your location
- Meet up with a friend
- Send your location via satellite
- Add or remove a friend
- Locate a friend
- Get notified when friends change their location
- Notify a friend when your location changes
- Turn off Find My
- Add your iPhone
- Add your iPhone Wallet with MagSafe
- Get notified if you leave a device behind
- Locate a device
- Mark a device as lost
- Erase a device
- Remove a device
- Add an AirTag
- Share an AirTag or other item in Find My on iPhone
- Add a third-party item
- Get notified if you leave an item behind
- Locate an item
- Mark an item as lost
- Remove an item
- Adjust map settings
- Get started with Fitness
- Track daily activity and change your move goal
- See your activity summary
- Sync a third-party workout app
- Change fitness notifications
- Share your activity
- Subscribe to Apple Fitness+
- Find Apple Fitness+ workouts and meditations
- Start an Apple Fitness+ workout or meditation
- Create a Custom Plan in Apple Fitness+
- Work out together using SharePlay
- Change what’s on the screen during an Apple Fitness+ workout or meditation
- Download an Apple Fitness+ workout or meditation
- Get started with Freeform
- Create a Freeform board
- Draw or handwrite
- Apply consistent styles
- Position items on a board
- Search Freeform boards
- Share and collaborate
- Delete and recover boards
- Get started with Health
- Fill out your Health Details
- Intro to Health data
- View your health data
- Share your health data
- View health data shared by others
- Download health records
- View health records
- Monitor your walking steadiness
- Log menstrual cycle information
- View menstrual cycle predictions and history
- Track your medications
- Learn more about your medications
- Log your state of mind
- Take a mental health assessment
- Set up a schedule for a Sleep Focus
- Turn off alarms and delete sleep schedules
- Add or change sleep schedules
- Turn Sleep Focus on or off
- Change your wind down period, sleep goal, and more
- View your sleep history
- Check your headphone levels
- Use audiogram data
- Register as an organ donor
- Back up your Health data
- Intro to Home
- Upgrade to the new Home architecture
- Set up accessories
- Control accessories
- Control your home using Siri
- Use Grid Forecast to plan your energy usage
- Set up HomePod
- Control your home remotely
- Create and use scenes
- Use automations
- Set up security cameras
- Use Face Recognition
- Unlock your door with a home key
- Configure a router
- Invite others to control accessories
- Add more homes
- Get music, movies, and TV shows
- Get ringtones
- Manage purchases and settings
- Get started with Journal
- Write in your journal
- Review your past journal entries
- Change Journal settings
- Magnify nearby objects
- Change settings
- Detect people around you
- Detect doors around you
- Receive image descriptions of your surroundings
- Read aloud text and labels around you
- Set up shortcuts for Detection Mode
- Add and remove email accounts
- Set up a custom email domain
- Check your email
- Unsend email with Undo Send
- Reply to and forward emails
- Save an email draft
- Add email attachments
- Download email attachments
- Annotate email attachments
- Set email notifications
- Search for email
- Organize email in mailboxes
- Flag or block emails
- Filter emails
- Use Hide My Email
- Use Mail Privacy Protection
- Change email settings
- Delete and recover emails
- Add a Mail widget to your Home Screen
- Print emails
- Get travel directions
- Select other route options
- Find stops along your route
- View a route overview or a list of turns
- Change settings for spoken directions
- Get driving directions
- Get directions to your parked car
- Set up electric vehicle routing
- Report traffic incidents
- Get cycling directions
- Get walking directions
- Get transit directions
- Delete recent directions
- Get traffic and weather info
- Estimate travel time and ETA
- Download offline maps
- Search for places
- Find nearby attractions, restaurants, and services
- Get information about places
- Mark places
- Share places
- Rate places
- Save favorite places
- Explore new places with Guides
- Organize places in My Guides
- Clear location history
- Look around places
- Take Flyover tours
- Find your Maps settings
- Measure dimensions
- View and save measurements
- Measure a person’s height
- Use the level
- Set up Messages
- About iMessage
- Send and reply to messages
- Unsend and edit messages
- Keep track of messages
- Forward and share messages
- Group conversations
- Watch, listen, or play together using SharePlay
- Collaborate on projects
- Use iMessage apps
- Take and edit photos or videos
- Share photos, links, and more
- Send stickers
- Request, send, and receive payments
- Send and receive audio messages
- Animate messages
- Send and save GIFs
- Turn read receipts on or off
- Change notifications
- Block, filter, and report messages
- Delete messages and attachments
- Recover deleted messages
- View albums, playlists, and more
- Show song credits and lyrics
- Queue up your music
- Listen to broadcast radio
- Subscribe to Apple Music
- Play music together in the car with iPhone
- Listen to lossless music
- Listen to Dolby Atmos music
- Apple Music Sing
- Find new music
- Add music and listen offline
- Get personalized recommendations
- Listen to radio
- Search for music
- Create playlists
- See what your friends are listening to
- Use Siri to play music
- Change the way music sounds
- Get started with News
- Use News widgets
- See news stories chosen just for you
- Read stories
- Follow your favorite teams with My Sports
- Listen to Apple News Today
- Subscribe to Apple News+
- Browse and read Apple News+ stories and issues
- Use Offline Mode to read downloaded News content
- Manually download Apple News+ issues
- Listen to audio stories
- Solve puzzles in Apple News
- Solve crossword and crossword mini puzzles
- Solve Quartiles puzzles
- Search for news stories
- Save stories in News for later
- Subscribe to individual news channels
- Get started with Notes
- Add or remove accounts
- Create and format notes
- Draw or write
- Add photos, videos, and more
- Scan text and documents
- Work with PDFs
- Create Quick Notes
- Search notes
- Organize in folders
- Organize with tags
- Use Smart Folders
- Export or print notes
- Change Notes settings
- Make a call
- View and delete the call history
- Answer or decline incoming calls
- While on a call
- Have a conference or three-way call on iPhone
- Set up voicemail
- Check voicemail
- Change voicemail greeting and settings
- Select ringtones and vibrations
- Make calls using Wi-Fi
- Set up call forwarding
- Set up call waiting
- Block or avoid unwanted calls
- View photos and videos
- Play videos and slideshows
- Delete or hide photos and videos
- Edit photos and videos
- Trim video length and adjust slow motion
- Edit Cinematic mode videos
- Edit Live Photos
- Edit portraits
- Use photo albums
- Edit, share, and organize albums
- Filter and sort photos and videos in albums
- Make stickers from your photos
- Duplicate and copy photos and videos
- Merge duplicate photos and videos
- Search for photos
- Identify people and pets
- Browse photos by location
- Share photos and videos
- Share long videos
- View photos and videos shared with you
- Watch memories
- Personalize your memories
- Manage memories and featured photos
- Use iCloud Photos
- Create shared albums
- Add and remove people in a shared album
- Add and delete photos and videos in a shared album
- Set up or join an iCloud Shared Photo Library
- Add content to an iCloud Shared Photo Library
- Use iCloud Shared Photo Library
- Import and export photos and videos
- Print photos
- Find podcasts
- Listen to podcasts
- Follow your favorite podcasts
- Use the Podcasts widget
- Organize your podcast library
- Download, save, or share podcasts
- Subscribe to podcasts
- Listen to subscriber-only content
- Change download settings
- Make a grocery list
- Add items to a list
- Edit and manage a list
- Search and organize lists
- Work with templates
- Use Smart Lists
- Print reminders
- Use the Reminders widget
- Change Reminders settings
- Browse the web
- Search for websites
- Customize your Safari settings
- Change the layout
- Use Safari profiles
- Open and close tabs
- Organize your tabs
- View your Safari tabs from another Apple device
- Share Tab Groups
- Use Siri to listen to a webpage
- Bookmark favorite webpages
- Save pages to a Reading List
- Find links shared with you
- Annotate and save a webpage as a PDF
- Automatically fill in forms
- Get extensions
- Hide ads and distractions
- Clear your cache and cookies
- Browse the web privately
- Use passkeys in Safari
- Check stocks
- Manage multiple watchlists
- Read business news
- Add earnings reports to your calendar
- Use a Stocks widget
- Translate text, voice, and conversations
- Translate text in apps
- Translate with the camera view
- Subscribe to Apple TV+, MLS Season Pass, or an Apple TV channel
- Add your TV provider
- Get shows, movies, and more
- Watch sports
- Watch Major League Soccer with MLS Season Pass
- Control playback
- Manage your library
- Change the settings
- Make a recording
- Play it back
- Edit or delete a recording
- Keep recordings up to date
- Organize recordings
- Search for or rename a recording
- Share a recording
- Duplicate a recording
- Keep cards and passes in Wallet
- Set up Apple Pay
- Use Apple Pay for contactless payments
- Use Apple Pay in apps and on the web
- Track your orders
- Use Apple Cash
- Use Apple Card
- Use Savings
- Pay for transit
- Access your home, hotel room, and vehicle
- Add identity cards
- Use COVID-19 vaccination cards
- Check your Apple Account balance
- Use Express Mode
- Organize your Wallet
- Remove cards or passes
- Check the weather
- Check the weather in other locations
- View weather maps
- Manage weather notifications
- Use Weather widgets
- Learn the weather icons
- Find out what Siri can do
- Tell Siri about yourself
- Have Siri announce calls and notifications
- Add Siri Shortcuts
- About Siri Suggestions
- Use Siri in your car
- Change Siri settings
- Contact emergency services
- Use Emergency SOS via satellite
- Request Roadside Assistance via satellite
- Set up and view your Medical ID
- Use Check In
- Manage Crash Detection
- Reset privacy and security settings in an emergency
- Set up Family Sharing
- Add Family Sharing members
- Remove Family Sharing members
- Share subscriptions
- Share purchases
- Share locations with family and locate lost devices
- Set up Apple Cash Family and Apple Card Family
- Set up parental controls
- Set up a child’s device
- Get started with Screen Time
- Protect your vision health with Screen Distance
- Set up Screen Time
- Set communication and safety limits and block inappropriate content
- Set up Screen Time for a family member
- Charging cable
- Power adapters
- MagSafe chargers and battery packs
- MagSafe cases and sleeves
- Qi-certified wireless chargers
- Use AirPods
- Use EarPods
- Apple Watch
- Wirelessly stream videos and photos to Apple TV or a smart TV
- Connect to a display with a cable
- HomePod and other wireless speakers
- Pair Magic Keyboard
- Enter characters with diacritical marks
- Switch between keyboards
- Use shortcuts
- Choose an alternative keyboard layout
- Change typing assistance options
- External storage devices
- Bluetooth accessories
- Share your internet connection
- Allow phone calls on your iPad and Mac
- Use iPhone as a webcam
- Hand off tasks between devices
- Cut, copy, and paste between iPhone and other devices
- Stream video or mirror the screen of your iPhone
- Start SharePlay instantly
- Use AirDrop to send items
- Connect iPhone and your computer with a cable
- Transfer files between devices
- Transfer files with email, messages, or AirDrop
- Transfer files or sync content with the Finder or iTunes
- Automatically keep files up to date with iCloud
- Intro to CarPlay
- Connect to CarPlay
- Use your vehicle’s built-in controls
- Get turn-by-turn directions
- Change the map view
- Make phone calls
- View your calendar
- Send and receive text messages
- Announce incoming text messages
- Play podcasts
- Play audiobooks
- Listen to news stories
- Control your home
- Use other apps with CarPlay
- Rearrange icons on CarPlay Home
- Change settings in CarPlay
- Get started with accessibility features
- Turn on accessibility features for setup
- Change Siri accessibility settings
- Open features with Accessibility Shortcut
- Change color and brightness
- Make text easier to read
- Reduce onscreen motion
- Customize per-app visual settings
- Hear what’s on the screen or typed
- Hear audio descriptions
- Turn on and practice VoiceOver
- Change your VoiceOver settings
- Use VoiceOver gestures
- Operate iPhone when VoiceOver is on
- Control VoiceOver using the rotor
- Use the onscreen keyboard
- Write with your finger
- Keep the screen off
- Use VoiceOver with an Apple external keyboard
- Use a braille display
- Type braille on the screen
- Customize gestures and keyboard shortcuts
- Use VoiceOver with a pointer device
- Use VoiceOver for images and videos
- Use VoiceOver in apps
- Use AssistiveTouch
- Adjust how iPhone responds to your touch
- Use Reachability
- Auto-answer calls
- Turn off vibration
- Change Face ID and attention settings
- Use Voice Control
- Adjust the side or Home button
- Use Apple TV Remote buttons
- Adjust pointer settings
- Adjust keyboard settings
- Control iPhone with an external keyboard
- Adjust AirPods settings
- Turn on Apple Watch Mirroring
- Control a nearby Apple device
- Intro to Switch Control
- Set up and turn on Switch Control
- Select items, perform actions, and more
- Control several devices with one switch
- Use hearing devices
- Use Live Listen
- Use sound recognition
- Set up and use RTT and TTY
- Flash the indicator light for notifications
- Adjust audio settings
- Play background sounds
- Display subtitles and captions
- Show transcriptions for Intercom messages
- Get live captions of spoken audio
- Type to speak
- Record a Personal Voice
- Lock iPhone to one app with Guided Access
- Use built-in privacy and security protections
- Set a passcode
- Set up Face ID
- Set up Touch ID
- Control access to information on the Lock Screen
- Keep your Apple ID secure
- Use passkeys to sign in to apps and websites
- Sign in with Apple
- Share passwords
- Automatically fill in strong passwords
- Change weak or compromised passwords
- View your passwords and related information
- Share passkeys and passwords securely with AirDrop
- Make your passkeys and passwords available on all your devices
- Automatically fill in verification codes
- Automatically fill in SMS passcodes
- Sign in with fewer CAPTCHA challenges
- Use two-factor authentication
- Use security keys
- Manage information sharing with Safety Check
- Control app tracking permissions
- Control the location information you share
- Control access to information in apps
- Control how Apple delivers advertising to you
- Control access to hardware features
- Create and manage Hide My Email addresses
- Protect your web browsing with iCloud Private Relay
- Use a private network address
- Use Advanced Data Protection
- Use Lockdown Mode
- Use Stolen Device Protection
- Receive warnings about sensitive content
- Use Contact Key Verification
- Turn iPhone on or off
- Force restart iPhone
- Back up iPhone
- Reset iPhone settings
- Restore all content from a backup
- Restore purchased and deleted items
- Sell, give away, or trade in your iPhone
- Erase iPhone
- Install or remove configuration profiles
- Important safety information
- Important handling information
- Find more resources for software and service
- FCC compliance statement
- ISED Canada compliance statement
- Ultra Wideband information
- Class 1 Laser information
- Apple and the environment
- Disposal and recycling information
- Unauthorized modification of iOS
Use the built-in privacy and security protections of iPhone
iPhone is designed to protect your data and your privacy. Built-in privacy features minimize how much of your information is available to anyone but you, and you can adjust what information is shared and where you share it. Built-in security features help prevent anyone but you from accessing the data on your iPhone and in iCloud.
To take maximum advantage of the privacy and security features built into iPhone, follow these practices.
Protect access to your iPhone
Set a strong passcode: Setting a passcode to unlock iPhone is the most important thing you can do to safeguard your device.
Use Face ID or Touch ID: Face ID ( supported models ) or Touch ID ( supported models ) provides a secure and convenient way to unlock your iPhone, authorize purchases and payments, and sign in to many third-party apps. See Set up Face ID on iPhone or Set up Touch ID on iPhone .
Turn on Find My iPhone: Find My helps you find your iPhone if it’s lost or stolen and prevents anyone else from activating or using your iPhone if it’s missing.
Control what features are available without unlocking your iPhone: Disallow or allow access to some commonly used features, such as Control Center and USB connections, when your device is locked.
Turn on Stolen Device Protection: Stolen Device Protection is a security feature designed to protect against the rare instance when someone has stolen your iPhone and knows your passcode. When this feature is turned on, certain actions require you to authenticate with Face ID or Touch ID, while more sensitive operations require a Security Delay. See Use Stolen Device Protection on iPhone .
Keep your Apple ID secure
Your Apple ID provides access to your data in iCloud and your account information for services like the App Store and Apple Music. To learn how to protect the security of your Apple ID, see Keep your Apple ID secure on iPhone .
Make account sign-ins safer and easier
For participating websites and apps, there are multiple ways to make sign-in more convenient and secure.
Sign in with passkeys: Passkeys let you sign in to website and app accounts with Face ID or Touch ID instead of a password. Because a passkey doesn’t leave the devices where you’re signed in with your Apple ID, and because it’s specific to the website or app you create it for, it’s protected from leaks and phishing attempts. And unlike a password, you don’t have to create, guard, or remember it.
Use Sign in with Apple: You can use your Apple ID instead of creating and remembering user names and passwords for signing in to accounts. Sign in with Apple also provides the security of two-factor authentication , and it limits the information shared about you.
Let iPhone create strong passwords: If passkey support or Sign in with Apple isn’t available when you sign up for a service, let iPhone automatically create a strong password that you don’t have to remember.
For all your website and app passwords, there are many other ways to make sign-in safer and easier.
Replace weak passwords: If you create any weak or compromised passwords, iPhone automatically identifies them for you to fix.
Share passkeys and passwords securely: Use AirDrop to securely share a passkey or password with someone using their iPhone, iPad, or Mac.
Use the built-in authenticator for two-factor authentication: For websites and apps that offer two-factor authentication, fill in automatically generated verification codes without relying on SMS messages or additional apps.
Easily fill in SMS passcodes: You can automatically fill in one-time passcodes sent from websites and apps to your iPhone.
Keep passkeys and passwords up to date on all your devices: iCloud Keychain automatically keeps your credentials up to date across your other devices.
Manage the information you share with people and apps
Use Safety Check: You can quickly and conveniently review and update information you share with people and apps. If your personal safety is at risk, you can also use Safety Check to immediately stop sharing information .
Control app tracking: All apps are required to ask your permission before tracking you or your iPhone across websites and apps owned by other companies for advertising or to share your information with a data broker. You can change permission later, and you can stop all apps from requesting permission.
Control what you share with apps: You can review and adjust the data you share with apps , the location information you share , the hardware you share , and how Apple delivers advertising to you in the App Store, Apple News, and Stocks .
Review the privacy practices of apps: Go to the app’s product page in the App Store for a developer-reported summary of the app’s privacy practices, including what data is collected. For the apps that you download, review the App Privacy Report , which shows you how apps are using the permissions you granted them.
Use Contact Key Verification: You can use Contact Key verification to generate unique codes that you and your contacts can use to verify each other’s identities. See Use Contact Key Verification on iPhone .
Protect your email privacy
Protect your Mail activity: Turn on Mail Privacy Protection to make it harder for senders to learn about your Mail activity. Mail Privacy Protection hides your IP address so senders can’t link it to your other online activity or use it to determine your exact location. Mail Privacy Protection also prevents senders from seeing whether you’ve opened the email they sent you.
Hide your personal email address: When you subscribe to iCloud+, Hide My Email allows you to generate unique, random email addresses that forward to your personal email account. You don’t have to share your personal email address when filling out forms or signing up for newsletters on the web, or when sending email .
Protect your web browsing
Use the internet more privately with iCloud Private Relay: When you subscribe to iCloud+, you can use iCloud Private Relay to help prevent websites and network providers from creating a detailed profile about you.
Manage your privacy, and help protect yourself against malicious websites: Safari helps prevent trackers from following you across websites. You can review the Privacy Report to see a summary of trackers that have been encountered and prevented by Intelligent Tracking Prevention on the current webpage you’re visiting. You can also review and adjust Safari settings to keep your browsing activities private from others who use the same device, and help protect yourself from malicious websites. See Browse the web privately in Safari on iPhone .
Lock down your iPhone if it’s facing a sophisticated cyberattack
If you find your iPhone and personal accounts are targeted by sophisticated remote attacks, you can also help protect yourself with Lockdown Mode. Lockdown Mode offers an extreme level of security for the very few users who, because of who they are or what they do, may be personally targeted by some of the most sophisticated digital threats, such as those from private companies developing state-sponsored mercenary spyware. Lockdown Mode automatically protects Safari, Messages, Home, and many other Apple services and apps. Webpages and internet communications continue working, but with reduction in performance and usability. See Harden your iPhone from a cyberattack with Lockdown Mode .
To get personalized support for these practices, go to the Apple Support website (not available in all countries or regions).
To learn how Apple designs security into the core of its platforms, see the Apple Platform Security User Guide . To learn more about how Apple protects your information, go to the Privacy website .
Tips & Tricks
Troubleshooting, why does safari say “not secure” for some webpages on iphone, ipad, or mac.

If you’re a Safari user who recently updated iOS or MacOS, you may occasionally run into a “Not Secure” message near the top of the screen when viewing some websites or while browsing the web.
That ‘Not Secure’ text is simply a notification from Safari that the webpage or website is using HTTP, rather than HTTPS. This is also reflected in the URL prefix of a website, for example https://osxdaily.com vs https://osxdaily.com
The “Not Secure” message is not an indication of any change in device security. In other words, the device and website is no more or no less secure than it was before updating the web browser and seeing the “Not Secure” message. By seeing the ‘Not Secure” Safari message on an iPhone, iPad, or Mac you are simply being informed by Safari that the website or webpage being visited is using HTTP rather than HTTPS, or perhaps that HTTPS is misconfigured at some technical level.
The “Not Secure” message may also be seen if the website has an expired SSL certificate, or an improperly configured SSL certificate, in which case that is an issue with the website itself. Again, this is not reflective of on-device security (ie; the iPhone, Mac, iPad, etc is not any less secure, it’s an issue with the website itself).
HTTP stands for HyperText Transfer Protocol and has been the standard web protocol since the beginning of the web. By default, HTTP does not encrypt communication to and from the website. You can learn more about HTTP on Wikipedia if interested.
HTTPS stands for HyperText Transfer Protocol Secure, and until recently was mostly reserved for websites where encryption matters, like with an online banking website, or anything where submitting sensitive data to and from a web site should be encrypted. When a website is using HTTPS properly it means the communication to and from the website is encrypted. You can learn more about HTTPS on Wikipedia if you’re interested.
Because both Safari and Chrome now use the “Not Secure” text in the URL bar of HTTP pages, it’s likely that more and more webpages will start moving to HTTPS simply to avoid any confusion for site visitors. Moving to HTTPS from HTTP is a technical process, so while many websites will have moved to HTTPS already others have not yet done so and remain on HTTP.
It is worth pointing out that if you see a “Not Secure” message on an online banking website or a website where you are want to transmit sensitive data like a credit card number or social security number, than you should probably close that website. However, if you see the “Not Secure” text on a website where you are not inputting or transmitting any sensitive data, like a news website, information site, blog, or personal site, it likely doesn’t matter much as long as there are no logins and no transfer of sensitive information, which is when encryption matters the most.
For those wondering, the ‘Not Secure’ message in the URL bar of Safari on iPhone, iPad, and Mac OS was introduced with iOS 12.2 update and MacOS 10.14.4 update , and will likely persist with future iOS and MacOS versions of Safari too. It’s also worth pointing out that the Google Chrome browser has a similar ‘Not Secure’ message in the address / search / URL bar in modern versions of Chrome as well.
Enjoy this tip? Subscribe to our newsletter!
Get more of our great Apple tips, tricks, and important news delivered to your inbox with the OSXDaily newsletter.
You have successfully joined our subscriber list.
Related articles:
- How to Use “Secure Empty Trash” Equivalent in OS X El Capitan
- How to Turn Off Split Screen in Safari for iPad? Exiting Safari Split Screen in iPadOS
- Secure Empty Trash in Mac OS X
- OSXDaily.com Privacy Policy
23 Comments
» Comments RSS Feed
Your suggestion to learn more about the protocol by visiting https://en.wikipedia.org/wiki/HTTPS might have been useful if Safari hadn’t said “cannot open because this website is not secure” !! Try updating the article to address older iOS versions.
What is the issue you are having?
Great article. Tells me everything I never wanted to know about why I can’t browse to a website. So much “doesn’t work, don’t care” in this article.
So glad it helped you understand why you might see the “Not Secure” badge on a website. It can also be because of expired certificates etc, but just Not Secure will not block you from seeing a site.
This is helpful thanks for the information, sounds like scare mongering!
I now understand why people suddenly decide to go off to live in the middle of the woods. I give up. I used to love modern technology, but I don’t like being spied on. I’m going off grid.
I can’t even bloody open my hospital website to get a contact number for a ward as it says “not secure” and won’t open, so I don’t know what others are saying that it doesn’t affect your browsing! It does!. 😡
I agree, I get the message and the iPad won’t open the site.
Even this site is ‘Not Secure’! Will I regret writing on here. I’ve just spent an hour on Vodafone chat about it thinking my phone had been hacked. I was told to change my browser to Chrome or Firefox.
Jill, here is an article that describes what the “Not Secure” message usually means if you see it on iPhone, iPad, or Mac web browsers:
https://osxdaily.com/2019/03/29/safari-not-secure-website-ios-mac/
I don’t care if I can still search. How do I turn the damn thing off? I have an iPad. I don’t want one more thing to ignore. I accidentally hit the update button and I’m always sorry. Apple seems to delight in aggravating users.
Is there anyway to turn it off or turn whatever off that’s making it do this? Almost everything I try to search does it and I can’t do anything!! I’m very angry 😡
Are you seeing something else? Certificate warnings? What is the device or OS?
The “Not Secure” Safari badge is only a message and has no impact on the ability to use Safari or the websites, you can still search and go to websites as normal, it’s just a goofy message that can be ignored with no impact on using websites, the only websites where it matters are banking and personal data website like health, email, financial, tax, etc. All it is basically is a notification indicating the website is HTTP rather than HTTPS. For the vast history of the web, HTTP was used until very recently.
this site IS using a https and it still says that on my iPhone but not my mac
https doesn’t just encrypt content it also prevents it from being modified. Hotels have been found changing the ads in news pages and replacing them with their own to make money. The company hosting the page loses the ad revenue.
That is true too, I have heard of some telecom companies doing that same thing in other parts of the world as well.
And for web sites that are ad-supported, that should be a good motivating factor to get migrated to https!
https://www.osxdaily.com = 24 Characters https://osxdaily.com = 23 Characters Not Secured – osxdaily.com = 26 Characters
Once again. Apple tries to reinvent the wheel and make it bloated, like their apps and updates. I use to really like Apple. OS X actually (not an iPhone user) but they just annoying me now.
And because none of this is banking it doesn’t even matter.
It’s alarmism. Like putting a big NOT SECURE sticker on a car because it might theoretically get into a car accident.
Honestly, it is annoying that they focus so much on saying the site is “not secure” if it doesn’t use SSL/TLS. Some sites are informational only and don’t need to be encrypted.
I agree completely, and it only confuses people who don’t know that HTTP (“Not Secure”) has been the web standard they’ve been using for decades already before.
Why is OSXDaily not using https at the first place? Even if I try to force https it redirects to http
We use https on the admin side, http on the public side. We’ll have to tackle https on the public side at some point to avoid confusion.
But ultimately there is no sensitive information being transmitted here, so it really does not matter much.
Paul, your argument is not exactly accurate:
https://https.cio.gov/everything/
> Every unencrypted HTTP request reveals information about a user’s behavior, and the interception and tracking of unencrypted browsing has become commonplace. Today, there is no such thing as non-sensitive web traffic, and public services should not depend on the benevolence of network operators.
Leave a Reply
Name (required)
Mail (will not be published) (required)
Subscribe to OSXDaily
- - 2 of the Best Hex Editors for Mac: ImHex & Hex Fiend
- - How to Update Node.js to Latest Version on Mac
- - How to Summarize & Analyze PDF Documents with ChatGPT on Mac
- - Enable Night Shift on Apple Watch with Siri
- - How to Install tvOS 18 beta on Apple TV
- - Beta 2 of iOS 17.6, iPadOS 17.6, & macOS Sonoma 14.6 Released for Testing
- - ChatGPT for Mac Now Available to All
- - MacOS Sequoia 15 Beta 2 Available to Download
- - iOS 18 Beta 2 Download Available Now for iPhone & iPad
- - Beta 1 of iOS 17.6, macOS Sonoma 14.6, iPadOS 17.6 Released for Testing
iPhone / iPad
- - How to Downgrade iOS 18 Beta to iOS 17
- - How to Use Screen Distance on iPhone & iPad to Help Eye Health
- - How to Fix iPhone “Charging on Hold” Message
- - How to Install iOS 18 Beta on iPhone
- - Fun: Get a Bouncy Ball to Play With on Your Mac Screen
- - Fix “A software update is required to install macOS in a virtual machine” Error on Mac
- - Can I Keep My MacBook Pro/Air Plugged in All The Time?
- - sysmond on Mac Using High CPU? Here’s the Likely Reason & How to Fix It

About OSXDaily | Contact Us | Privacy Policy | Sitemap
This website is unrelated to Apple Inc
All trademarks and copyrights on this website are property of their respective owners.
© 2024 OS X Daily. All Rights Reserved. Reproduction without explicit permission is prohibited.
Apple announces powerful new privacy and security features
Privacy Features Give Users Greater Control of Their Data

Features Designed to Help Protect User Safety

Powerful Security Protections to Safeguard User Data

Additional Features Designed with Privacy and Security at Their Core
- Check In makes it easy for users to let friends or family members know they’ve reached their destination safely. Once turned on by the user, Check In automatically detects when the user has reached their intended destination, and will let selected contacts know via Messages. In the case that something unexpected happens while the user is on their way, Check In will recognize that the user is not making progress toward their declared destination and check in with them. If they don’t respond, the feature will share useful information — like the user’s precise location, battery level, cell service status, and the last active time using their iPhone — with the contacts the user selected. In addition to making it easier to get help if needed, Check In is designed around privacy and security, keeping the user in control by letting them choose whom to share their information with, including the destination and time duration that they set. Users can end the Check In session at any time. Information sent with Check In is end-to-end encrypted so only the user’s family member or friend can read it, not Apple or anyone else.
- With NameDrop , a new AirDrop experience, a user can hold their iPhone near another to share their contact information with only their intended recipients. Users can also choose the specific contact details they want to share — and, importantly, what information they don’t want to share. Users can also share content like photos or links the same way. Apple Watch users can also use NameDrop by tapping the Share button in My Card in the Contacts app, or by tapping the My Card watch face complication, and then bringing Apple Watch face to face with someone else’s Apple Watch. As with all AirDrop experiences, these new features securely share content over an encrypted connection.
- Live Voicemail makes it easier to know when to answer a phone call. When someone calls and starts to leave a message, users will see a live transcription as the caller speaks. If the user wants to talk to the caller, they can pick up the call at any time. When Silence Unknown Callers is turned on, calls from unknown numbers will go directly to Live Voicemail without ringing. Calls identified as spam by carriers won’t appear as Live Voicemail, and will instead be instantly declined. This gives the user more peace of mind that spam, scams, or calls that may be invasive of privacy, can be ignored without missing important calls. Thanks to the power of the Neural Engine, Live Voicemail occurs entirely on device, and this information is not shared with Apple.
Text of this article
June 5, 2023
PRESS RELEASE
CUPERTINO, CALIFORNIA Apple today announced its latest privacy and security innovations, including major updates to Safari Private Browsing, Communication Safety, and Lockdown Mode, as well as app privacy improvements. Additionally, Apple introduced new features designed with privacy and security at their core, including Check In, NameDrop, and Live Voicemail. These new efforts are the latest manifestation of Apple’s deeply held belief that privacy is a fundamental human right and that good privacy is built on a foundation of strong security.
“Privacy is designed into every new Apple product and feature from the beginning,” said Craig Federighi, Apple’s senior vice president of Software Engineering. “We are focused on keeping our users in the driver’s seat when it comes to their data by continuing to provide industry-leading privacy features and the best data security in the world. This approach is evident in a number of features on our platforms, like the major updates to Safari Private Browsing, as well as the expansion of Lockdown Mode.”
Major Updates to Safari Private Browsing Safari introduced private browsing years before any other browser. This year, a significant update provides even greater protection against trackers as users browse the web and from people who might have access to their device. Advanced tracking and fingerprinting protections go even further to help prevent websites from using the latest techniques to track or identify a user’s device. Private Browsing now locks when not in use, allowing a user to keep tabs open even when stepping away from the device.
Photos Privacy Permission Improvements A new embedded Photos picker can help users share specific photos with apps while keeping the rest of their library private. When apps ask to access the user’s entire photo library, the user will be shown more information about what they’ll be sharing, along with occasional reminders of their choice.
Link Tracking Protection in Messages, Mail, and Safari Private Browsing Some websites add extra information to their URLs in order to track users across other websites. Now this information will be removed from the links users share in Messages and Mail, and the links will still work as expected. This information will also be removed from links in Safari Private Browsing.
App Privacy Improvements New tools give developers more information about the data practices of third-party software development kits (SDKs) they use in their apps, allowing them to provide even more accurate Privacy Nutrition Labels. These changes also improve the integrity of the software supply chain by supporting signatures for third-party SDKs to add another layer of protection against abuse.
Communication Safety Communication Safety, designed to warn children when receiving or sending photos in Messages that contain nudity, now covers video content in addition to still images. A new API lets developers integrate Communication Safety right into their apps. Additionally, the feature will now help keep kids safe when they’re sending and receiving an AirDrop, a FaceTime video message, and when using the Phone app to receive a Contact Poster and the Photos picker to choose content to send. All image and video processing for Communication Safety occurs on device, meaning neither Apple nor any third party gets access to the content. These warnings will be turned on for the child accounts in their Family Sharing plan, and can be disabled by the parent.
Sensitive Content Warning Sensitive Content Warning helps adult users avoid seeing unwanted nude images and videos when receiving them in Messages, an AirDrop, a FaceTime video message, and the Phone app when receiving a Contact Poster, all using the same privacy-preserving technology at the core of Communication Safety. The feature is optional and can be turned on by the user in Privacy & Security settings. As with Communication Safety, all image and video processing for Sensitive Content Warning occurs on device, meaning neither Apple nor any third party gets access to the content.
Passwords and Passkeys Updates For easier and more secure password and passkey sharing, users can create a group to share a set of passwords, and everyone in the group can add and edit passwords to keep them up to date. Since sharing is through iCloud Keychain, it is end-to-end encrypted. Additionally, one-time verification codes received in Mail will now automatically autofill in Safari, making it easy to securely log in without leaving the browser.
Lockdown Mode Lockdown Mode expands to provide even more protections for those who may be targeted by mercenary spyware because of who they are or what they do. New protections encompass safer wireless connectivity defaults, media handling, media sharing defaults, sandboxing, and network security optimizations. Turning on Lockdown Mode further hardens device defenses and strictly limits certain functionalities, sharply reducing the attack surface for those who need additional protections. Additionally, Lockdown Mode will be supported on watchOS.
These features will be coming in free software updates this fall.
Press Contacts
Apple Media Helpline
Images in this article
How To Remove Apple Security Alerts & Mac Pop-up Viruses
While most Apple virus warning pop-ups and security alerts are scams, they can be red flags signaling real issues that threaten your internet safety.
Jason Fragoso
SVP of Growth at Aura
Jason Fragoso is SVP of Growth at Aura. As a father of two he cares deeply about creating a safer internet for all families.
Jory MacKay
Aura Cybersecurity Editor
Jory MacKay is a writer and award-winning editor with over a decade of experience for online and print publications. He has a bachelor's degree in journalism from the University of Victoria and a passion for helping people identify and avoid fraud.

Aura’s app keeps you safe from scams, fraud, and identity theft. Try Aura for free.
In this article:

Aura’s digital security app keeps your family safe from scams, fraud, and identity theft.
Is the Apple Security Alert Real?
If you’re seeing pop-up messages warning you of security alerts or virus attacks against your Apple device, you’re most likely worried. But while these messages may look real, they’re almost certainly scams .
While Macs can get viruses , only about 7% of all malware targets Mac computers — compared to 91% for Windows devices [ * ].
These fake pop-ups are designed to trick you into giving up your sensitive information, clicking on links that download malware, or calling a scam phone number.
The bad news is that these pop-ups can indicate that your device is compromised in some way. However, the good news is that it doesn’t take much work to remove these pop-ups, check your device for viruses, and secure your identity.
In this guide, we’ll explain how the Mac pop-up virus and Apple security alert scams work — and how you can remove them from your device.
{{show-toc}}
What Is the Apple Security Alert Pop-Up Scam? Why Are You Seeing It?
Thanks to Apple's secure ecosystem, iOS and macOS users don't encounter many security breaches. This means that the overwhelming majority of security alerts are scams.
Depending on the type of scam, you may see messages like “Urgent action required!” or “Viruses have been detected on your Mac/Apple iPhone.”

For the most part, fake Apple security alerts are harmless unless you click on them (although some may signal that your device is infected with adware or spyware).
Cybercriminals use urgent language to scare you into clicking on their malicious links, which could give hackers access to your device , connect you with a fake tech support agent, or download malware posing as fake antivirus software.
Here are some of the reasons why you might be seeing scam pop-ups:
- Malware, adware, or potentially unwanted programs (PUPs). If you accidentally downloaded malicious or infected apps on your Mac or iOS device, they can control the device and show constant pop-ups to redirect you to fake websites or phone numbers.
- Excessive browser permissions or malicious cookies. Sketchy websites can request permissions from your web browser, which may lead to pop-up ads in the form of fake security alerts. Similarly, Apple devices can pick up malicious cookies that contribute to persistent ads.
- Visiting fake websites. Scammers can create look-alikes of well-known sites that trick you into thinking you're somewhere safe and familiar. These fake websites are embedded with pop-up alerts advertising fake security updates or pointing to imaginary vulnerabilities on your device.
- Clicking on fraudulent text messages and email scams. If you clicked on a malicious link in a scam text message or email, you may have infected your device with malware that triggers fake alerts. You may also receive a security alert in the form of a text or email — but this is a phishing attempt to steal your personal data.
- Hacked computers or jailbroken iOS devices. If hackers have access to your device, they can inject malware or hijack your browser and force you onto fake sites. If you jailbreak your device, you could also expose it to unchecked malicious apps.
- Suspicious extensions. While Apple makes it difficult to download suspicious extensions, you may still encounter malicious extensions, especially on jailbroken devices . These extensions could compromise your device with malware or generate fake alerts and ads.
Does Apple send security alerts? Yes, Apple does send real threat notifications — but only to users targeted by state-sponsored attacks [ * ]. These notifications will appear when you log in to your Apple ID at appleid.apple.com or via email and iMessage. Be cautious when handling emails from Apple as scammers may imitate the official communications.
9 Warning Signs of a Fake Apple Virus or Pop-Up Scam
If you’re still worried that your device has been hacked or compromised, look for these common warning signs that you’re dealing with a scam pop-up:
- Unexpected emails, text messages, or pop-ups claiming your device has a virus. No person or website can tell you that your Apple device is infected with a virus unless you give them access to it. Any email, text, or strange pop-up that warns you of an infection is almost certainly a scam (unless it comes from a reputable antivirus provider).
- Requests to call a technical support number. Calling technical support is often one of the last troubleshooting steps, but many scams try to get you on the phone right away. If you get a message telling you to call a strange number, it's likely a scam. You can also double-check the phone number to verify it's not an Apple number.
- Payment requests — especially using nontraditional methods. Fake security alerts may be advertisements for sketchy antivirus programs or services. Be especially wary if you’re asked to pay for an app or service via payment apps (Zelle, Venmo, etc.), gift cards, or wire transfers.
- Constant pop-ups on your Mac or iPhone. The presence of regular pop-ups means you probably have adware or some other nefarious program or extension on your Apple device. If you start seeing unwanted pop-ups, there's a chance you're going to get a fake security alert at some point.
- You’re asked to share personal information (including passwords). No serious cybersecurity alert will request your personal information. Scammers, however, try to pry away your private data, such as login details and your financial information.
- Your device is acting strangely, getting hot, or crashing regularly. A computer or phone that's acting up may signal that it’s been infected with malware or a virus. These infections run in the background or use up resources, which can overheat your device and cause shutdowns.
- You keep getting redirected to other websites. If you're being taken to sites without your permission, you may have a browser hijacker or a remote access hacker . For instance, some PUPs can cause both browser redirects and fake security alerts.
- Your default browser or other settings suddenly change. Certain types of malware and malicious extensions can change your browser settings without your authorization. If your settings change, don't be surprised if you get fake security alerts as well.
- Any other signs of a phishing attack. When scammers set their sights on you, they may try multiple tactics to steal your information. If you're being bombarded with phishing attempts , such as unsolicited emails, phone calls, or job offers, scammers could also resort to fake virus alerts.
Did you click on a pop-up link or give someone sensitive data? Act quickly! Mac and iPhone pop-up scams can lead to hacking, account takeovers, or even identity theft. If you think you’re a victim, follow these steps on what to do if you clicked on a phishing link or gave up personal information .
How To Remove Fake Apple Security Alerts and Pop-Up Scams (Mac and iPhone)
- Scan your Apple device for malware
- Delete potentially unwanted programs (PUPs)
- Remove suspicious browser extensions
- Check website permission settings
- Clear your browser cookies, cache, and other data
- Block pop-ups in your browser
- Perform a factory reset
While Macs and iPhones keep most malware and viruses at bay, they aren't invincible. If you start seeing fake security alerts and pop-up scams on your Apple devices, follow the steps below to remove them.
1. Scan your Apple device for malware
Many fake security alerts stem from malware and adware deeply embedded in your Apple device, possibly even hiding in your settings or preferences.
To stop pop-up scams, you need to first find the malware at the root of the problem. While Apple doesn't allow third-party apps to scan iPhones, Mac users can find reliable antivirus software from reputable providers.
How to scan your Apple device for malware:
- Avoid free or suspicious antivirus offers. Hackers often hide viruses and ransomware in free antivirus apps or Mac/iPhone “cleanup” tools. Avoid these by only downloading apps from the official Apple App Store — where you can check reviews and know that the developers have passed Apple’s stringent security screenings.
- Run a full scan, and delete suspicious apps. For example, if you’re using Aura’s antivirus software, click on Scan for Viruses and then Full Scan and Scan Now. Aura will detect and quarantine all infected files, which you can delete immediately or leave for automatic deletion.
2. Delete potentially unwanted programs (PUPs)
Apple security alerts are often caused by PUPs — potentially unwanted programs that can lead to annoying ads and unauthorized browser changes. Unlike malware, PUPs may not harm your device directly — but they can contribute to security risks, so it’s best to remove them.

NOTE: Be careful when deleting applications on your Mac. Always research the application name to ensure that it's a PUP before removing it.
How to delete PUPs from your Mac:
- Find and shut down suspicious apps. Open your Finder , select Applications , and then Utilities to find the Activity Monitor . Here, you can see all currently running apps, and spot the suspicious programs. Click on the app you want to shut down, and select Quit or Force Quit to close it [ * ].
- Remove apps. Open your Finder and select Applications . If the app has a folder, open the folder, click on the Uninstaller , and follow the instructions to remove it. If the app doesn't have a folder or uninstaller, drag the suspicious app into the Trash [ * ].
💡 Related: Can Macs Get Viruses? How To Get Rid of Malware on a Mac →
3. Remove suspicious browser extensions
Unwanted browser extensions may redirect you to malicious websites riddled with pop-ups, or cause the fake security alert pop-ups themselves. If you think a rogue extension is the cause of your problems, you need to remove it from your browser to stop the security alerts.
How to remove suspicious browser extensions:
- Safari: Open Safari and click on Settings or Preferences and then click on Extensions . You can now click on the suspicious extension and select Uninstall to remove it [ * ].
- Chrome: Open Chrome and click on the Extensions tab in the Address Bar or click on the three dot icon and then Extensions. You can then select Manage Extensions , click on the suspicious extension, and select Remove [ * ].
- Firefox: Open Firefox and click on the Menu button. Then select Add-on and themes and then Extensions . Find the suspicious extension and click on the Ellipsis icon and then Remove [ * ].
4. Check website permission settings
Many websites use permissions to generate pop-ups or send notifications. Some abuse the process by misleading users or hiding permissions altogether. Because of this, you can allow a site to send you fake notifications without knowing.
How to check website permissions:
- Safari: In Safari , click on Settings or Preferences and then Websites . You'll then see a list of permission categories, such as Pop-Up Windows, Downloads, and Notifications. Click on a category to see what websites have permissions, and adjust them to your liking [ * ].
- Chrome: In Chrome, click on the three dot menu button at the top right of the browser and select Settings . Then click on Privacy and security and Site settings. You can then click on the various permissions to see and adjust what sites have permissions [ * ].
- Firefox: Click on the Menu icon in Firefox and select Settings and Privacy & Security . In the Permissions section, you can select Settings to see and change what sites have access to each permission [ * ].
💡 Related: Can Someone Hack My iPhone? How To Tell & What To Do →
5. Clear your browser cookies, cache, and other data
Over time, your device picks up tracking cookies, data, and scripts that live in your storage and cache. This can lead to unwanted targeted ads, alerts, and pop-ups, along with corrupted or malicious data and site permissions.
When you clear history and website data, cookies, and cache, you refresh your device.
How to clear your browser cookies, cache, and other data:
- Safari: Open up your Safari Settings and click on Clear History and Website Data . You can also click on Advanced and Website Data to Remove All Website Data but keep your history [ * ].
- Chrome: In Chrome, click on the three dot icon. Then click on More tools and Clear browsing data . You can also choose a time range [ * ].
- Firefox: In Firefox, click on the Menu button and select Settings . Then, in the Privacy & Security section, navigate to Cookies and Site Data and select Clear Data [ * ].
6. Block pop-ups in your browser
While scammers use various methods and exploits to generate fake Apple security alerts, many use basic pop-ups. One of the best ways to avoid scam pop-ups is to block them so that you never see them.

How to block pop-ups in your browser:
- Safari: Open your Safari Settings or Preferences . On an iPhone, you can Block Pop-ups from here. On a Mac, navigate to the Websites first and then click on Block Pop-Ups [ * ].
- Chrome: Click on the More icon and then Settings . From there, click on Privacy and security , then Site Settings , and then Pop-ups and redirects . You can block pop-ups here [ * ].
- Firefox: Click on the hamburger Menu button, and click on Settings . Then click on Privacy & Security and navigate to the Permissions section. Enable Block pop-up windows here [ * ].
7. Perform a factory reset
A factory reset will remove all apps, data, and system settings on your device, including most compromised or malicious components. Your device will be returned to its original state, which makes it effective in the fight against malware.
NOTE: Make sure you have a recent and clean backup to restore your personal data.
How to perform a factory reset:
- On your Mac: In the Apple menu, select System Settings or System Preferences . Depending on your device, you may be able to click on Erase All Content and Settings . If not, click on General and then Transfer or Reset first [ * ].
- On your iPhone or iPad: Click on Settings in your iPhone or iPad and then General . Click on Reset [Device] and Erase All Content and Settings [ * ].
💡 Related: Why a Factory Reset Won’t Remove All Viruses (Do This Instead) →
The 5 Latest iOS and Mac Pop-up Viruses To Avoid
Scammers are always finding new ways to trick you with pop-up scams. They're constantly changing the look and language of these pop-ups to keep people guessing.
Some of the versions currently circulating out there include:
- Apple Security Alerts. Thanks to PUPs, adware, and malicious websites, you could receive various Apple Security alerts seeking to lure you into clicking on their links. If you do click, you could download malware, give up your information, or pay for a useless program or service.
- “Your Mac/iOS may be infected with X viruses." This pop-up appears when your device is redirected to one of several malicious sites. The pop-up pretends that the website performed a scan of your computer and discovered multiple viruses — something websites can't do. If you follow through with the download, you'll be required to pay for a fake application.
- “Ask You” Mac pop-up scam. Some websites take advantage of your Mac's Notification Center to send you fake "Ask You" hacks and virus warnings. The warnings may stem from a virus, or when you unintentionally allow notification permissions. The scammers hope to trick you into a fake Apple support phone call or remote session so that they can upload malicious code to your device.
- “Your computer is low on memory” pop-up. This specific pop-up comes from adware or a browser redirect exploit on your Apple device. This pop-up tricks you into clicking on the "close" button, which actually activates browser permissions without you knowing. These permissions can lead to browser changes, as well as recording and stealing your private information.
- “Your browsing history showed visits to unsecured websites.” This fake alert appears in a text message from strange numbers and area codes. Generated by scareware or phishing malware, the text comes with a link that leads to a malicious website. Here, you might pick up a virus or be tricked into buying fake software.
How To Shield Your Mac, iPhone, and iPad From Hackers
While Apple has an excellent track record of keeping malware off its devices, there are still threats that users need to be aware of. Thankfully, you can keep your data and devices safe with a solid digital security setup and a proper cyber hygiene regimen .
Here’s what to do to keep your Apple device virus-free:
- Only download apps from the official App Store. Apple thoroughly vets all apps in its official store for quality and security. While some malicious apps may sneak through, you should be safe if you stick to software in the App Store.
- Tighten your device’s security settings. Apple devices run on relatively secure ecosystems, but you should double-check your Mac's security settings via the System Settings in the Apple menu . Click on Privacy & Security and ensure that your device only runs apps from the Mac App Store from identified developers [ * ].
- Enable auto-updates on your operating system and apps. Apple regularly sends security updates and patches, so be sure to enable auto-updates. In the menu bar of your device, select Settings or System Settings and General . From there, click on Software Update and turn on automatic updates.
- Keep regular backups of your important data. If your device gets corrupted, you may need to restore the device to a secure backup. When this happens, you uninstall all apps and delete all files and settings. If you maintain a regular backup, you won't lose your important data in the process.
- Pay attention to legitimate Gatekeeper alerts. Macbooks and other MacOS devices have Gatekeeper, a security technology that sends alerts when you open a risky app. You may be alerted when opening an app downloaded from an unverified source, an app with an unverified developer, or an app that might damage your computer. Do not ignore these.
- Use strong passwords and 2FA on your accounts. Passwords and two-factor authentication are the only defenses that your online accounts have against cybercriminals. Make passwords strong and unique, and regularly update them to keep intruders out. A secure password manager allows you to create and store unique passwords for every account, so you don’t have to worry about remembering them.
- Look for the warning signs of phishing scams. You can avoid most phishing scams with awareness and caution. Look out for the telltale signs of a scam, such as unsolicited messages with strange links, unrelated contact information, and urgent phrasing.
- Don’t click on unknown links or download strange attachments. Scammers use links to hide malicious programs and apps and redirect victims to fake websites. You're always best to avoid clicking on unsolicited links. You can also hover over a link to see where it will take you before clicking.
For the most comprehensive protection, consider Aura’s all-in-one solution.
Aura constantly monitors and protects your online and financial accounts and secures your devices with AI-powered digital security, Safe Browsing tools, a military-grade VPN, password manager, and a virus scanner . And if the worst should happen, Aura also provides up to $5 million in identity theft insurance along with 24/7/365 fraud resolution support.
Secure yourself and your family against scammers & hackers. Try Aura free for 14 days .
Editorial note: Our articles provide educational information for you to increase awareness about digital safety. Aura’s services may not provide the exact features we write about, nor may cover or protect against every type of crime, fraud, or threat discussed in our articles. Please review our Terms during enrollment or setup for more information. Remember that no one can prevent all identity theft or cybercrime.

Award-winning identity theft protection with AI-powered digital security tools, 24/7 White Glove support, and more. Try Aura for free .
Related Articles

Answered: How To Remove a Hacker From Your Smartphone
Deleting suspicious apps, resetting your device, and recovering hacked accounts are among the best ways to remove a hacker from your smartphone.

Answered: Do You Need Antivirus Software in 2024?
Do you need antivirus software on your modern devices, or is it an unnecessary add-on? Let’s uncover the truth about staying safe online.
Try Aura—14 Days Free
Start your free trial today**
14 days FREE of All-In-One Protection
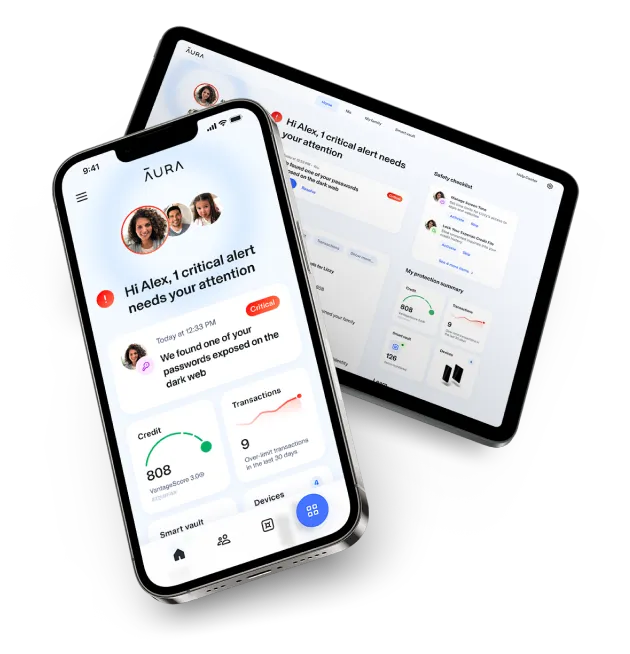
4.7 as of March 2024
- Accessories
- Meet the team
- Advertise with us
- Editorial Guidelines
How to get rid of fake Apple security alerts on iPhone

You are just surfing the web, and suddenly, you are interrupted by a pop-up that says your iPhone is infected with a virus! This has happened to most of us. So, what do you do? Well, stop panicking. Apple never sends such security alerts. Scammers design these fake alerts to get you to tap the link. Read along to remove those fake Apple security alerts on iPhone!
How to remove Apple security alert scams from your iOS device
If you see pop-up messages like “ Tap here to secure your iPhone ,” “ Your device is at risk ,” etc., don’t tap them. Not even the x icon to close the tab. Doing this will lead you to the phishing site!
When the alert pops up, just follow the below steps:
- Tap the tabs icon at the bottom right of Safari.

- On iPhone with Touch ID : Swipe up from the bottom.
- On iPhone with Face ID : Swipe up from the top.
- Toggle on the Airplane mode .
- Navigate and select Safari in the settings menu itself.
- Turn on Block Pop-ups .
- Scroll down and turn on Fraudulent Website Warning .

- Now, follow step 3 and toggle off the Airplane mode .
Once you’ve followed all the steps mentioned above, you will no longer see such pop-ups. And to avoid such issues in the future, make sure you do not visit any sketchy websites, tap advertisements, and avoid hitting random links.
There are innumerable instances where scammers send messages with links to dupe people for thousands of dollars. So, always avoid going to such links and stay safe.
Have more queries? Share them in the comments below!
- How to remove a virus from iPhone or iPad (Security tips)
- Most common Mac viruses and how to remove them
- Best antivirus apps for iPhone and iPad

Consumer Technology and Motorcycles are the two things that excite Darryl the most. Why? Because Tech helps better people's lives, and solving people's problems related to tech is something he enjoys. And what about bikes, you ask? Well, drop a gear and disappear.
LEAVE A REPLY Cancel reply
Save my name, email, and website in this browser for the next time I comment.
Related Articles
How to find your lost airpods in any scenario, how to turn on ios 18 eye tracking on your iphone, fixed: iphone calls going straight to voicemail without ringing, how to download twitter video to iphone camera roll.
- Amazon Prime Day Early Deals
- Summer Sales: Waterproof Bluetooth Speakers
How to Control iPhone Safari Settings and Security
Control your settings and security in the iPhone browser
:max_bytes(150000):strip_icc():format(webp)/SamCostello-d7fcf106ec2048ccb06d1e2190b3396d.jpg "iphone safari security warning")
- Ithaca College
How to Change the Default iPhone Browser Search Engine
How to use safari autofill to fill out forms faster, how to view saved passwords in safari, control how links open in iphone safari, how to cover your online tracks using private browsing, how to clear your iphone browser history and cookies, prevent advertisers from tracking you on your iphone, how to get warnings about potentially malicious websites, how to block websites, ads, cookies, and pop-ups using safari, how to use apple pay for online purchases.
- Take Control of Your iPhone Security and Privacy Settings
What to Know
- To change search engine, go to Settings > Safari > Search Engine . To control links, go to Safari > Open Links .
- To use AutoFill, go to Settings > Safari > AutoFill > turn on Use Contact Info .
- To view saved passwords, go to Settings > Passwords & Accounts > Website & App Passwords .
This article explains how to adjust Safari settings and security on your iPhone or iPad.
Searching for content in Safari is simple; tap the menu bar at the top of the browser and enter your search terms. By default, all iOS devices use Google for web searches, but you can select a different search engine by following these steps:
Open the Settings app.
Select Safari > Search Engine .
Select the search engine you would like to use as the default. Options include Google , Yahoo , Bing , and DuckDuckGo . The setting is automatically saved, so you can search using the new default search engine right away.
Similar to a desktop browser , Safari automatically fills in forms by grabbing information from your address book. This saves time because you don't need to fill out the same forms over and over again. To use this feature, follow these steps:
Select Safari > AutoFill .
Toggle the Use Contact Info switch to on/green.
Your information appears in the My Info field. If it does not, select the field and browse your address book to find your contact information.
Older versions of iOS allowed you to change your username and password info here. If you want to save, edit, or delete usernames and passwords in iOS 13 or later, go to the Passwords & Accounts settings page (select Settings > Passwords & Accounts ).
To save frequently used credit cards to make online purchases quicker, move the Credit Cards switch to on/green. If you don't have a credit card saved on your iPhone, select Saved Credit Cards , and add a card.
Saving usernames and passwords in Safari means you're not forced to memorize login credentials to access a website. As this data is sensitive, iOS takes measures to protect it. If you need to look up a username or password, you can do so by following these steps:
Select Passwords & Accounts > Website & App Passwords .
You are asked to authorize access to this information using Touch ID , Face ID , or your passcode.
A list details all the websites for which iOS has saved login data. Select a site to view the corresponding username and password.
You can choose where new links open by default—in a new window that appears either in front of or behind the page you are currently viewing. Follow these steps to adjust this setting:
Select Safari > Open Links .
Select In New Tab to open links in a new window in Safari and to have that window appear in front of the current tab. Select In Background to open links in a new window that appears behind the page you are currently viewing.
Browsing the web leaves digital footprints. Between browsing history, cookies, and other usage data, you may prefer to cover some of those tracks. The Safari Private Browsing feature prevents Safari from saving information about your behavior—including browsing history, cookies, and other files—while it is turned on.
When you want to delete your browsing history or cookies manually, follow these steps:
Select Safari > Clear History and Website Data .
A menu appears asking if you would like to clear the browsing data. Select Clear History and Data .
Cookies allow advertisers to track you across the web. This lets them build a profile of your behavior and interests to target you with ads better. Here's how to opt-out of some of that tracking data:
Select Safari .
Move the Prevent Cross-Site Tracking switch to on/green.
Older versions of iOS included a Do Not Track feature that asked websites not to track your browsing data. Apple removed this feature, as the request was never mandatory and did not do much to limit the tracking of user data.
Setting up fake websites that look like ones you normally use is a common method of stealing data from users. Safari has a feature to help avoid these sites. Here's how to enable it:
Move the Fraudulent Website Warning switch to on/green.
You can speed up your browsing, maintain privacy, and avoid certain ads and websites by blocking cookies. Here's how:
Move the Block All Cookies switch to on/green, then select Block All to confirm the action.
If you set up Apple Pay , you can use it at any participating retailer to complete purchases. To make sure you can use it at those stores, enable Apple Pay for the web. Here's how:
Move the Check for Apple Pay switch to on/green.
Take Control of Your iPhone Security and Privacy Settings
While this article focuses on privacy and security settings for the Safari web browser, the iPhone has other security and privacy settings. These settings can be used with other apps and features to protect private info stored on your iPhone .
Get the Latest Tech News Delivered Every Day
- How to Clear Cache on an iPad
- How to Clear Cache and Cookies in Every Major Browser
- How to Close All Tabs in Safari on the iPhone or iPad
- How to Manage Browsing History on Safari for iPad
- How to Change Settings in iOS Dolphin
- How to Manage History and Browsing Data on iPhone
- How to Turn Off Private Browsing on iPad
- How to Clear Search History on iPhone
- Can An iPad Get Infected With a Virus?
- How to Enable or Change AutoFill Information on an iPhone
- How to Find a Wi-Fi Password on an iPhone
- How to Solve Safari Crashes on the iPhone
- What Is DuckDuckGo? Is It Safe?
- How to Disable JavaScript in Safari for iPhone
- How to Change the Default Search Engine in Safari for iOS
- How to Manage Your Browsing History in Safari
What Does It Mean When Safari Labels a Website “Not Secure?”

Have you noticed a warning in Safari that the website you are browsing is not secure? What does secure mean in this context? In short, Safari is warning you that the website is using Hypertext Transfer Protocol (HTTP) instead of Hypertext Transfer Protocol Secure (HTTPS). Websites using HTTPS have encrypted their data, making browsing their site and especially entering any sensitive information, such as login credentials or payment information, much safer for you. Here is what to do if you see this warning while browsing Safari on your iPhone.
Check the URL

- If, however, there is a secure version of the site, you should be able to browse it safely now.
Related: How to Block or Allow Pop-ups on Safari on Your iPhone
What to Do If There Is No Secure Site Available
First and foremost, if you encounter a not-secure warning when attempting to log in to a website, purchase something online, or do any banking—basically in any situation in which you are asked to enter sensitive or personal information—you should close the site immediately and not enter any information into it. Any reputable online store or bank should and will be using a secure HTTPS connection.

However, smaller and older websites may not yet have made the transition from using HTTP to HTTPS, and Safari may warn you that these sites are not secure. In these cases, you should use your best judgment when browsing unsecure websites. If you’re just reading an article on an old blog that hasn’t been updated since 2003, you probably won’t encounter any problems browsing a website that still uses HTTP. After all, for many years, only pages processing transactions or dealing with login credentials used secure connections. You should still be aware that an unsecure connection will make it easier for a dubious third party to get a hold of your browsing activity. If you’re concerned about security on your Apple devices, you can sign up for our daily tip to stay on top of all the latest updates.
One thing to be sure of is that even if you are just now seeing warnings about unsecure web pages on Safari while using your iPhone, it doesn’t mean that you are any less secure than you have been in the past. Instead, it just indicates a change in the way that iOS responds to websites still using HTTP. iOS instituted this change in iOS 12.2. If you have recently updated your iOS, you may start noticing this warning on web pages you have visited in Safari many times before. All that has changed is that now you’re more aware of the security protocols (or lack thereof) these sites employ.
Author Details

Elisabeth Garry
Elisabeth Garry is an Associate Editor for iPhone Life. Formerly of Gartner and Software Advice, they have six years of experience writing about technology for everyday users, specializing in iPhones, HomePods, and Apple TV. As a former college writing instructor, they are passionate about effective, accessible communication, which is perhaps why they love helping readers master the strongest communication tools they have available: their iPhones. They have a degree in Russian Literature and Language from Reed College.
When they’re not writing for iPhone Life, they’re reading about maritime disasters, writing fiction, rock climbing, or walking their adorable dog, Moosh.

Article Spotlight
How to avoid scams & hacks in 2024.

Did you know that U.S. consumers lost over $3.5 billion to online fraud in the first half of 2022? Password scammers and digital criminals will never stop trying to steal your personal information.
Did you know that, contrary to popular belief, iPhones are incredibly vulnerable to hackers and scammers ? The same is true for Macs and iPads. Despite Apple's reputation for security and privacy, their devices are still very susceptible to cyber attacks and phishing scams.
Featured Products

NordVPN packs numerous privacy features into a slick client that has grown beyond just VPN protection into a privacy juggernaut, offering antivirus and unique tools at a premium price. Try it today!
Most Popular

How to Tell If Someone Blocked Your Number on iPhone

App Store Missing on iPhone? How To Get It Back

How to Tell If a Dead iPhone Is Charging

How To Find My iPhone From Another iPhone

How to Refresh AirTag Location Manually & More Often

How to Schedule a Text Message on iPhone

Answered: What Is the Flower on iPhone Camera?

iPhone Notes Disappeared? Recover the App & Lost Notes

How To Get an App Back on Your Home Screen

How To Put Two Pictures Together on iPhone

What Is SOS on iPhone? Learn This Key Emergency Feature!

10 Unique Things to Do on FaceTime
Featured articles.

Why Is My iPhone Battery Draining So Fast? 13 Easy Fixes!

Identify Mystery Numbers: How to Find No Caller ID on iPhone

Apple ID Not Active? Here’s the Fix!

How to Cast Apple TV to Chromecast for Easy Viewing

Fix Photos Not Uploading to iCloud Once & for All (iOS 17)

There Was an Error Connecting to the Apple ID Server: Fixed

Give Your iPhone a Security Boost With This iOS 17 Feature
A pple released iOS 17.5 in May, and the update introduced a few new features to iPhones , like the ability to detect unknown third-party trackers. But the tech giant gave all iPhones a new security feature with the release of iOS 17.3 in January. The feature is called Stolen Device Protection , and it aims to protect your data if your phone is stolen or falls into nefarious hands.
According to Apple, Stolen Device Protection can help protect your accounts and personal information in case your iPhone is pilfered. This is an optional feature, but Apple recommends everyone turn it on.
Here's how to enable Stolen Device Protection and what to know about the new security feature.
Read more: How to Make Your iPhone's Stolen Device Protection More Effective
How to turn Stolen Device Protection on
After you update your iPhone, your phone should ask you whether or not you want to turn Stolen Device Protection on. If you didn't see this screen, or meant to do it later, here's how to enable the security feature.
1. Open Settings .
2. Tap Face ID & Passcode .
3. Scroll down the menu until you see Stolen Device Protection .
If you already have the feature enabled, it will say On next to Stolen Device Protection . If it says Off , tap Turn On Protection directly below Stolen Device Protection .
Read more: How to Give Stolen Device Protection a Boost
What to know about Stolen Device Protection
As CNET's David Lumb reports , Stolen Device Protection requires you to enter your biometric information at least once to access some of your sensitive settings and information when you're not in a familiar location, like your home.
Here are some of the things Apple said you'll need to enter your biometric information for in order to change or access when you're in an unfamiliar location:
- Using passwords or passkeys saved in your Keychain.
- Using payment methods saved in Safari that autofill.
- Turning off Lost Mode .
- Erasing all content and settings on your iPhone.
- Applying for a new Apple Card.
- Viewing your Apple Card's virtual number.
- Taking certain Apple Cash and Savings actions in your Wallet, like initiating a transfer.
- Using your iPhone to set up a new device.
The feature also uses a new mechanism called Security Delay, when changing some settings. If you try to change these settings when you're in an unfamiliar location, Stolen Device Protection will require you to enter your biometric info twice; once initially and then again after an hour. According to Apple, if you arrive at a familiar location while waiting for the Security Delay to end, your device could prematurely end the delay.
Here are some of the things Apple said are protected by Security Delay:
- Turning Stolen Device Protection off.
- Changing your Apple ID password.
- Signing out of your Apple ID.
- Updating your Apple ID account security settings, like adding or removing trusted devices.
- Adding or removing Face ID or Touch ID information.
- Changing your iPhone passcode.
- Resetting all your iPhone's settings.
- Turning Find My off.
Because Stolen Device Protection only protects a handful of settings, you still have to take steps to protect your other information. For example, Apple notes that you can still use your iPhone passcode to make purchases with Apple Pay, so Stolen Device Protection won't totally protect your finances. While Stolen Device Protection is an optional feature and doesn't protect everything on your phone, Apple still recommends everyone turn it on.
For more on Stolen Device Protection, check out how to improve your iPhone's Stolen Device Protection . You can also check out what to know about iOS 17.5.1 , other features that are included iOS 17.5 and our iOS 17 cheat sheet .

Looks like no one’s replied in a while. To start the conversation again, simply ask a new question.
when i opened safari an apple security warning popped up saying (6) virus detected click ok to start cleaning process and then be sure to upgrade system to latest version on your iphone. is this legit?
iPhone 6s, iOS 10.3.2
Posted on Jul 27, 2017 5:47 AM

Posted on Jul 27, 2017 5:58 AM
no, it's just malicious web popups.
It's a scam... Do this: Settings → Safari then tap to Clear History and Website Data then restart your device.
Avoid phishing emails, fake 'virus' alerts, phony support calls, and other scams - Apple Support: https://support.apple.com/en-ca/HT204759
These are scams and should be ignored
1. Identify and report phishing emails and other suspicious messages: https://support.apple.com/en-us/HT204759
2. Annual Reminder- Watch out for email Phishing Scams: https://blog.macsales.com/40094-an-annual-reminder-watch-out-for-phishing-scams? utm_source=xlr8yourmac
3. Identifying fraudulent "phishing" email: https://support.apple.com/en-us/HT204759
4. Beware of Browser Pop-Up Tech Support, Phishing Scams: http://blog.macsales.com/29155-beware-of-browser-pop-up-tech-support-phishing-sc ams
5. Phishing & Other Suspicious Emails: http://www.apple.com/legal/more-resources/phishing/
6. Avoid phishing emails, fake 'virus' alerts, phony support calls, & other scams: https://support.apple.com/en-us/HT204759
● If you receive what you believe to be a phishing email that's designed to look like it’s from Apple, please send it to [email protected] .
● To report spam or other suspicious emails that you receive in your iCloud.com, me.com, or mac.com Inbox, please send them to [email protected] .
● To report spam or other suspicious messages that you receive through iMessage, tap Report Junk under the message, or take a screenshot on your iPhone, iPad, iPod touch, or Mac and send it to [email protected] .
● If you receive a suspicious message about your purchase activity in the iTunes Store, App Store, or iBooks Store, contact iTunes Support.
Loading page content
Page content loaded
Jul 27, 2017 5:58 AM in response to abygail53

Jul 27, 2017 5:49 AM in response to abygail53
No it is a scam. There are no viruses on iPhones.

No. Hope you didn't do it.
IMAGES
VIDEO
COMMENTS
Safari warns you when a website that you're visiting isn't secure. In any of these cases, you may see a "Not Secure" or "Website Not Secure" message in Safari: The website is encrypted, but its certificate is expired or illegitimate. The website's certificate is valid but the version of TLS is not secure (TLS version 1.1 or earlier).
The overview of the steps for completing this procedure is as follows: Remove Safari virus warning (Mac) Open the browser and go to Safari menu. Select Preferences in the drop-down list. Once the Preferences screen appears, click on the Advanced tab and enable the option saying " Show Develop menu in menu bar ".
If Apple detects activity consistent with a mercenary spyware attack, we notify the targeted users in two ways: A Threat Notification is displayed at the top of the page after the user signs into appleid.apple.com. Apple sends an email and iMessage notification to the email addresses and phone numbers associated with the user's Apple ID.
Tap Clear History and Website Data. While in Safari settings, toggle on Fraudulent Website Warning. Toggle on Block Pop-ups as well. Tap on Settings in the upper-left corner. Toggle Airplane Mode back off. Now you can open Safari again; at this point, Apple virus scams shouldn't be appearing anymore.
Remove the Apple Security Alert virus with an iOS antivirus: Go to the App Store and find a reliable iOS antivirus. Our top choice is TotalAV, now 80% OFF. Click the Get button and confirm your Apple ID. Open the app and run a full system scan. Remove virus with TotalAV.
Open Firefox, and click on the 3 horizontal lines in the top right-hand corner of the browser window. In the menu that appears, click on Add-ons and themes. A new window will open showing all enabled extensions. Identify any suspicious extensions, click on the 3 dots to the right hand side, and click Remove.
For Safari, open the app. Navigate to Safari > Settings from the menu bar. Select the Extensions tab. In the sidebar, click any extension that looks suspicious. Click Uninstall. For Google Chrome ...
Head over to the Settings app on your iPhone or iPad -> Safari -> Advanced. Now, tap Website Data. Next, tap on Edit at the top right corner of the screen. Next up, select the specific cookie you want to get rid of and hit the Delete button. Do not forget to tap Done at the top right to confirm the action. 3.
Next, after you go through the description of the warning, click on the "visit this website" hyperlink located all the way at the bottom, as shown below. Now, you'll get a pop-up in Safari. Choose "Visit Website" to confirm your action and access the website. And there you have it, you're viewing the site. Again on the Mac you'll ...
Mac owners should click on the Apple logo in the top lefthand corner of their desktop screen. They should then click on "About this Mac," then click "Software Update" to check for ...
Safari can detect when websites are suspicious or may appear fraudulent, and if you enable the setting, you can get a warning before visiting those sites. You can also just hit "Ignore" if you know the site is legit. Launch Settings from your Home screen. Tap Safari. You'll have to scroll down to find it.
Protect access to your iPhone. Set a strong passcode: Setting a passcode to unlock iPhone is the most important thing you can do to safeguard your device. Use Face ID or Touch ID: Face ID (supported models) or Touch ID (supported models) provides a secure and convenient way to unlock your iPhone, authorize purchases and payments, and sign in to many third-party apps.
That 'Not Secure' text is simply a notification from Safari that the webpage or website is using HTTP, rather than HTTPS. This is also reflected in the URL prefix of a website, for example https://osxdaily.com vs https://osxdaily.com. The "Not Secure" message is not an indication of any change in device security.
CUPERTINO, CALIFORNIA Apple today announced its latest privacy and security innovations, including major updates to Safari Private Browsing, Communication Safety, and Lockdown Mode, as well as app privacy improvements. Additionally, Apple introduced new features designed with privacy and security at their core, including Check In, NameDrop, and Live Voicemail.
While most Apple virus warning pop-ups and security alerts are scams, they can be red flags signaling real issues that threaten your internet safety. ... Safari: Open Safari and click on Settings or Preferences and then click on Extensions. ... On your iPhone or iPad: Click on Settings in your iPhone or iPad and then General. Click on Reset ...
When the alert pops up, just follow the below steps: Tap the tabs icon at the bottom right of Safari. Tap x to clear the tab located at the top right. Summon Control Center : On iPhone with Touch ID: Swipe up from the bottom. On iPhone with Face ID: Swipe up from the top. Toggle on the Airplane mode. Navigate and select Safari in the settings ...
Open Safari's preferences. Click on the Websites tab and then scroll down to Notifications. Clear any entries in the right hand window. You might find something similar in the Pop-up Windows heading below that. Block any you don't recognize. Then if you want, uncheck the box below as shown here.
Control your settings and security in the iPhone browser. To change search engine, go to Settings > Safari > Search Engine. To control links, go to Safari > Open Links. To use AutoFill, go to Settings > Safari > AutoFill > turn on Use Contact Info. To view saved passwords, go to Settings > Passwords & Accounts > Website & App Passwords.
Check the URL. Tap the search bar. Move your cursor to the start of the URL. Type "https://" and tap go. If a secure version of the site is not available, you will see a page that looks like this. If, however, there is a secure version of the site, you should be able to browse it safely now. Related:
iPhone 4S, iOS 8.3 Posted on May 23, 2015 8:11 PM Me too (479) Me too Me too (479 ... Security warning keeps popping up in Safari. Welcome to Apple Support Community A forum where Apple customers help each other with their products. Get started with your Apple ID.
Try double clicking the Home button and swipe Safari upwards. Go to Settings/Safari and clear History and Website Data. Open Safari and test. Safari - Clear the history and cookies on your iPhone, iPad, or iPod touch. Safari website data on your iPhone or iPad - How to clear.
Summary We are running a web site (https only) and have a single bug report from a user that says the site gets warned as "Not secure". The user gets this warning only when accessing it from the Safari browser on an iPhone (iOS 14.6). Other users - also on iPhone/Safari - does not see the same message (just the padlock which indicates it's secure).
Unfortunately, a cybercriminal can hack your iPhone in a variety of ways. Here's a rundown of some of the most common ways criminals hack iPhones: Malware: Malware can be disguised as a legitimate app or file that you download unintentionally. Once it's on your iPhone, malware can hijack your phone's resources and steal sensitive information.
Apple takes shot at Google in very public way. NurPhoto via Getty Images. When it comes to mobile browsers, there are just two that matter: Chrome and Safari have 90% market share between them ...
A new iPhone warning has been issued by a security firm, after it found Apple IDs are being targeted ... [+] in an SMS phishing campaign. A new iPhone warning has been issued by a security firm ...
Security experts have issued an urgent warning to all 1.46 billion iPhone users after uncovering a new cyberattack that lets bad actors take over smartphones.
I have an outlook account, and use a hotmail email address. Currently I receive emails on an iPhone, iPad, iMac and Mac book. I login using my email and a password and I believe (from the information provided) that from September 2024 I need to authenticate this login with a further step in addition to an email and password.
Samsung has again beaten Pixel to the punch when it comes to issuing details of this month's security release. But be warned, this update is actually bad news for your Galaxy device—the ...
A pple released iOS 17.5 in May, and the update introduced a few new features to iPhones, like the ability to detect unknown third-party trackers.But the tech giant gave all iPhones a new security ...
when i opened safari an apple security warning popped up saying (6) virus detected click ok to start cleaning process and then be sure to upgrade system to latest version on your iphone. is this legit? when i opened safari an apple security warning popped up saying (6) virus detected click ok to start cleaning process and then be sure to ...