Create an expense or mileage claim
This article is for small businesses who use Xero
- Create an expense claim to be reimbursed for your personal money spent or your daily allowance.
- Create and submit a mileage claim to be reimbursed if you use your own vehicle for work.
If you've used company money to make a purchase, create and submit a company expense claim .
Create and submit expense claims to be reimbursed for personal money spent or your daily allowance.
If you have the admin or approver permissions, you can create an expense claim on behalf of an employee. Open an expense claim, click your name, then select the relevant employee. You can't edit the employee once it's been created.
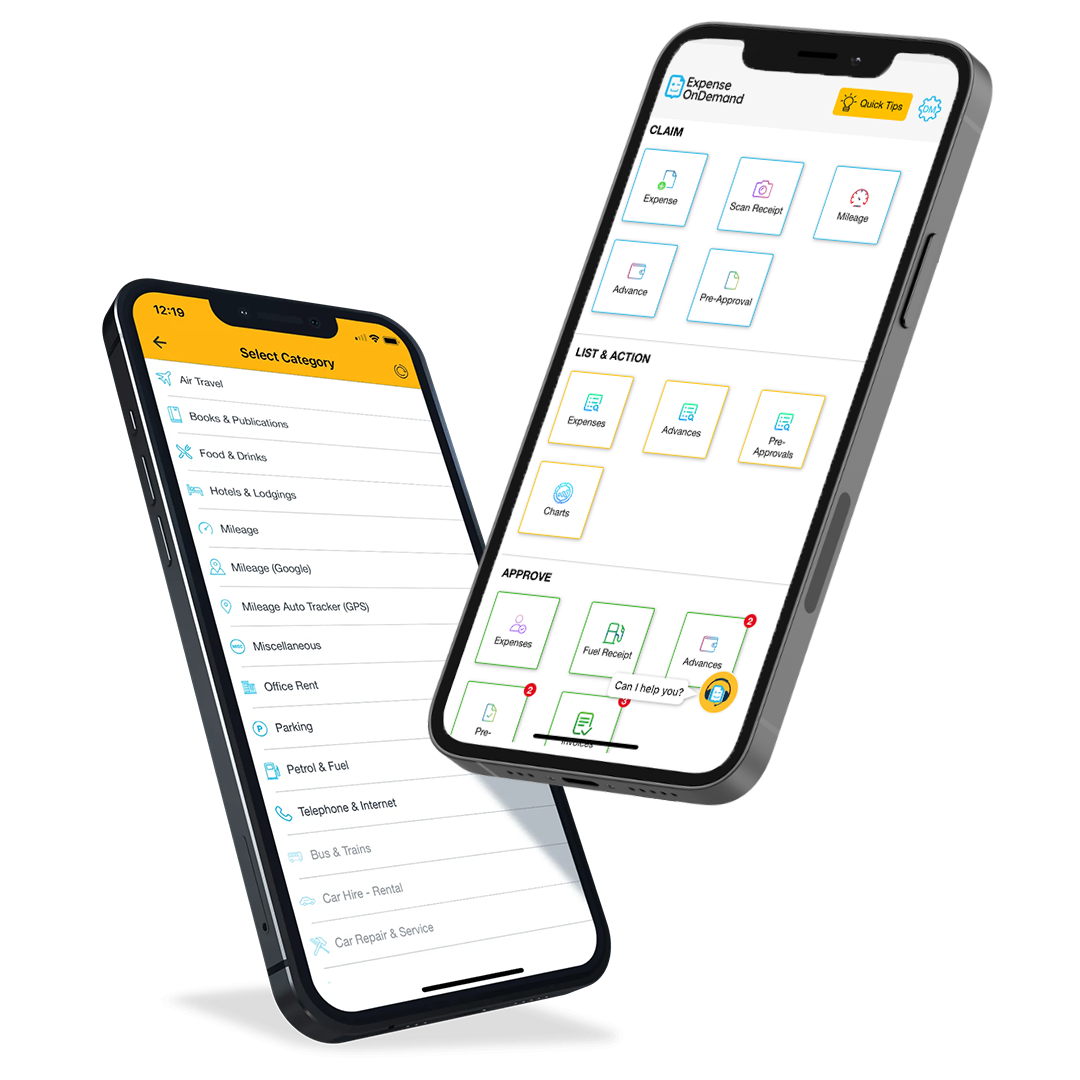
You can also use Xero Me for iOS or Android to create your expense claims.
Before you can use the auto-populate feature when creating claims on the iOS and Android apps, an expenses admin needs to enable receipt analysis .
- In the Business menu, select Expense claims .
Click New expense , then select Expense claim .
(Optional) Click Upload to add your expense receipt, or drag and drop an image into the field.
Under Purchase amount , select the currency of the purchase and enter the total amount paid, including tax. If you choose a currency other than your organisation's base currency, the exchange rate used shows at the bottom of the screen.
Enter details in the required fields.
(Optional) Under Optional , add tracking categories, assign to a project or customer, or assign a label to this expense.
- Save draft to finalise and submit later
- Submit to send the expense claim to your approver
- Approve if you’re the approver and want to process the claim

Add a receipt
- In the Business menu, select Expense claims .
- Click Go to classic expense claims .
- Click Add Receipt .
- Enter the claim details in the receipt fields.
- Click Save or click Save & Add Another Receipt if you'd like to add another receipt.
Submit an expense claim for approval
Once you've entered and saved your receipts in Xero, choose what receipts to submit. Any receipts you don't submit will remain on the Current Claim tab.
- In the Current Claim tab, select each receipt you want to submit in this claim.
- Click Submit for Approval , then select OK to confirm.
You can now view this claim in the Previous Claims tab, or while it's pending review, in the Awaiting Authorisation tab.
Receipt fields explained
- Open the Xero Me app.
- On the dashboard, tap + New claim .
- Tap Expense claim .
- Take a photo of the receipt, then tap Continue .
- Tap No receipt to continue without attaching a receipt.
- Enter the expense details in the required fields.
- (Optional) Under Optional fields , add tracking categories, assign to a project or customer, or assign a label to this expense.
- Tap Submit to send it to an approver, or tap Save draft to add the expense claim as a draft.
- Open the Xero Me app.
- On the dashboard, tap + New claim , then tap Expense claim .
- Take a photo of the receipt, then tap Use Photo .
- Tap Skip if you have no photo or file, then enter the details manually.
- Tap Add details now to manually fill out the expense claim fields.
- Tap Analyse for Xero to extract the receipt details and enter them into an expense claim. You'll get a notification when the claim is ready to view.
- Once the claim is created, check the details and enter any missing information, such as amount, description, and date.
- (Optional) Under Optional , add tracking categories, assign to a project or customer, or assign a label to this expense.
- Save draft to add as a draft
- Submit to send it to an approver
- Approve if you're the approver and want to process the claim
Create and submit a mileage claim to be reimbursed. This option isn't available in Classic expense claims.
If you have the admin or approver user permissions, you can create a mileage claim on behalf of an employee. Open a mileage claim, click your name, then select the relevant employee. You can't edit the employee once it's been created.
The measurement of distance defaults to your country's measurement. Xero calculates the total in your organisation's base currency.
- Click New expense , then select Mileage claim .
- (Optional) Click Upload an image to add a file or photo for the mileage claim.
- Enter the mileage to claim, the standard rate per mi or km, a description of the trip, and the date travelled.
- Under Optional , add tracking categories, assign to a customer or project, or assign a label to the expense.
- Open the Xero Me app.
- Tap Mileage claim .
- (Optional) Tap Add document to add a file or photo for the mileage claim.
- Enter the distance travelled, or tap Calculate distance to enter a start and end location. Once Xero displays the route on the map, tap Use this distance.
- Enter the standard rate per mi or km, a description of the trip, and the date travelled.
- Tap Account to assign an expense account.
- Tap Submit to send it to an approver, or tap Save draft to add the expense claim as a draft.
- On the dashboard, tap +, then tap Mileage claim .
- (Optional) Tap Add a document to add a file or photo for the mileage claim.
- Enter the distance travelled, or tap Calculate distance to enter a start and end location. Once Xero displays the route on the map, tap Use this distance .
- Tap Account to assign an expense account.
- Under Optional , add tracking categories, assign to a customer or project, or assign a label to the expense.
- Submit to send the expense claim to an approver
What's next?
Was this page helpful, still have questions, contact xero support.
Raise a case with our support team
Start a discussion
Ask our community of customers, accountants and bookkeepers
Product Ideas - open link in new window
Share your ideas and feedback to help us improve our products

- Theme Color Learn how to pick the right colors
Smart Formula Allowances (from Xero)
Introduction.
Smart Formulas can be used to create allowances in addition to determining the earnings rates for employees.
These allowances can be either automatically or manually applied depending on how they are set up.
Getting Started
The following steps must be completed to use Smart Formulas for allowances:
- Set up Pay Items in Xero
- Assign Pay Items to Employee Pay Templates in Xero
- Enable Smart Formulas in UpSheets
- Refresh Smart formulas from Xero to UpSheets
- Import your file using Smart Formulas
This document explains Step 1. Set up Pay Items in Xero for Allowances. Click here for detailed instructions on steps 2-5
1. Set up Allowance Pay Items in Xero
The steps below are for loading smart formulas to set up automatic and manual allowances with Smart Fomulas.
Pay Items are set up in Xero by navigating to Settings> Payroll Settings> Pay Items
To be used for timesheets the pay items must:
- Have a Rate Type = Multiple; or
- Have a Rate Type = Rate per unit and Type of units = hours
- Have a Rate Type = Rate per unit and Type of units = The same time unit used for the Ordinary Earnings Type of the Employee (Days/Weeks etc)
To enable a pay item for use as an allowance Smart Formula, the name must use the following format:
NUMBER NAME [DAY][PERIOD][TYPE][MINMAX]
001 Daily Allowance [WEEKDAY][10~24][DAY]
For more information on defining NAME, NUMBER, DAY please see Smart Formulas (from Xero)
The Period element can be used to define the minimum and maximum hours for applying the allowance, e.g.
[8~24] will apply the allowance only if 8 or more hours are worked.
[0~24] or [] will apply the allowance if any hours are worked.
This can be used to create different allowances for different periods e.g.
[0~10] Will be applied if the hours are less than 10
[10~24] Will be applied if the hours are 10-24
For allowances that require a time range, this can be defined as below and also limited by using the MINMAX element. To do so use the start_time - end_time option. Each time must be set using four digits and 24 hours clock.
[0000-1300] = midnight to 1pm
[1400-1600] = 2pm to 4pm
[2000-0000] = 8pm to midnight
The MinMax defines the number of hours when a time range is used for the period (e.g. [0000-0600].
The format is:
- from_hour ~ to_hour .
[0~5] = the first 5 hours
[5~24] = From 5 to 24 hours
[0~24] = the first 24 hours
This element is only available for certain allowance types as defined in this guide.
Determines the type of allowance. The code value below should be entered into the formula to define the type of allowance.
Time-Based Allowances
Other allowances, time-based allowances (hour / shift / day / week).
All of these allowances work in a similar manner and can be used with the DAY/PERIOD elements to determine when they are applied.
The main difference is how they are applied to imported lines:
- HOUR - Applies the allowance to every hour worked in the period
- SHIFT - Applies the allowance to every shift (i.e. once for every timesheet line imported even on the same day)
- DAY - Applies the allowance once per day (i.e. once even if multiple shifts are imported on the same day)
- WEEK - Applies the allowance once per week (i.e. once per week so long as a line is imported during that week). The DAY element is not used for this type)
001 Allowance [WEEKDAY][0000-0600][HOUR]
Will apply the allowance for every hour worked between midnight and 6am on a Monday, Tuesday, Wednesday, Thursday or Friday. This can be used to add an additional hourly allowance to a base rate. If an emplyee worked from 02:00 - 03:30 they would be allocated 1.5 x this allowance. This allowance is only configured to work for periods between set hours.
001 Allowance [WEEKDAY][1~24][SHIFT]
Will apply the allowance for every timesheet line imported for a Monday, Tuesday, Wednesday, Thursday or Friday and the employee has worked at least 1 hour (and less than 24). This could potentially apply multiple times in a single day.
002 Allowance [WEEKDAY][8~24][DAY]
Will apply the allowance if one or more timesheet lines are imported for Monday, Tuesday, Wednesday, Thursday or Friday and the total hours each day are between 8 and 24. This can only apply once per day, but could apply up to 5 times if each weekday is worked.
003 Allowance [WEEKEND][][DAY]
Will apply the allowance if one or more timesheet lines are imported for Saturday or Sunday. The number of hours is not a factor as it is left blank. This would apply 2 allowance lines if both days are worked.
004 Allowance [EVERY][40~168][WEEK]
Will apply the allowance if the total hours worked in a week is over 40 (but below 168). This would apply a maximum of once per week.
Broken/Split Shift (BS)
A Broken/Spilt Shift allowance will be applied when an employee works multiple shifts in a day that have a gap between them. The size of the gap between shifts is defined using the period element.
The fourth [MinMax] element can be used to determine the maximum number of allowances to be applied in a day or week. e.g. [1~3] is once per day and 3 per week. This is optional and if left out it will apply the allowance every time the condition is met.
001 Split Shift [EVERY][1~3][BS][1~7]
Will apply the allowance if the gap between two shifts is more than one hour but less than 3. This will be applied a maximum of once per day and 7 times per week.
002 Split Shift [EVERY][3~21][BS][2~3]
Will apply the allowance if the gap between two shifts is more than three hours but less than 21. This will be applied a maximum of twice per day and three times per week.
003 Split Shift [WEEKDAY][1~23][BS]
Will apply the allowance if the gap between two shifts worked on a weekday is more than one hour but less than 23. There is no limit to how many times this will be applied each day or week.
Minimum Engagement (ME)
A Minimum Engagement allowance is applied when a shift is less than a set number of hours. The number of units is automatically calculated as the difference between the hours worked and the set number of hours. In this way, it can be used to pay an employee a minimum number of hours even when fewer are worked.
The MINMAX element is used to determine the minimum and maximum hours where the allowance should be applied.
001 Minimum Engagement [EVERY][][ME][0~4]
Will apply the allowance if any shift is worked for less than 4 hours. The number of units applied will be equal to 4 less the number of hours worked. If 1 hour is worked, the allowance will be for 3 hours. If more than 4 hours are worked, no allowance is applied.
002 Minimum Engagement [EVERY][][ME][1~2]
Will apply the allowance if a shift is worked for more than 1, but less than 2 hours. The number of units applied will be equal to 2 less the number of hours worked. If 1.5 hours are worked, the allowance will be for 0.5 hours. If more than 2 hours or less than one hour are worked, no allowance is applied.
Top Up (TU)
A Top Up allowance applies one unit of the allowance whenever an employee works at a particular time.
001 Top Up [MON-FRI][1900-0000][TU]
Applies the allowance if a shift is worked that starts, finishes or encompasses the period of 7pm to midnight on a Monday - Friday. This is usually set up In Xero as a rate per unit allowance to pay a set amount as an extra payment for a shift.
Manual (MAN)
A Manual allowance is not applied automatically, but can be added in UpSheets after importing your file and then uploaded to Xero.
Please note, these allowances must be added to all employee pay templates in order for them to be applied.
100 Manual Allowance [MAN]
When assigned to an employee an Add Line link will be displayed within UpSheets:

Clicking the link will display all manual allowance to be selected and applied to the employee on that date:

Related questions
%201.png)
How to Put Expenses in Xero
How to Put Expenses in Xero: A Quick Guide
Managing your business expenses is crucial for accurate financial records and smooth operations. Xero, a popular online accounting software, offers an efficient system to help you keep track of your expenses.
In this article, we will guide you through the process of putting expenses into Xero, making expense management more accessible and efficient.
Firstly, we will cover the various user roles within Xero Expenses, which allows for different levels of access and control. Depending on your role, you may be a Submitter, Approver, or Admin, each with varying permissions for entering, editing, and managing expenses. This feature ensures that your employees can input their own claims, while managers or admins can approve, decline, and reimburse them effectively.
Next, we'll delve into the process of creating and recording expenses in Xero, whether it be materials, equipment, or mileage claims. By following the step-by-step instructions, you will be able to efficiently log your expenses, ensuring accurate financial reporting and a stronger understanding of your business's financial health.
Getting Started With Xero for Business Expenses
To start putting expenses in Xero, you will first need to set up your Xero account. Visit the Xero website, choose a pricing plan that includes Xero Expenses, and complete the registration process. Once you have a subscription, you can access the Xero app on your smartphone or through your web browser.
Start by familiarising yourself with the Xero dashboard. Here, you'll find an overview of your organisation's financial activity, including your income, expenses, and bank accounts. Familiarise yourself with the navigation options, as you will be using them frequently to input expenses.
When you're ready to track expenses, you can use the Xero Expenses feature, which streamlines the process of capturing receipts, submitting expense claims, and reimbursing your employees. To create an expense, follow these steps:
- Open the Xero Expenses module from the main menu.
- Click on the Add Expense button.
- Enter an appropriate description for the expense, and select its category (e.g. travel, meals, or office supplies).
- Input the date of the purchase and the total amount paid.
- Attach a digital copy of the receipt, which can be a photo taken with your smartphone or a scanned image.
Keep in mind that the number of active users allowed to submit expenses within your organisation depends on your Xero subscription. Users are considered active if they submit a claim during the month, or if another user submits a claim on their behalf.
Now that you've learned how to input expenses in Xero, make it a habit to regularly update your records. This will help you maintain an accurate picture of your organisation's financial situation, making it easier to manage cash flow, control costs, and make informed decisions.
Remember, with consistent use and diligent tracking, Xero will become an indispensable financial tool for your organisation, helping you easily organise and monitor your expenses.
Tracking Business Expenses in Xero
Managing your business finances efficiently is crucial, and Xero offers a streamlined way to track business expenses. The Xero Expenses feature allows you to monitor company costs and reimburse personal money spent on the business by staff members.
To get started with Xero Expenses, you must first invite staff members to the system and assign them user roles. As a Submitter, a staff member can enter, edit, and submit their own claims. This makes it easy for you to organise reimbursements and keep an account of the expenses incurred by team members.
When logging expenses, such as materials, equipment, or tools, you can use Xero's tools to show that the expenses were incurred and paid for with personal funds. This feature, known as Funds Introduced, helps you maintain your records accurately and ensures timely reimbursements.
You can also set up tracking categories to gain insight into different areas of your business performance, such as departments or locations. While tracking categories are not explicitly designed for job costing, they can help you see how each part of your business contributes to overall costs and make proactive financial decisions.
Xero Go, the mobile app, allows you to create and view receipts and business expenses on the go, making it even simpler to manage your business expenses. With Xero Go, you can be confident in your ability to stay on top of expenses regardless of where you are or the device you're using.
In summary, Xero provides a comprehensive and user-friendly platform for tracking business expenses and ensuring that team members are reimbursed for any personal funds spent on the company. By using Xero's features and tools, you can maintain accurate financial records and make informed decisions about your business's financial health.
Using the Xero Expenses App
App accessibility.
The Xero Expenses App is available for both submitters and approvers. Employees can use the web version, Xero Me or the Xero Expenses mobile app to submit expense claims, while approvers and admin users can submit and approve claims through the Xero Expenses web version or the mobile app. Xero Me, however, cannot be used by approvers.
Inputting Expenses into the App
To input expenses into the Xero Expenses App, follow these simple steps:
- Capture receipts: Take a photo of your receipts using the app. This will make your expense claims fast and paperless, making it easier for you and your company to track and manage expenses.
- Submit expense claims: Enter the details of your expense, such as date, amount, and category, and submit the claim for approval.
- Reimburse expenses quickly: As an approver, you can review and approve expense claims without delay, ensuring employees are reimbursed promptly.
- Monitor employee spending: Use the app's analytics feature to gain insights into your team's expenses and manage them efficiently.
- Manage expenses on the go: Whether you need to claim expenses or track mileage, the Xero Expenses App allows you to do it all from your mobile device.
The Xero Expenses App is a convenient and efficient tool for managing your expenses, making it easy for employees to submit, approve, and reimburse costs while keeping track of company spending.
Managing Reimbursements in Xero
Understanding xero's reimburse function.
Xero's reimburse function is designed to help you manage employee expense claims efficiently. This feature allows your staff to be reimbursed for personal money spent on behalf of the business, while also enabling you to track and monitor these expenses. By using Xero's reimbursement tools, you can better manage funds in and out of your business, ensuring accurate accounting and financial health.
Employee Reimbursement Process
The employee reimbursement process in Xero can be broken down into a few simple steps:
- Submit the claim : Employees create and submit expense claims or mileage claims within Xero for any personal funds spent on the business, including daily allowances and work-related travel expenses.
- Approve the claim : Once an expense or mileage claim is submitted by the employee, it needs to be reviewed and approved by the appropriate person in your organisation, such as a manager or accountant.
- Reimburse the employee : After the claim has been approved, you should set up Xero Expenses and create an expense suspense account in the chart of accounts to clear reimbursements. Next, create reimbursement pay items and mark expenses as paid through the suspense account.
- Add reimbursement to payroll : To reimburse the employee, add the reimbursement amount to a draft pay run within Xero Payroll. This will ensure that the reimbursement is correctly implemented and accounted for in your financial records.
- Process and reconcile payroll : Finally, process the pay run and reconcile payroll to complete the reimbursement process. This will ensure that all the necessary financial records are in order and up-to-date.
By following these steps, you can effectively manage reimbursements in Xero and maintain a clear, accurate picture of your business's financial position.
Leveraging the Xero Me Mobile App
The Xero Me mobile app is a powerful tool that allows employees to efficiently manage their expenses and submit claims while on the go. With this app, you can easily capture receipts, submit expense claims, and track the status of your claims.
Submitting expenses in the app is simple. To begin, open the Xero Me app on your iOS or Android device. Make sure you have the necessary permissions, such as 'submitter' access, to perform these tasks. Then, follow these steps to create an expense claim:
- Navigate to the Expenses section in the app.
- Tap on the '+' icon to create a new expense claim.
- Enter the required details, such as the date, amount, and vendor.
- Attach a photo of the receipt or invoice.
- Add notes or additional information if necessary.
- Review your submitted information and save the expense claim.
Once saved, your expense claim will be sent to the designated approvers for review.
The Xero Me app also gives you the ability to view and edit your expense claims . This feature allows employees to keep track of claim statuses and make any necessary updates. Follow these steps to access and edit your claims:
- Access the Expenses section of the app.
- Locate the desired expense claim.
- Tap on the claim to view the details.
- Make any required updates and save the changes.
As an employee, leveraging the Xero Me mobile app ensures you stay on top of your business expenses, making reimbursements and claim tracking more straightforward and efficient. Download Xero Me to manage your expenses with ease and convenience on your mobile device.
Accounting Principles in Xero
Xero is a powerful software that helps you manage your organisation's finances, applying key accounting principles for accuracy and compliance. In this section, we'll discuss how Xero applies these principles when handling expenses.
To begin with, Xero allows you to record and categorise your business expenses more efficiently. By maintaining accurate records of expenses, you can ensure proper financial reporting and tax compliance. The platform lets you input these costs in various ways, such as manually entering an expense or uploading a receipt through the Xero Go mobile app. Additionally, you can also connect your bank account to Xero for seamless import and categorisation of transactions.
Partnering with the double-entry bookkeeping system, Xero records both sides of every financial transaction for an accurate view of your business's financial position. For example, when you record an expense paid with personal funds, Xero will decrease your business liability account (Funds Introduced) and increase the relevant expense account.
In Xero, expense accounts are tailored to meet your business needs, allowing for detailed classifications like rent, office supplies, travel, and more. Proper categorisation helps you monitor and control costs while generating insightful financial reports for your organisation.
To maintain your organisation's financial integrity, it's essential to apply the accrual accounting principle in Xero. This means recording transactions in the period they occur, regardless of payment timing. For example, if you receive an invoice in August but pay it in September, Xero should still record the expense in August. This method provides a more accurate picture of your financial results and obligations.
Lastly, to comply with the matching principle, Xero's software enables you to link expenses to specific revenue streams or projects. By doing so, you can correctly match these costs to the income they generate, thereby assessing your business profitability more accurately.
By adhering to these accounting principles, Xero helps you manage your business finances with greater precision and clarity. So, whether you're processing expense claims for reimbursement or tracking expenses for tax purposes, Xero has you covered.

Ready to level up your employee expense management?
Connect With Us
Comparisons
Start using Xero for free Sign up now
- Small Business Resources
- Accountants & Bookkeepers
- Product Updates
- Data & Insights
- News & Events

Published by Xero
Mileage in Xero Expenses is now in open beta
Popular this week:.
Mileage in Xero Expenses is now in open beta and available to all partners and their clients using Xero Expenses.
By allowing you to easily capture and record mileage claims, this new feature in Xero Expenses means you can be reimbursed faster.
The open beta allows us to work collaboratively with you to continue building a feature that saves you time and solves your expenses problems.
The key features
Mileage in Xero Expenses eliminates all the common pain points associated with this process. Join the open beta today to:
- Submit on the go and capture mileage expenses as they happen
- Better manage cash flow and plan ahead with real time visibility
- Gain visibility with a clearer view of spending by account and employee.
Xero chief product officer, Anna Curzon, announced the mileage feature at Xerocon London 2019 saying:
“Last year we released Xero expenses which made it simple for employees to submit and be reimbursed for their business expenses – we eliminated the need to keep receipts. Yet a large proportion of expense claims in the UK are for mileage and fuel. So we’re giving employees the ability to submit a mileage claim.
“Employees will simply input their distance travelled, on the Expenses app or the web. The claim value is then calculated based on the rate per mile offered by the employer.”
Getting started is easy
To join the open beta, there’s no need to register your interest and no waiting list.
If you’re already using Xero Expenses you can activate this feature by simply going into the Expenses settings within Xero. Once this is done, all employees with access can add expense and mileage claims using the ‘New expense’ button.
For clients that are new to Xero Expenses, setting them up is painless with the mileage feature now part of the normal set up flow.
Share this article
Start using Xero for free
Find out why 3.95 million subscribers locally and across the world trust Xero with their numbers.
Related articles
Related articles:, make the most out of your xerocon london trip, how to build a tech stack that powers your practice, staying on top of gst due dates in 2024, change region.
You're on our Global website. Change your region to see information and pricing for another location.
- South Africa
- New Zealand
- Philippines
- United Kingdom
- United States
Single Touch Payroll Phase 2 resource hub
Xero partners and customers can now enrol in STP Phase 2 reporting, once steps one, two and three have been completed.

Overview of STP Phase 2
Single Touch Payroll Phase 2 will see Australian businesses build on their existing reporting to share more information each pay run.

What is STP Phase 2?
What you need to know about how STP Phase 2 will work in Xero, and how it will affect your business.

STP Phase 2 transition guide
Check out this helpful guide which will help you navigate your STP Phase 2 transition in Xero Payroll.

Live resources
Access the latest education resources and check out when the next live webinar will be.

Access the STP 2 Portal in Xero
Start your transition in Xero today.
Step one - Update employee profiles
The first step involves transitioning your existing employee profiles to be STP Phase 2 compliant.

Existing payroll employees
Find out the steps you need to take to update your existing payroll employee profiles.

Video: updating existing payroll
This video shows how to update your existing payroll employee records with the fields required as part of STP Phase 2.

Info pack: employee records
This information pack covers stage one, employee records, and will help you prepare your payroll data in Xero.

New employee onboarding
Find out more about the changes to the way new employee profiles are set up in payroll.

Video: new employee set up
This video shows how to add an employee with the new STP Phase 2 employee set up.

Video: new contractor set up
This video shows how to add a contractor with the new STP Phase 2 employee set up.
Step two - Replacing pay items
Step two involves reporting the individual components that make up an employee’s pay, rather than reporting just a single gross amount.

Replacing pay items
Find out how to update your pay items for STP Phase 2 compliance on Xero Payroll.

Article: New reporting categories
Read our Xero Central article which takes you through the different types of reporting items for STP Phase 2.

Info pack: Pay item transition
This information pack covers stage two, pay items, and will help you prepare your payroll data in Xero.

Video: How to update pay items
This video shows how to update your existing pay items so earnings can be correctly reported to the ATO.

Article: All purpose allowances
Learn about all purpose allowances, how to process and disaggregate them for your employees in Xero Payroll.
Step three - Leave categories
Step three involves classifying your organisation's active leave pay items in line with the ATO’s appropriate reporting codes.

Leave mapping
Find out how to assign your leave categories for STP Phase 2 compliance on Xero Payroll.

Article: About Paid leave items
Read our Xero Central article which takes you through the leave categories for STP Phase 2 reporting.

Video: Updating leave categories
This video shows how to update your existing leave pay items for correct ATO reporting.
Step four - Enrol in STP Phase 2
The capability to enrol in STP Phase 2 is now available to all customers, meaning you can officially enrol and make the switch today.

Blog: Enrol in Phase 2 reporting
Once payroll data is updated and each step is marked as complete, you’ll be able to opt-in to Phase 2 reporting.

Fix an STP filing error
Ready to file? This article helps you resolve the common filing errors received when filing pay runs with STP Phase 2.
- Shopping Cart
What to know about Single Touch Payroll Phase 2

One of the biggest difficulties is the concept that these ATO requirements for STP2 must not change the way wages are calculated for employees. It does change how those amounts need to be reported to the ATO via their payslip.
RELATED ARTICLES
- How changes to Paid Parental Leave could affect your business
- Your award wage questions answered
Officially, these changes commenced on 1 January 2022, however, many payroll software providers were given an extension to enable them to implement the changes to their systems.
What is STP Phase 2?
In phase 2 the all-purpose hourly rate or any over-award rates of pay the allowance components of that rate need to be separated out on the payslip.
Employers have historically set up their contracted rates to be inclusive of employees’ hourly rate and all-purpose allowances; that arranged is still lawful and is not changed by these reporting requirements. What is required is that employers need to list the separately identifiable allowances on the payslip.
The most common allowances that will need to be disaggregated for electricians and apprentices are the all-purpose allowances of Tool Allowance, Electricians Licence Allowance and Industry Allowance.
There has been feedback that higher contracted rates or rates made under Individual Flexibility Agreements do not need to be shown separately as the employer cannot ‘know’ how those rates can be broken down.
However, MEA has sought clarification from the ATO on their view of this position. The ATO accepts that there may be some scenarios where the employer cannot breakdown all the possible allowances that maybe applicable in an all-inclusive rate scenario, there are known allowances that must be paid to a worker under the electrical award as all-purpose allowances. These should be shown.
An example of where an allowance may not be ‘identifiable’ is if in the higher rate of pay the travel allowances are incorporated but the worker may start and/or finish at the depot or site on various days and this is not identifiable for each occasion.
Members have also expressed confusion about statements on website material such as:
Some employers may have historically set up their payroll using a single rate that includes the employees’ hourly rate and the all-purpose allowances. These allowances now need to be “disaggregated” unless:
- the allowance forms part of overtime
- or cash out of leave or unused leave on termination.
This means that when paying overtime the various allowances do not need to be separated out for each hour of the overtime worked. For example, an all-inclusive rate of $40 per hour will be shown as such on the payslip – along with the relevant overtime penalty rate applied.
Where annual leave is being paid out on termination – the allowances do not need to be shown separately.
How does STP2 work?
For the purposes of demonstrating how to break out the rate under the STP2 requirements for the electrical award we will use the following scenario:
An example ‘all-inclusive’ rate of $40 per hour for a full-time electrician (James) working 38 hours per week. This rate will be inclusive of the following allowances tool, industry, licence, travel time per day, start/finish on the job (sites up to 50km from office/depot) and annual leave loading.
This has been chosen as it is quite a common arrangement of award conditions in an over-award rate of pay. Fred employs James under the Electrical, Electronic and Communications Contracting Award 2020:
In this week James has done a normal 38 hour working week, three hours of overtime at time and a half. He starts at the depot each day but he finishes on site at his last job and drives a work vehicle home.
The wage for this working week is calculated as simply as $40 per hour x 38 hours = $1,520.
When Fred reports the wages, he paid James for his week of work through STP, he includes:
⁺ These allowances are ‘all-purpose’ allowances. They must be included in all wages calculations. Overtime, annual leave, sick leave, public holidays etc. The payroll system needs to be specifically setup to treat these allowances in this way.
* No need to separate the allowances where they are part of the overtime calculation.
Is your payroll software up to it?
By and large the prominent small business payroll software systems have taken a long time to implement changes relating to all-purpose allowances. While most have been updated with this functionality, setting up the allowances properly will likely require information and guidance from the software provider.
It is the view of MEA that if the system you use cannot provide functionality to manage all-purpose allowances that a different software package may need to be considered. A system that does not include these allowances in calculations of overtime, leave and the like (only calculating on the base rate) will likely lead to an underpayment of wages.
Do you use Xero?
Please see this link for how to include the allowances as ‘all-purpose’ .
Xero has provided a short recording of how to set up these allowances .
How do the different codes relate to the Electrical Award?
The allowance types that will be commonly reported on from within the Electrical, Electronic and Communications Contracting award are as follows:
More detail can be found at the following link to the ATO’s reference guide to the codes.
What this all means
In summary, while the STP2 reporting requirements are frustrating and difficult to implement in many systems the overall effect of these changes should not impact how workers are paid under the award or their contract of employment.
These requirements only relate to how their payments are expressed on the payslip. It is important to also ensure that the all-purpose allowances are set up properly so that they calculate overtime and leave correctly.
If you need assistance regarding STP2, or for further information Master Electricians have unlimited access tothe Employer Advice Line on 1300 889 198.
Recent News
- Third generation tradie breaking tradition 16th April 2024
- Charging ahead 14th April 2024
- Small town success story 12th April 2024
Subscribe to Receive free Industry Updates
- Skip to content
- Skip to breadcrumbs
- Skip to header menu
- Skip to action menu
- Skip to quick search
Child pages
- MYOB AccountRight v19 Support Notes
Employee allowances (Australia only)
- A t tachments (4)
- Page History
- Page Information
- Resolved comments
- Link to this Page…
- View in Hierarchy
- View Source
- Export to PDF
- Export to Word

- Created by admin , last modified by BrianQ on Jul 31, 2018
This information applies to MYOB AccountRight version 19. For later versions, see our help centre .
https://help.myob.com/wiki/x/WwGc
ANSWER ID:9156
AccountRight Plus, Premier and Enterprise, Australia only
As part of an award, agreement, contract or industry norm, employees may be paid a series of allowances in respect of a particular condition of their employment, such as the following example:
The employees of a real estate agency are paid a weekly travel allowance to help cover the costs of transporting clients to see properties. The allowance is fixed at $200 per week regardless of the number of kilometres travelled. The allowance is tax exempt and is subject to Superannuation Guarantee provisions.
This page describes how to set up employee allowances based on the above example, but the same principles apply for all employee allowances.
Setting up a new wage category
This task explains how to set up a wage category to cater for the specific employee allowance. If you have different allowances for different employees, such as varying meal allowance rates for different employees, complete this task for each allowance.
- Go to the Payroll command centre and click Payroll Categories .
- Click the Wages tab and click New . The Wages Information window is displayed.
- Name the new category, for example Travel Allowance, and set the Type of Wages option to Hourly .
- For the Pay Rate select the Fixed Hourly Rate of option and enter $200 in the field provided. If the allowance is to be paid by kilometre then the rate could be set to the amount paid for each kilometre.

- Click Employee and select the employee(s) eligible for the allowance.
- If the allowance is exempt from tax*, click Exempt and select the PAYG Withholdings category. *Not sure if the allowance is tax exempt? Check with your accountant or the ATO.
- Click OK to return to the Wages Information window.
- Click OK to the Wages Information window.
- Click the Superannuation tab of the Payroll Categories list.
- Click the zoom arrow next to the Superannuation Guarantee category then click Exempt .
- Select the Travel Allowance category so that it is excluded from the calculation of superannuation.
- Click OK to the Wages Exemptions window then click OK to the Superannuation Information window.
- Click the Entitlement tab of the Payroll Categories list.
- Click the zoom arrow next to the Holiday Leave Accrual category then click Exempt .
- Select the Travel Allowance category so that it is excluded from the calculation of your leave accrual.
- Click OK to the Wages Exemptions window then click OK to the Entitlement Information window.
- Repeat for any other leave accruals that are based on Gross Hourly.
Paying the allowance
When the time comes to process the employee's paycheque, the new allowance wages category will be available for the specified employee. In this example, you would enter '1' in the Hours column against the Travel Allowance category to pay 1 week's travel allowance of $200 as shown below.
If the allowance is paid on the basis of kilometres travelled, then the kilometres travelled would be entered in the Hours column.

Need to pay the same allowance each pay?
Add the allowance to the employee's standard pay ( Card File > Cards List > Employee tab > open the employee's card > Payroll Details tab > Standard Pay ). Enter the number of allowance units in the Hours column.

The allowance amount will now appear automatically on each of the employee's pays.
Allowances and your payment summaries
Employee allowances and tax obligations vary from business to business, so it's recommended you check with your accountant or the ATO regarding how allowances should be handled on your payment summaries. For more information on using the Payment Summary Assistant, see the AccountRight help .
If you are required to specify an allowance separately to Gross Payments on your payment summaries, you can do this at the Payment Summary Fields step of the Payment Summary Assistant in your software. You can enter a description for the allowance, such as "Travel", and select the applicable wage category as shown in the following example.

Payroll categories
Different tax rate for employee allowances (Australia only)
Employee reimbursements (Australia only)
Setting up leave accruals (Australia only)
Prepare payment summaries
Need more help ?
Give us a call or speak to us on LiveChat
Learn about AccountRight v19
Check out our help for how-to information and feature overviews.
Community Forum
See what other users are talking about and ask your own questions.
Watch quick videos to understand MYOB AccountRight v19 features.
Disclaimer | Privacy Policy | Security
Copyright © 2023 MYOB Technology Pty Ltd. All rights reserved
- Powered by Atlassian Confluence 5.10.3
- Printed by Atlassian Confluence 5.10.3
- Report a bug
- Atlassian News
- Unito home /
- How To Set up Bills and Invoices in Xero Accounting Software
Xero is, to put it simply, the gold standard in large or small business accounting . With a single dashboard, you get to manage and streamline almost anything related to cash flow and corporate finance. Whether you’re managing taxes, reconciling bank transactions, or preparing to create and send your first online invoices, Xero has you covered.

In this article:
- Key tools for Xero customers
What to know about Xero invoices
- How to create an invoice in Xero
- Approving invoices in Xero
Customizing your Xero invoice
- Why we love Xero invoicing
- How to sync your Xero invoice data
Xero accounting software offers the following key tools for customers:
- Invoic ing and bil l ing .
- Financial reporting .
Invoicing, you could say, is Accounting Software 101 for accountants and finance workers. If you run a small business or large, you need to get paid. Xero’s services make sure that you get paid faster and through the payment method of your choosing. Your bank accounts will thank us for this step-by-step guide.
There are two ways to utilize online invoicing services in Xero:
- Classic invoicing .
- New invoicing.
Xero is retiring classic invoicing on September 2, 2024
Classic invoicing is the legacy invoicing system that long-time users are familiar with. Features include:
- Ability to create and send overpayments.
- Editing the exchange rate on an invoice to be paid in a different currency.
New invoicing is a more streamlined way to set up invoices in Xero. This route comes with extra features including:
- Auto-saved drafts.
- One-click approval email.
- The optional addition of a credit limit.
If you’re used to using only one of these modes and would like to try out the other, simply click on the button that says Switch To Classic Invoicing or Switch To New Invoicing , depending on which mode you’re currently in.
We’ll be using a sample company to show you both ways to create invoices. This is a fictional small business, and you can test it as well with a free trial to access all Xero features – All you need is a login ID. You can decide which of Xero’s plans best suits your business needs later on.
How to create an invoice in Xero
Invoices in xero classic.
The steps to create and send an invoice are pretty similar in both modes, but the interface looks a little different. Let’s break down the classic invoicing method.
- From the Account menu, click the tab that says Business . From the drop-down menu, click Invoices .
- Here you can either create a one-time new invoice or a repeating invoice.
- By default, you’ll be taken to the New Invoicing mode. Use the Switch To Classic Invoicing button at the bottom.
- Fill in and review your details based on your needs. Don’t forget to include recipient, details of services rendered/products sold, amount due, payment due date, payment method, and any relevant taxes.
- Go to the Save menu to choose how you’d like to save your invoice in Xero.
- Attach any extra files your invoice needs by clicking the icon on the right and adding files from your Xero library or by uploading them from your device (phone or computer). These files could include payment information, pictures of the final product, terms and conditions, documents etc.
- Add the invoice to a Xero project, if needed.
- You’re all set! Time to hit the Approve button (we’ll cover approval in the next section).
Invoices in Xero
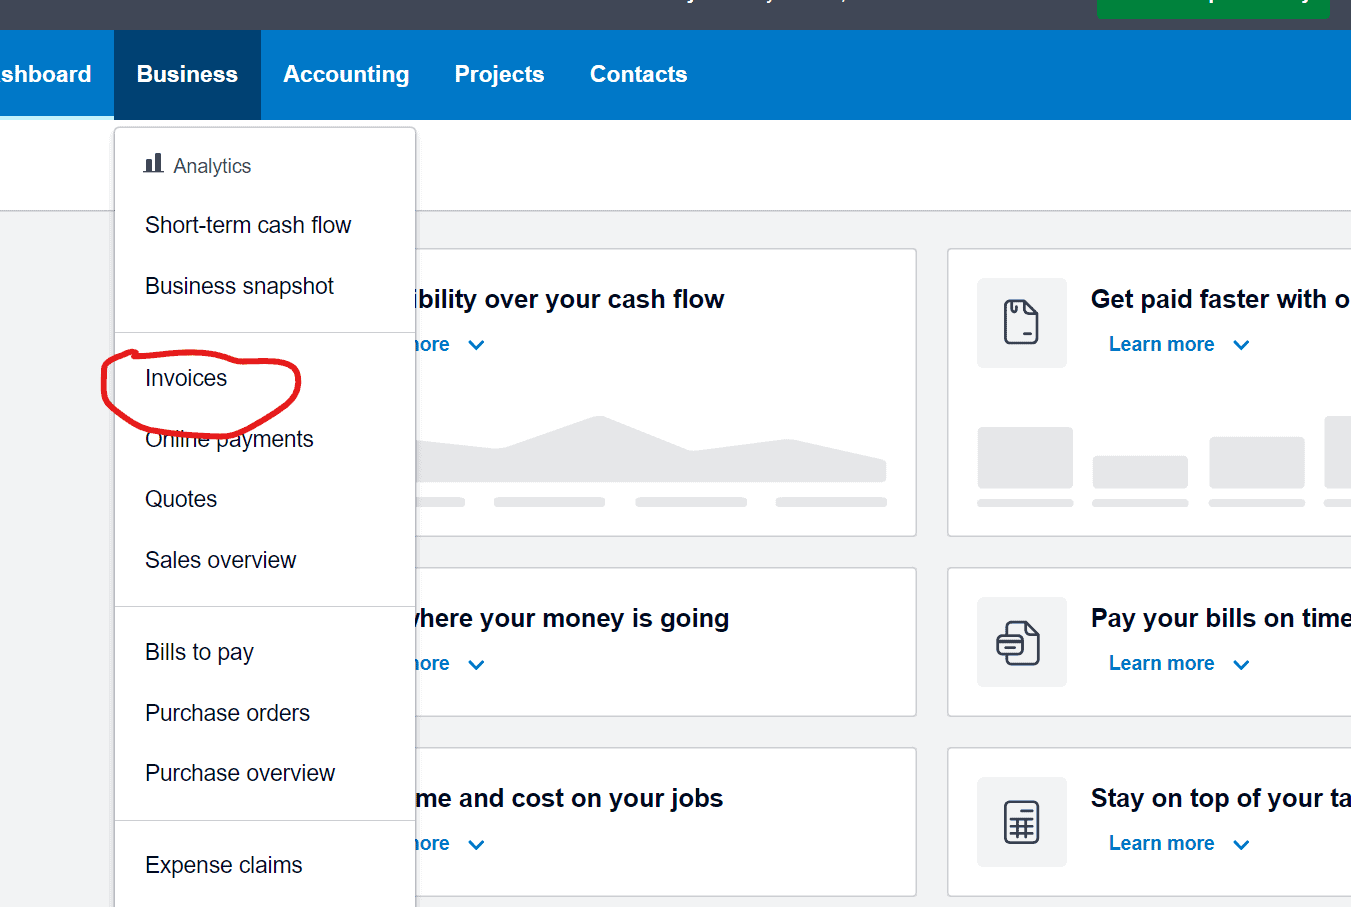
- Visit the Account menu, click Business , and Invoices and then choose whether to set up a one-time or a repeating invoice.
- You’ll be taken to the Classic invoicing page now since you last created an invoice in Classic mode. Go to the bottom and choose Switch To New Invoicing .
- As before, add your invoice details, ensuring everything is accurate.
- Add the payment method of your choice and set your preferred currency.
- Attach files by clicking the button in the bottom left corner.
- Click the Preview button to see how the invoice will look for your customer. You can click Save And Close if you plan to come back to the invoice later or choose Approve And Email .
- You’re all set to approve and send invoices! Time to get paid faster.
Approving invoices in Xero
Now that you understand how to get started with Xero invoicing, it’s time to approve, send, and have your customer pay . You might be approving an invoice you created yourself, or one that another member of your team has submitted for approval.
The steps to approve an invoice in Xero are pretty much the same in both classic and new invoicing modes.
- Go to the Business menu and select Invoices .
- Open the invoice that you wish to approve.
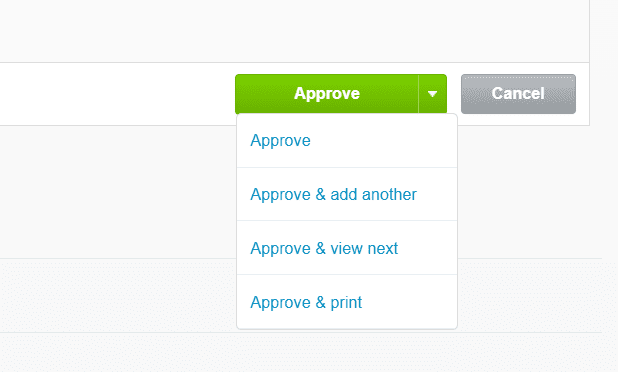
- Click on Approve . If you’re in New Invoicing mode, this will read as Approve And Email , since you can do both with a single click.
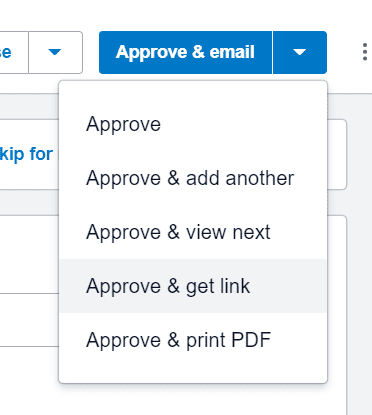
You have a range of additional options on how to approve your invoice. In Classic Mode, they include:
- Approve And Add Another – This lets you approve the current invoice and immediately open a new draft invoice.
- Approve And View Next – This lets you approve the current invoice and immediately open the next invoice that needs approval.
- Approve And Create PDF – This lets you approve the invoice and produce a PDF copy of it for printing.
You get two additional options in the New Invoicing mode:
- Approve and get link – This lets you approve the invoice and get a link to an online copy of it.
- Approve – This lets you just approve the current invoice and then come back later to email it or get a PDF.
- Next, simply Send to your customers for them to pay.
To free up your schedule, you also have the option to approve multiple Xero invoices at the same time.
- Under the Business menu, scroll to Invoices . Go to the tab that says Draft or Awaiting Approval .
- Mark the check boxes next to all the invoices that need approval. Then, Approve , and then click on OK.
That’s it! Bills and invoices are now made easier.
Customization options allow your invoices to perfectly represent your business. Xero has you covered for making it simple.
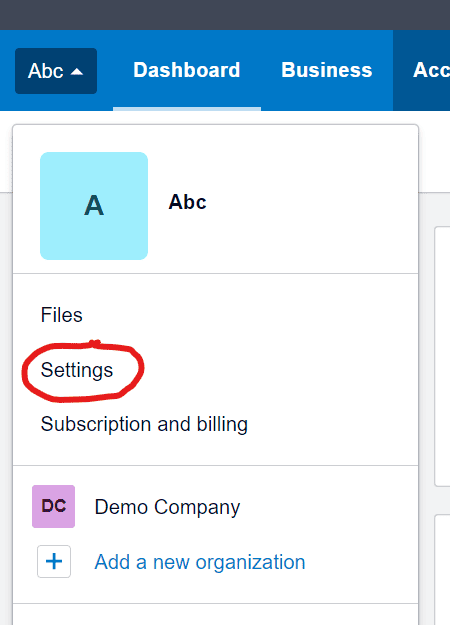
- Under your organization’s tab, click Settings , and then Invoice Settings .
- Select New Branding Theme . You’ll notice that you have a choice between Standard and Custom . The standard option is a basic invoice template with certain pre-filled criteria, like margins and paper size. If you’d like to keep it simple, we recommend picking this option. Then, pick a name for your theme.
- Customize and correct your invoice layout as you like based on a wide range of options.
- You can also directly edit the Standard Template and customize it that way.
- Click on Save . That’s all you need for stress-free customization.
Why we love Xero invoicing
At Unito, we’re big fans of Xero. It’s accounting software with invoicing that works. Whether you use the Classic or the New Invoicing style, it’s easier than ever, small business accounts or large, to get paid how you’d like. Let’s talk about some of the nifty general features that come with Xero accounting.
- Clean, professional look – The invoice templates give you a clean look that will suit any kind of business and industry. Plus, you can add your own company logo and branding to perfect it.
- Intuitive invoicing dashboard – Anyone can learn how to plan and send invoices in just a few clicks. For extra assistance, you have Xero Central, which gives you step-by-step walkthroughs on all topics related to cash flow and invoice creation.
- Multiple ways to pay – From credit and debit card payments to PayPal and Stripe, Xero lets you power up a small business in the way that the big players do.
How to sync your Xero invoice data
Once you’ve set up your Xero invoice and started receiving payments, it’s time to think about syncing all that data with the rest of your business stack. The thing is, Xero doesn’t come with a feature to automatically import your invoice data to a spreadsheet. You’ll have to do it manually, which can be a drag in your to-do list, and it leaves more room for human error. It’s a high-risk task for your business finances.
Start syncing Xero data with a free Unito trial
Luckily, Unito offers a free trial and flexible plans for new customers and a Xero to Google Sheets sync that does this for you in seconds. With every new invoice, you can automatically sync the data in a Google Sheet that you can then modify or share with other teams that don’t use Xero. What’s more, Unito syncs all your historical software data too, so your reports are updated at any given time. Whenever you make a change to an invoice created in Xero, the synced Google Sheet reflects the change too. Small business or large enterprise, Unito helps you protect your time, so you can get back to the important work.
You can visit our step-by-step article on how to sync Xero with Google Sheets . And it’s not just one tool. From Excel to Airtable to HubSpot, Unito lets you set up a workflow between Xero and any of your tools where you can view your invoicing in a handy spreadsheet. Taking charge of your tool stack has never been easier! Reach out to know more and start your free trial today.

Jira Cloud vs. Server: Which One Do You Need?
Choosing between Jira Cloud vs. Server is usually up to a system administrator, but here’s a guide to making that decision if it’s up to you.

How to Use Trello Like a Pro: 6 Tips and Tricks
Trello has a ton of features that even people who use the tool every single day don’t know about. Here are six ways you can get more out of your boards.
Related articles

Unlock the Power of Sync (Ebook)
Data integration isn’t a luxury, but most existing platforms haven’t stepped up to the plate in a meaningful way. In this ebook, you’ll learn how a 2-way sync can change the game for your organization.

What is a Webhook? A Beginner’s Guide
A webhook might sound like something Spiderman uses to defeat the Green Goblin, but it’s actually a fundamental part of how lots of web apps interact.
How to Integrate ServiceNow and Jira Without Spokes or Code
Integrate ServiceNow and Jira without writing a single line of code with Unito’s 2-way integration to simplify ITSM operations for your org.
Processing a living away from home allowance in Xero
How do I process a living away from home allowance in Xero for the ATO? I have been in touch with Xero support, and they suggested a three tier process. They suggested I create an earnings rate, a reimbursement rate and a deduction rate. Is this the best way to report a living away from home allowance? It seems very cumbersome to have to allocate the same amount of money to three different rates for a single employee. Our employees are mainly fly-in/fly-out (FIFO) workers. Please assist with an answer. Thank you
Kind regards
- Report as inappropriate
Most helpful reply
Hello @Winifred
Every software package is different, so this is a question for Xero. You may need to contact them again to see if there is an easier way to input allowances.
We can only help with tax questions about allowances which you can read about on our website.
All the best,
IMAGES
VIDEO
COMMENTS
Set up an earnings pay item with an allowance category. Xero then separates allowances from gross payments on payment summaries and payment summary annual reports. If you add or edit an allowance, you must assign it to one of six types: Car, Transport, Laundry, Meals, Travel or Other. Xero will use the type to group allowances for reporting ...
Overview. Create an expense claim to be reimbursed for your personal money spent or your daily allowance. Create and submit a mileage claim to be reimbursed if you use your own vehicle for work. Tip. If you've used company money to make a purchase, create and submit a company expense claim. Create and submit an expense claim.
Reportable as W1 > Select this option. Click on [Add] Add the Car Allowance Pay Item to the Employee's Pay Template. Go to Payroll > Employees. Open the Employee details and click on the [Pay Template] Tab. Click on [+Earnings Line] Select/Enter the following details: Earnings Rate > Select: Car Km Allowance.
Travel allowance. I thought setting up a Travel Allowance pay item would be simple but I'm finding lots of conflicting info on tax on the ATO site and am a bit confused. Its just a simple a $90 per night allowance to employees when they spend the night away from home. Accomodation and flights is already paid for by company.
The steps below are for loading smart formulas to set up automatic and manual allowances with Smart Fomulas. Pay Items are set up in Xero by navigating to Settings> Payroll Settings> Pay Items. To be used for timesheets the pay items must: Have a Rate Type = Multiple; or. Have a Rate Type = Rate per unit and Type of units = hours.
Get set up in three steps. Watch our support videos for easy-to-follow guidance to complete your basic set-up. 1. Opening balances. Set your opening balance and dates for more accurate reporting. Watch now (viewing time: 3:10) 2. Add an account. Add your bank or credit card account, then import statements.
To create an expense, follow these steps: Open the Xero Expenses module from the main menu. Click on the Add Expense button. Enter an appropriate description for the expense, and select its category (e.g. travel, meals, or office supplies). Input the date of the purchase and the total amount paid.
The key features. Mileage in Xero Expenses eliminates all the common pain points associated with this process. Join the open beta today to: Submit on the go and capture mileage expenses as they happen. Better manage cash flow and plan ahead with real time visibility. Gain visibility with a clearer view of spending by account and employee.
Speed up the process from claim to reimbursement. Employees of businesses using Xero Expenses can track mileage, scan receipts and submit expense claims using the Xero Me app for iOS or Android, and those with approval permissions can review and approve expense claims.
Am being switched over to Xero Expenses from Zoho and had to check what the mileage rate is (it was the base HMRC rate) before i submitted, but it should be possible to set default rates like £0.45 and £0.25 so that users can just select the relevant rate.
Xero partners and customers can now enrol in STP Phase 2 reporting, once steps one, two and three have been completed. ... Find out more about the changes to the way new employee profiles are set up in payroll. Video: new employee set up. ... Article: All purpose allowances. Learn about all purpose allowances, how to process and disaggregate ...
Please see this link for how to include the allowances as 'all-purpose'. Xero has provided a short recording of how to set up these allowances. How do the different codes relate to the Electrical Award? The allowance types that will be commonly reported on from within the Electrical, Electronic and Communications Contracting award are as ...
Go to the Payroll command centre and click Payroll Categories.; Click the Wages tab and click New.The Wages Information window is displayed.; Name the new category, for example Travel Allowance, and set the Type of Wages option to Hourly.; For the Pay Rate select the Fixed Hourly Rate of option and enter $200 in the field provided. If the allowance is to be paid by kilometre then the rate ...
Invoices in Xero. Visit the Account menu, click Business, and Invoices and then choose whether to set up a one-time or a repeating invoice. You'll be taken to the Classic invoicing page now since you last created an invoice in Classic mode. Go to the bottom and choose Switch To New Invoicing.
I have been in touch with Xero support, and they suggested a three tier process. They suggested I create an earnings rate, a reimbursement rate and a deduction rate. Is this the best way to report a living away from home allowance? It seems very cumbersome to have to allocate the same amount of money to three different rates for a single employee.