

Item added to your cart
Shop by category.
- Accessories
- Comms & Navigation
- PDP Mounting Brackets
- Performance
- Recovery Gear
- Suspension Upgrades
Shop by Model
- 70 Series Landcruiser
- 200 Series Landcruiser
- 300 Series Landcruiser
- Toyota HiLux
- Toyota Prado
- Ronny Dahl's Picks!
- Open media 1 in modal
- Open media 2 in modal

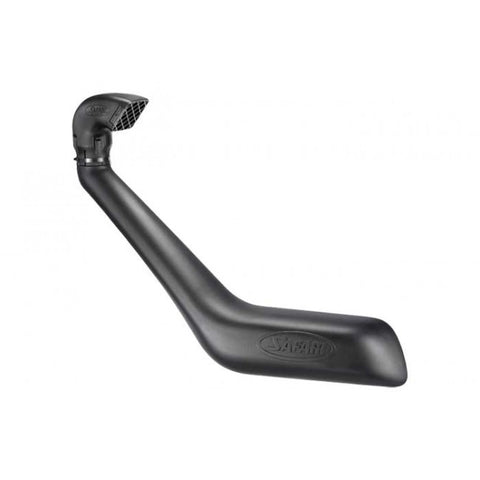
Safari 4x4 | Toyota Landcruiser VDJ 70 series | SS79HPV | Armax Snorkel
Currently in Stock!
Couldn't load pickup availability
Product Dimensions
140 cm x 47 cm x 20 cm
Box Dimensions
140 x 47x 20
Safari Armax Snorkel VDJ 70 series
· Safari’s rounded style Air Ram; however with minimum 4” neck and an optimised air flow, low restriction grill · Australian designed, moulded and manufactured · Design and flow tested by our in house engineers for maximum performance · Development in conjunction with other soon to be released ARMAX™ performance enhancement products. · Raised air intake to prevent your engine from ingesting harmful elements · OE Style Upper Mounting Bracket · Water separating air ram design to remove water from the air stream · Durable and UV stable snorkel and air ram for added strength · Comprehensive Snorkel fitting guide suitable for Toyota Land Cruiser 4WD with an accurate template for installation. · Lifetime warranty
Customer Reviews
About safari 4x4, shipping info.
Orders before 1PM will be shipped same day.
Metro shipping times are from 2 days and regional shipping times are from 3. Please see our shipping page for more details and info on bulk orders
Warranty & Returns
30 day refunds are available for all undamaged/Sealed products. Please fill in the Return
Feel free to contact us if you have any questions. We're based in WA and are here to help
We Only Sell the Good Stuff
At PDP we only stock the highest quality parts & accessories. Honestly, if we wouldn't put a part in one of our own cars, neither should you. We won't recommend a product to you that we haven't worked with ourselves. We stand behind everything we choose to stock in our store.
We're Here to Give You a Hand
Just like our cars, we like to make sure we go the extra mile. We still like to think of ourselves as the small business we started out as, which means reputation means a lot to us. Whether you just need some advice, or your stuck mid-installation, give us a call and we'll give you a hand.
- Choosing a selection results in a full page refresh.
Net Orders Checkout
Shipping address, shipping methods.
- Product Features
- Tuning Locations

Safari ARMAX Snorkels
The safari armax™ snorkels feature:-.
- Safari’s UV Stabilised Polyethylene
- Safari’s rounded style Air Ram; however with minimum 4” (101.6mm) neck and an optimised air flow, low restriction grill - Design and flow tested by Safari engineers for maximum performance
- Life Time warranty
We are closed for holidays, returning January 8. For urgent enquiries, please email [email protected] .

- 4WD Performance Exhausts
- Throttle Controllers
- Power Module Plus
- Performance Headers
- Heavy Duty Airbox
- High Flow Snorkel
- Electronic Exhaust
- Merchandise
- Find Your Vehicle
- Toyota 300 Series Landcruiser
- Next-Gen Ford Ranger
- 79 Series DPF Back Dual Cab Landcruiser
- 200 Series DPF Back
- Y62 Nissan Patrol Series 1-5
- JB74 & JC74 XL Suzuki Jimny
- Toyota Hilux
- 4WD Upgrade Guide
- DIY Installation
- Exhaust Notes
- Video Library
- Module Map Portal
- Upcoming 4WD Shows
- Find a Dealer
- Contact Torqit
- Request A Product
- Influencer / Sponsorship Request
- Extended Warranty
- Delivery & Returns
- Warranty Request
- Terms and Conditions of Sale

4″ Stainless Steel Snorkel for Toyota 79 Series Landcruiser
$ 1,490.00 AUD
Toyota Landcruiser 4″ Stainless Steel Snorkel
Torqit’s 4″ Stainless Steel Snorkel for the 79 Series Toyota Landcruiser provides maximum airflow while protecting the vehicle from water and polluted air. Does not suit the 01/2024… facelifted 70 Series.
- The Product
- Specifications
- Instructions
4″ STAINLESS STEEL SNORKEL FOR TOYOTA 79 SERIES 4.5L SINGLE CAB LANDCRUISER: 03/2007…
If you drive off-road, in rural areas or through deep water crossings, a properly functioning snorkel is a key addition to your 4WD. Torqit’s 79 Series Landcruiser 4” Snorkel has been designed to provide your vehicle’s engine with cooler and cleaner air for optimum performance. This means maximum airflow and potential fuel savings- all while minimising wear and tear on the engine.
Mandrel bent from 304 grade stainless steel, the one-piece construction eliminates all joins to keep the snorkel streamlined and watertight. Torqit’s 79 Series Snorkel is rear facing and angled slightly down to help prevent rain, insects and water from entering the snorkel’s mouth.
Made in Australia, this snorkel is designed to withstand rigorous off-roading and the harsh extremes of the Australian climate. Preventing dust and water intake* with a fully sealed snorkel gives you the ultimate peace of mind that your vehicle is protected and working at optimum capacity.
Set into the side of the panel for a streamlined profile, the snorkel bolts to the vehicle with two 304 grade steel brackets, laser cut with Torqit’s logo. Each bracket includes a rubber backing which protects the body paint and prevents water from entering the threads.
Finish Options:
Stainless Steel Brushed to a 320 grit finish at Torqit’s head office, our stainless steel option adds a distinctive look to your 79 Series build.
Powder Coated Torqit’s powder coated option in satin black is highly durable and scratch resistant. Complementing the color of aftermarket accessories such as bull bars and roof racks, this option gives your 79 Series build a coordinated finish.
We recommend combining Torqit’s Stainless Steel Snorkel with additional products for the ultimate performance upgrade- read up on the top recommendations for the 79 Series here.
79 SERIES SNORKEL FEATURES
304 Grade Stainless Steel As premium quality steel, 304 grade stainless is renowned for its high strength, resistance to corrosion and easy maintenance. A snorkel is constantly exposed to the elements, yet the properties of 304 grade steel mean it can withstand rust and the harshest of Australian conditions.
Thick Stainless Steel To handle extreme off-roading and rough terrain, Torqit uses steel up to 2 mm thick. The thickness maintains the structural integrity of the pipe even after bending, and means you can go off-road with peace of mind knowing your snorkel will not crack and dent.
Mandrel Bent Pipe Torqit’s Mandrel Bender uses a flexible rod to support the pipe internally and prevent crinkling as it is bent. This one-piece construction eliminates all joins to keep the snorkel rigid, and produces a constant wide diameter with minimal bends for unrestricted airflow. Check out Torqit’s Mandrel Bender in action.
Rubber Pinch Weld and Anti-Rust Paint To protect the guard panel from rusting, Torqit’s snorkel comes complete with clear OEM-certified paint for applying to the guard cut. A rubber pinch weld provides a final sealed finish, and also helps prevent corrosion and water leakage.
79 SERIES SNORKEL INSTALLATION
Torqit’s 79 Series Snorkel comes with a steel fitting template which bolts onto the existing factory mounts for guaranteed accuracy. We recommend allowing one hour for fitment, and an additional 30 minutes if fitted alongside our 79 Series airbox.
For more information, click the instructions tab above. Alternatively, install at your closest Torqit dealer, which you can find by clicking here .
SNORKEL FEATURES
- Premium 304 grade stainless steel
- Mandrel bent pipe
- Heavy duty laser cut brackets
- Stainless steel/ satin black powder coated option
- OEM-certified paint for guard cut
- Rubber pinch weld
- Folded steel fitting template
- Uses existing factory mounts
- Compatible with aftermarket roof platforms and light bars**
- 5 year product warranty
Recommended: Pair with Torqit’s 79 Series Airbox for maximum results.
* Know your vehicle’s wading depth! While Torqit’s snorkel is designed to be watertight, the addition of a snorkel alone does not prevent water from entering/damaging your vehicle in other areas. Please check your vehicle manufacturer’s recommended wading depth before undertaking water crossings.
**Torqit’s 79 Series Snorkel accommodates a 134 mm Stedi light bar, and a 1535 mm x 1385 mm Rhino roof platform. Please note this snorkel is compatible with both the single and dual cab 4.5L 79 Series Landcruiser.
Torqit’s 79 Series Snorkel comes with a full fitting kit and steel template. The template is laser cut and CNC folded to match the profile of the guard and includes a soft foam backing to protect the vehicle panel. By bolting into existing factory threads, the template provides a 100% accurate cutting guide- no measurements required.
The cutting tool moves along the top of the template, which is laser etched with instructions and cutting points. By supporting the guard panel as it is cut, the rigid steel also prevents the panel from buckling in and out and removes room for error.
Also included in the fitting kit is clear OEM-certified paint for applying to the guard cut. This prevents rust from forming beneath the pinch weld and keeps the panel in optimum condition.

Stay up to date on special offers
Subscribe to our mailing list and receive 5% OFF your next product order!
- First Name *
- Name This field is for validation purposes and should be left unchanged.

- Search forums
Follow along with the video below to see how to install our site as a web app on your home screen.
Note: This feature may not be available in some browsers.
- Vehicle Tech Forums
- 100-Series Cruisers
Safari Snorkel install LX470 100
- Thread starter MightyBombJAC
- Start date Jun 13, 2015
This site may earn a commission from merchant affiliate links, including eBay, Amazon, Skimlinks, and others.
More options
MightyBombJAC
- Jun 13, 2015
- Thread starter
CurbsEnthusiasm
Looking good. Something I plan to eventually do to my LX as well.
crimsonaudio
2003 - gojira.
I'll probably eventually do this but "What in the world am I doing?" is what keeps me from doing so...
Overall it was pretty easy. Took me less than 2 hours. Now that I have it installed, I am going to remove it and have it smoothed out and painted green to match. My painter is gone for a week, but when I finish that, I'll be sure to post pics. I am very pleased with the fit and quality. There is no wind noise at highway speeds and it really took the soccer mom look away from the LX If, anybody else is going to do this, send me a message and I will loan you my hole saw.
Very nice. I may do a snorkel one day but I will have to do something different about my second battery first. Can't wait to see it painted to match the body. This will be a first I have seen on a 100 series.
Full car pic please. Great job documenting the install!
Nice write up. Anyone know which version (knock off) has the antenna clearance?
TeCKis300 said: Full car pic please. Great job documenting the install! Click to expand...
Damn that looks good! Well done sir.
Leave it black!
Just curious...does going from the intake relatively hidden under the hood to more of a scoop possibly add some fuel efficiency? Also, does this mod still allow for one of those larger K&G air filters?
LEX said: Leave it black! Click to expand...
jayLC1 said: Just curious...does going from the intake relatively hidden under the hood to more of a scoop possibly add some fuel efficiency? Also, does this mod still allow for one of those larger K&G air filters? Click to expand...
Mach lll Club
Very good job. It takes a lot of courage to use a drill and hole saw on a Land Cruiser. Don't think I have what it takes. Can't make seem to make the decision to add a snorkel. May regret it later.
Looks Awesome!! Came out great !! Saw in ur Pix u r in Stuart, FL. I'm in St Aug but we were down in Port St Lucie for Memorial Day wknd and went to the Seal Museum & Bathtub Beach one day. (Sorry for the off topic rant)
- Jun 14, 2015
Looks great! Keep it black though.
Similar threads
- Drunken Ira Hayes
- Dec 23, 2023
- Jan 14, 2024
- Jan 31, 2024
- FamilyCamper
- Aug 8, 2023
Users who are viewing this thread
- Stay logged in
Share this page

- Mods 1 – Getting Started
- Mods 2 – Tire Size Guide
- Mods 3 – Tire Buying Guide
- Mods 4 – Performance
- Mods 5 – Lift & Level Kits
- Mods 6 – Grille Kits
- Mods 7 – Headlights
- Mods 8 – Fog Lights
- Mods 9 – Rock Sliders
- Mods 10 – Roof Racks
- Mods 11 – Front Bumpers
- Mods 12 – Rear Bumpers
- Mods 13 – Skid Plates
- Mods 14 – Wheels
- Switch Systems
- Rooftop Tents
- Acc Lighting
- Tail Lights
- Rock Sliders
- Skid Plates
- Front Bumpers
- Rear Bumpers
- Accessories
- Recovery Gear
- Refrigerators
- Trail Tested
- Maintenance

5th Gen Mods , Accessories , DIY , Expeditions , Install , Off-Road , Overland , Performance , Reviews , Trail Tested
Arb safari snorkel install & review – 5th gen 4runner.

ARB Safari Snorkel Step-By-Step Install On The 5th Gen 4Runner: Full Review & Product Overview
While the majority of 4Runners sold here in North America will sadly spend most of their miles on pavement, there are some that will see a lot of time off-road, either out of necessity or for recreation.
For those on dirt, there are certain modifications that are smart to consider to extend the life and comfort of your 4Runner. Suspension upgrades, tougher tires, bolt-on armor, etc… While all of these upgrades are valid, what upgrades are being made to protect the motor while on the trail? The motor only has a few points of entry or exit that will cause damage or wear over time: the intake and the exhaust. The exhaust side of the equation is less of a concern because it’s pushing gasses away from the motor, so let’s focus on the intake side as its job is to feed the engine with clean air.
ARB Safari Snorkel for 5th Gen 4Runner
Benefits of a snorkel.

The stock air intake on the 4Runner pulls air from the space between the inner and outer front fender on the passenger side. With the plastic fender liner installed, a good amount of dust and water will be averted from the open intake hole. But take a long trip through the dust, or ford a river and you risk a clogged air filter or worse—water in your intake box.
If you have aftermarket front fenders and no longer have the factory fender liner, you can take that risk and increase it. How do you minimize or eliminate the risk? Like many great answers to overland questions — ask the Aussies! There’s no coincidence that one thing you’ll see on many Australian vehicles who spend time off-grid is a raised intake or snorkel. Drawing clean air from a windshield height intake will help prolong your engine life, reduce filter replacement, and eliminate water intake problems. Many vehicle manufacturers offer raised intakes from the factory for overseas applications, but unfortunately, Toyota hasn’t made an option for the 4Runner, but we’re not lost.
ARB Safari Snorkel

Safari Snorkel has been one of the leaders in the snorkel aftermarket for decades and has an extensive product offering that includes our 5th Gen 4Runners. They use a UV-stable polyethylene material that has been CAD-designed for optimal fitment and airflow specific to the 4Runner. Paired with their signature Air Ram head, the snorkel is designed to work in the harshest conditions keeping dirt, debris, rain, and rivers out of your vehicle’s intake.
Find it online:
- Safari Snorkel Kit (Part #SS450HP) 5th Gen 4Runner: Check Price
Install Overview

- Safari Snorkel SS450HP
- Air Ram head
- Adapter boot
- Hole/cutting template
- Upper mounting plate
- Miscellaneous hardware
Tools and Materials
- Painter’s tape
- Permanent marker
- Marking punch
- #5 step drill bit
- Miscellaneous drill bits up to 5/16”
- Right angle drill (optional)
- Body saw (air reciprocating saw)
- 80-grit sandpaper
- Deburring tool
- Loctite Blue 242
- Rustoleum black paint
- Silicone sealant
- Rubber mallet
- Body clip tool
Step 1. Prep Surface

To start, go ahead and prep the area you’ll be working on by washing the front passenger side of the 4Runner. This will remove any contaminants and make sure you have a nice “seal” between the snorkel and the body panel when you’re all finished.
Step 2. Remove Airbox

Remove the upper half of the factory airbox loosening the 10mm clamp on the intake hose closest to the airbox, and removing the factory MAF harness from the intake. You can leave the intake hose attached to the throttle body, but put a nitrile glove over the hose to prevent any contaminants from entering the intake while you’re working.
Remove the three 12mm bolts attaching the airbox to the fender, and roll the airbox towards the firewall to gain access to the bottom of the intake wiring harness. There is one clip to undo here. Remove the lower section of the airbox.
Step 3. Remove Factory Intake Duct

While you have the airbox handy, remove the factory intake duct using a small pry tool. This is where the new adapter hose will attach later on. After removing the inlet, give the whole lower section a thorough cleaning from debris that might have been in the airbox from before. This will also allow you to have a benchmark for how well the snorkel is performing after you’ve installed it.

Step 4. Seal Factory Drain Holes

The factory airbox has two drain holes in it, one on the side that faces the front of the vehicle and one on the bottom. It’s optional, but I would recommend using silicone caulking to fill these holes to seal up the intake. This will keep your intake sealed during water crossings, but will also keep any water that goes into the snorkel (unlikely) in the intake. So if you do seal the intake, make sure you check it occasionally if you’re operating in heavy rain or snow to make sure it’s dry. Once the silicone is applied, set it aside and let it dry while you work.
Step 4. Mask Off Work Area

Next, use the painter’s tape to tape off the area of the fender that you’ll be working on. Use the template as a guide, going all the way down to the fender flare. Make sure you add some tape over the seam between the fender and flare so metal shavings don’t pile up in them when you drill. Taping the whole work area will help keep your fender from being accidentally scratched while working. It’s not a required step, but it’s a smart step to take to protect your 4Runner.
Step 5. Put Layout Over Tape

Take the template out of the box and line it up on the back of the snorkel to make sure all of the holes match up. This preventive step helps to ensure you’re not drilling the wrong holes if you were supplied the wrong template! Attach the template to the fender using painter’s tape, aligning the left edge with the door jam and the top with the top of the fender. Make sure you thoroughly tape the edges so everything lines up properly and matches the contours of the fender.
Step 6. Outline Layout

With the template installed, mark the holes with a permanent marker. Once marked, remove the template and set it aside.
Step 7. Install Studs into Snorkel

Before getting into the drilling portion of the install, grab the six 8mm studs from the hardware bag. Apply some Loctite 242 to one half of the thread on the stud, and install them into the snorkel. Doing this ahead of time will allow the Loctite to set a bit before you add the nyloc nuts during install.
Step 8. Remove Inner Fender

Remove the plastic inner fender liner from the front to the back starting with the body screws under the factory bumper working through the plastic clips and screws towards the firewall. Use a body clip tool to pry the factory clips without breaking the heads off. You’ll only need to pull the fender liner a little more than halfway down. Just far enough to be able to reach back to the rear-most mounting bolt.
Step 9. Drill Holes into Fender

Back to the outer fender… With the holes now marked take a marking punch and punch a mark in the center of each pen mark. This will help keep the drill bit centered when you begin to drill. With the center punched, take your step drill and drill the six mounting holes in the fender. Make sure you are wearing safety glasses for this task as metal in your eye will ruin your weekend install. Take your time and once the appropriate diameter has been reached, spin the bit lightly a couple more revolutions to clean up the hole edge. You’ll want to drill to 16mm, or 5/8” for the mounting holes. No turning back now!
When drilling the hole closest to the passenger door, make sure you have enough clearance behind the fender so you don’t hit the inner fender. Have someone you trust poke their head in the fender to watch while you drill. Make sure they’re wearing safety glasses as well.
Step 10. Drill Cut Start Point

With the mounting holes drilled, mark your hole for the starting point for the inlet hole. You’ll need to choose a size that’s large enough to accommodate your saw blade of choice. Make sure when you mark your hole, mark it on the INSIDE of the area to be cut and far enough from the cut line to make sure you’re not drilling into the portion of the fender you’re keeping.
Step 11. Cut Out Big Hole

After drilling the starter hole, it’s time for the main event. I would recommend taking this moment to enjoy some liquid courage as you’re about to cut a big hole in your 4Runner. Beverage consumed (and then some time to re-group), grab your body saw. I used a pneumatic reciprocating air saw for this task because it’s a precision saw that leaves a thin kerf and a very smooth finish. Use good lighting for this job to make the line more visible. Take your time, adjusting your position to get the best stability during the cut. You can use a magnet across a cut section of the hole to hold the inner piece in place when you finish your cut so it won’t fall through. Breathe easy, the hardest part is over!
Step 12. Clean Cut Holes

Use the deburring tool to remove any metal burrs from the holes you just cut/drilled. Lightly use your finger to feel the inside of the holes for burrs. On the larger intake hole, use 80-grit sandpaper to smooth off the edge of the hole, if needed. Remove the painter’s tape when you’ve finished cleaning the holes.
Step 13. Test Fit Snorkel

Take your snorkel with the studs pre-installed and line it up with the fender to check the fit with the new holes. With any luck, you’ll have a perfect fit with no adjustments needed. If your holes are off, use a die-grinder to adjust them.
Step 14. Mark Drill Holes on A-Pillar

Use this time to mark your A-pillar mounting plate. Mockup the snorkel, and look at where you’ll need to apply painter’s tape. Remove the snorkel, and apply the tape with a few inches on each side. Then reapply the snorkel with the upper plate installed to mark where the plate will be attached to the A-pillar. Use your permanent marker to mark the top, bottom, and windshield edge of the plate. Remove the snorkel and the plate from it. You’ll come back to this in a bit.
Step 15. Paint Drill Holes

With the holes cleaned up, use a Q-tip to apply a layer of paint on all bare edges of metal. This will help prevent any rust from eating away your fender underneath the snorkel. Let the paint dry while you move on to the next step.
Step 16. Drill Pilot Holes into A-Pillar

Take the upper mounting plate and realign it with the marks you made earlier. Then using your permanent marker, mark the three holes you’ll need to drill in the A-pillar. With the holes marked, use the marking punch to set the center of the holes to drill. Starting with a small drill bit (1/16”) drill a pilot hole with your right angle drill. You can use a standard drill for this, but the right angle drill will allow for more depth control when drilling. You’ll want to just break the surface with these holes, but you won’t need to worry about any airbags in the A-pillar.
Step 17. Drill Final Holes into A-Pillar

After drilling your pilot holes, you can get ready to drill the holes for the plastic clips supplied in the snorkel kit. My final hole size was 5/16” to where the clips fit snugly with a hammer tap to set them. I would recommend drilling a 9/32” hole first, checking for snugness with the clip, then widening to 5/16” if needed. You want these to be as snug as possible to help hold them in place. Remove the painter’s tape.
Step 18. De-Burr Drill Holes

With your three holes drilled, use the deburring tool to clean up your holes and paint them as you did with the holes on the fender. Let them sit for a good 10-30 minutes, depending on how warm your workspace is. I used a heat gun to help cure the paint a little quicker.
Step 19. Silicone Clips into Holes

Paint cured, grab the silicone that you used for the airbox and apply a bead around the bottom of the clip. Line it up with the hole, and use a rubber mallet to tap it into place. Gently rotate the clip once it’s seated to even out the silicone at the interface. Repeat this for the other two clips. You can remove any silicone residue by lightly wiping it off with a paper towel damp with Acetone.
Step 20. Install A-Pillar Bracket

Install the upper plate with the supplied stainless steel screws by hand. Be sure to not spin too fast or the clip will start spinning. If it does, take a thin pair of pliers to lightly grip the edges of the clip while you screw in from above. Snug up all 3 screws evenly.
Step 21. Remove Stock Airbox Tabs

You’ll need to modify the stock airbox by removing the retaining and alignment tabs where the factory inlet used to be. I used a die grinder to remove the tabs as described in the instructions and smoothed them with some sandpaper to ensure a clean fit. This is where the snorkel adapter will slide onto the airbox.
Step 22. Install Intake Adapter

Set the intake adapter into the fender with the round end through the inner fender. Slide the smaller of the two hose clamps over the end sticking through the hole with the tensioning screw facing up on the forward side of the adapter. Take the lower half of the intake box and set it into place, sliding the round end of the adapter over the intake on the box. Use a little dish soap on the inside of the rubber adapter as a lubricant if needed. Reinstall the lower airbox, along with the wiring harness clips you removed at the beginning. Wait to tighten the hose clamp until after the snorkel is installed.
Step 23. Install Hose Clamps on Adapter

Take the larger of the two hose clamps and install it on the oval end of the adapter in the fender. Snug it up just enough so it doesn’t rotate on the adapter. You’ll want the tensioning screw facing down on the rearward side of the adapter. Take a small amount of dish soap and spread it on the inside of the adapter as a lubricant.
Have one of the upper bracket bolts at the ready. Bring in the snorkel and line it up with the fender, setting it into place. Reach in from underneath to massage the adapter onto the snorkel making sure it seats evenly. Then, grab your bolt and lightly thread it into one of the upper bracket holes to keep the snorkel in place while you get ready to secure it from inside the fender.
Step 24. Install Nuts and Washers

With your six washers and nyloc nuts handy, thread one of each onto the six studs inside the fender. Tighten them evenly with a ratcheting wrench, eventually getting them all snug on the fender. Once the snorkel is secured from inside the fender, add the upper mount bolts on the A-pillar and tighten them until they’re snug.
Step 25. Tighten Hose Clamps

With the snorkel fully secured, tighten the hose clamps with a 7mm socket on both the snorkel and the intake side of the adapter.
Step 26. Install Airbox

Make sure your airbox is cleaned out using a vacuum and rag, then reinstall the filter and upper half of the air box. Tighten the hose clamp (10mm) and reinstall the harness clips/plug before securing the upper airbox.
Reinstall the inner fender liner after you have cleaned out any metal shavings from the drilling using a vacuum. Use the driver’s side if you can’t remember which clips/screws go where.
Step 27. Install Air Ram

Finally, attach the Air Ram head to the top of the snorkel using the provided black hose clamp with the tensioning bolt facing back. That’s it! You’re done!
Trail Impressions

With the snorkel installed, it isn’t really noticeable from the driver’s seat. You’ll only know it’s there from the grief you get from your significant other when you pick them up from work…ask me how I know.
Aesthetically, the Safari Snorkel will change the exterior appearance of your 4Runner and may look a little out of balance if you have a mostly stock 4Runner. That being said, this is a functional upgrade, first and foremost. If the Safari Snorkel gives you what you need when you need it, who cares what it looks like. On a mild to wild build, this snorkel looks right at home with its black textured finish.
Road Impressions

On the road, there is surprisingly no increase in sound from the snorkel either from wind or intake noise. You do get some increased intake noise if you rev the engine while parked, a benefit for overland parking lot meetups…joking.
Final Thoughts

Functionally, the snorkel has been working well on the 4Runner. I’ve taken it through a number of good water holes that have been covering the trails here in Central Oregon with no water to show in the airbox. I have also driven through heavy rain and snow with the snorkel with no accumulation in the intake, which is promising. The major factor I haven’t been able to test yet is dust, which was my main reason for installing the snorkel. With winter set in here and plenty of moisture in the dirt, I won’t get a good idea for dust until later this year.
I have high hopes for this Safari Snorkel to keep my airbox clean and dry through all of the conditions that I intend to put my 4Runner through in the years to come. It’s big, burly, and built to take a beating — much like the 4Runner itself.

Max Sheehan
Freshly rooted in Central Oregon, I have always had an eye for the outdoors and the vehicles that get you there. As a gateway to the wild, I have spent weekends exploring the best that the west coast has to offer in my expedition style 4Runner.
Thank you for the great write up! I just installed my snorkel following it.
One thing that I figured out that helped was to tape over the washers holes with painters tape (the ones that go on the inside of the fender). Then poke a little starter hole in the middle of the tape to use to press the washer onto the studs. This way the washers have a little bit of friction from the tape to hold them on when pushing them onto the studs giving you all the time you need to get the nut ready.
I only needed this trick for the upper 2 left studs that are very hard to reach with large hands.
I’d welcome thoughts for the nuts. I lost 2 in the process somewhere in the fender and had to buy more. I thought about hot gluing the nut to the washer so they go on as one unit, but that was after I already lost 2 so I never tried it.
Will this install be different for the 2020? There are SRS airbags in each of the A-pillars; what’s the possibility of activating/damaging the airbag system when drilling into the passenger side pillar?
No . Air bags are behind the a piller trim on inside. There is a Chanel in between on the outside. When you drill in its does not go through to inside of vehicle
Look at Snorkel Upgrade for a pre filter.
It’s almost like you know what article is dropping soon! 😉 I’ve been very happy with the one I installed on this ARB snorkel.
- Get Free Parts & Get Paid! Apply to Write
GET 20% OFF
Take up to 20% off at the trail 4runner store.
Includes Facelift Model
Safari 4x4 Engineering is one of the longest standing names in the 4x4 industry. Dating back to 1981, Safari has been a leader in Australian made 4x4 products that are built to last in the harshest conditions on the planet.
For decades Safari 4x4 Engineering has designed and manufactured automotive snorkels and 4WD performance systems made to enhance the performance, durability and driveability of 4x4 vehicles. From the Amazon to the Andes – from the Kalahari to the Kimberley – from the Sahara to the Simpson, four wheel drivers across the globe have put their trust in genuine Safari Products. Safari engineers industry leading products through innovative design, where each product release is the result of a comprehensive research and development program. Every Safari product produces a totally engineered and thoroughly tested solution to be used by 4x4 enthusiasts all over the world. Safari’s unmatched reputation for durable and high-quality products has been built on decades of engineering excellence in the 4x4 industry.
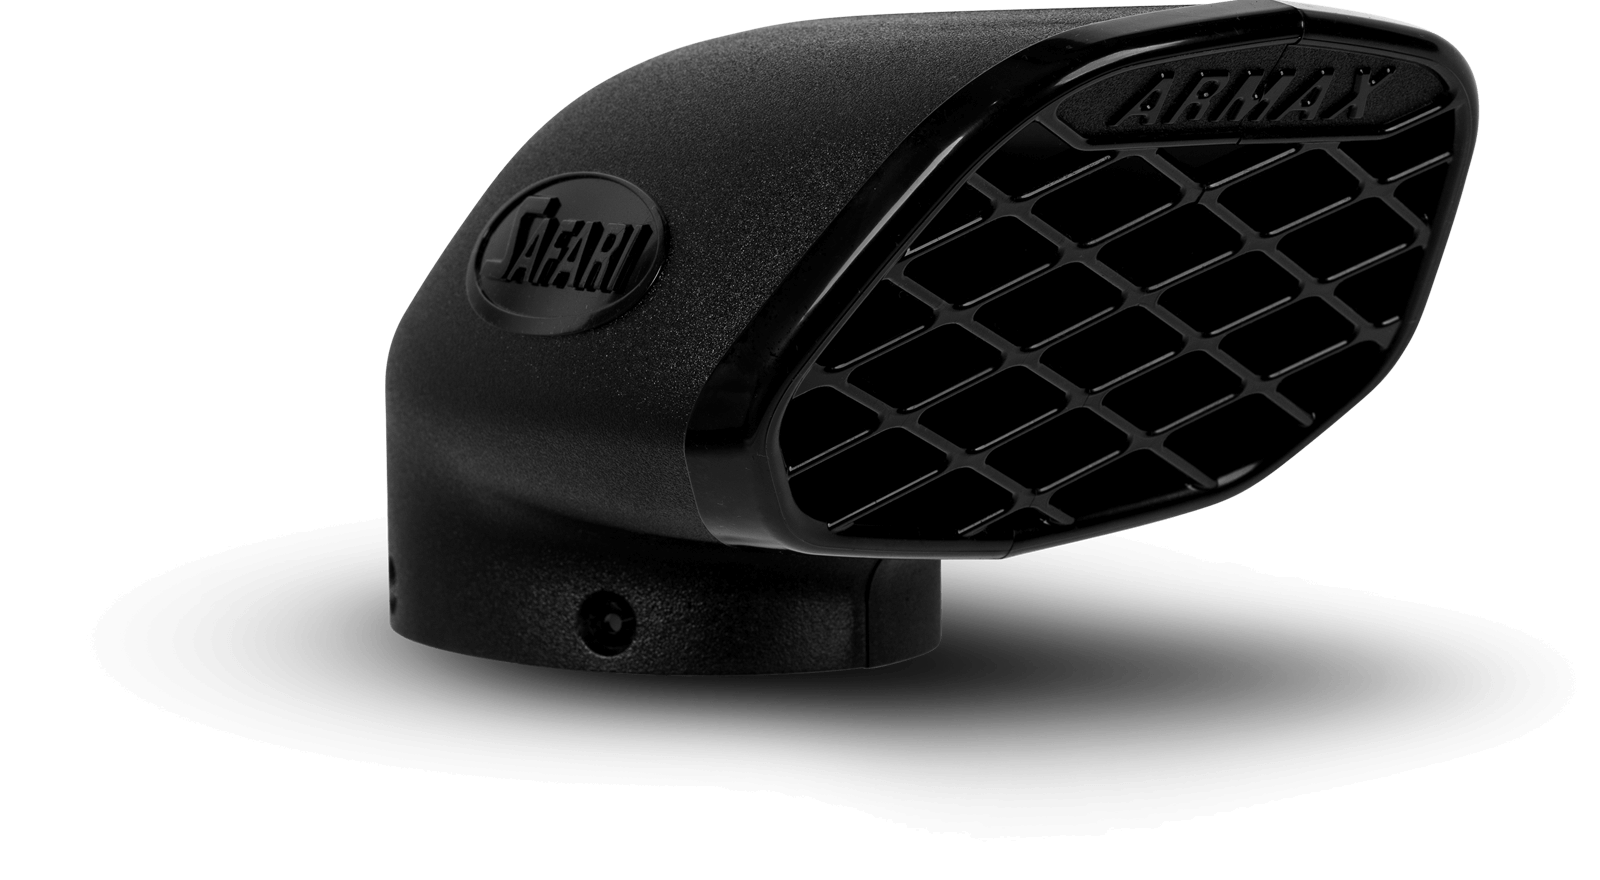
Ultimate Protection
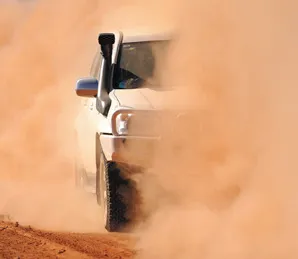
A minimal amount of water ingested into a diesel engine is enough to cause an engine to fail. Safari Snorkels move the air intake to a higher position to give you the ability to navigate off road conditions that involve water and dust in the vehicle’s path. The Safari Air Ram simultaneously removes the maximum volume of water from the incoming air stream with its unique water separating technology, while efficiently flowing the maximum required airflow.
As well as water, dust can be equally as damaging to your 4x4’s engine. By raising the air intake to the roof level of the vehicle, a Safari Snorkel provides cleaner air to your engine that’s free from low lying dust in the vehicle’s path. Safari Snorkels ensure the ultimate protection for your 4x4, no matter the conditions or path you are faced with
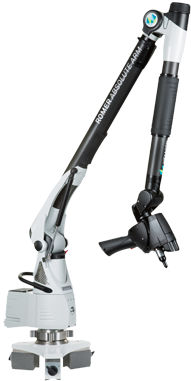
The Process
The development process begins with every vehicle being 3D Laser Scanned utilizing Safari’s Romer Absolute 3D scanning arm. This creates an exact digital model of the vehicle with scanning system tollerances within 0.08mm ensuring all Safari Snorkels provide the best fit for your vehicle. Utilizing the latest in 3D modelling software, extensive design and engineering is carried out to ensure optimum airflow and aesthetics are achieved. The next step in the process is to 3D print prototypes of the main components of the Snorkel system for trial fitment and airflow analysis.
The all new
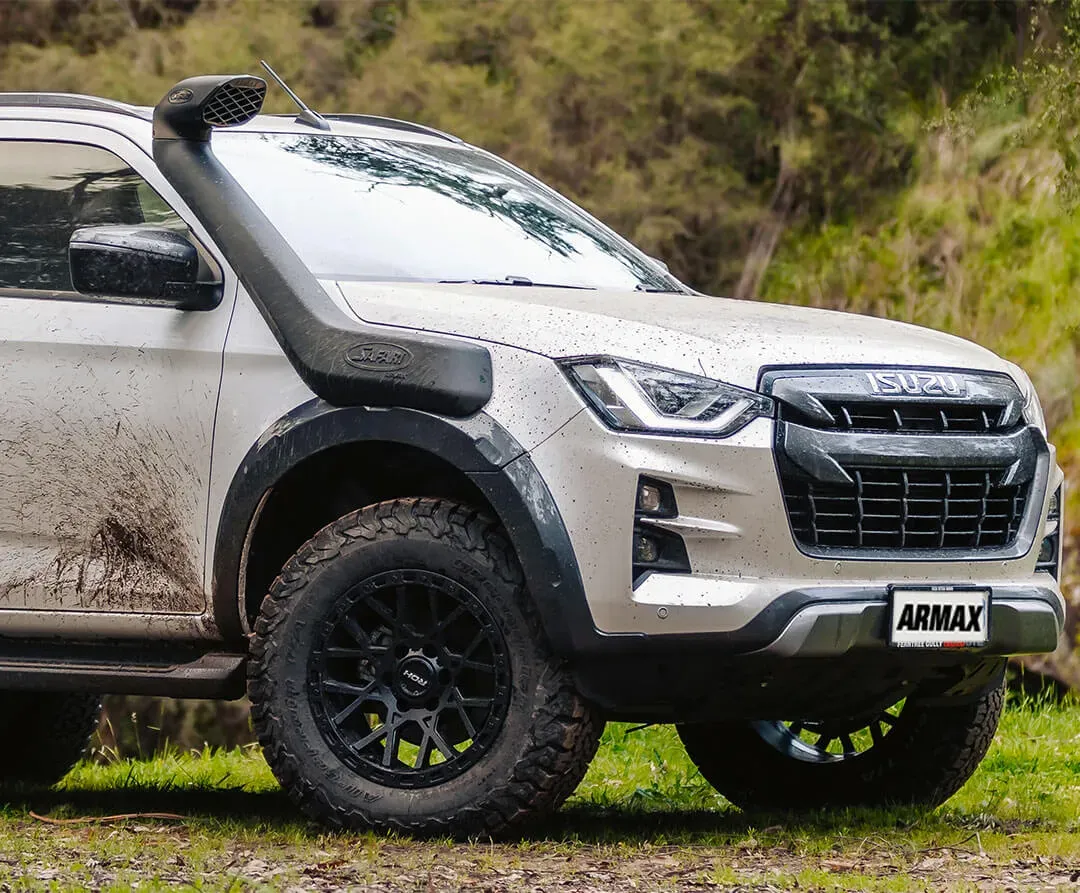
The All New
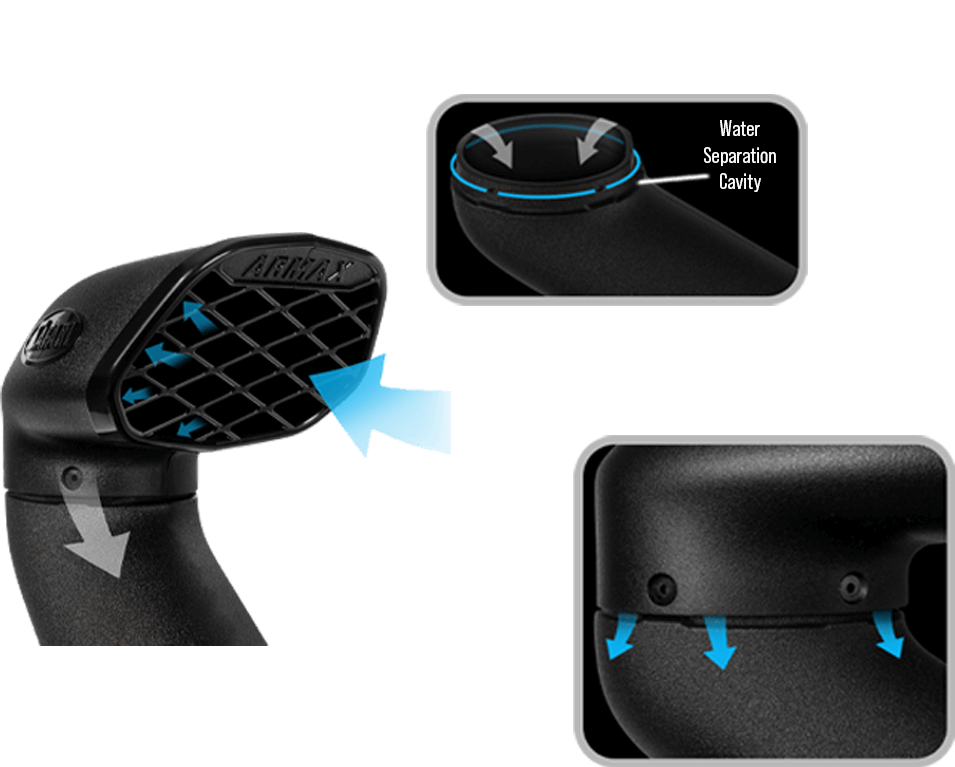
The Safari ARMAX™ performance range of Snorkels feature:
- Designed and flow tested by our in house engineers for maximum performance.
- Development and verification in conjunction with other ARMAX™performance enhancement products.
- Safari’s water separating style Air Ram with a 4”(101.6mm) outlet and an optimised air flow, low restriction grill.
- Water tight raised air intake for ultimate engine protection against water and dust.
- Safari’s own Industrial Spec UV Stabilised Polyethylene material.
- Life Time warranty.
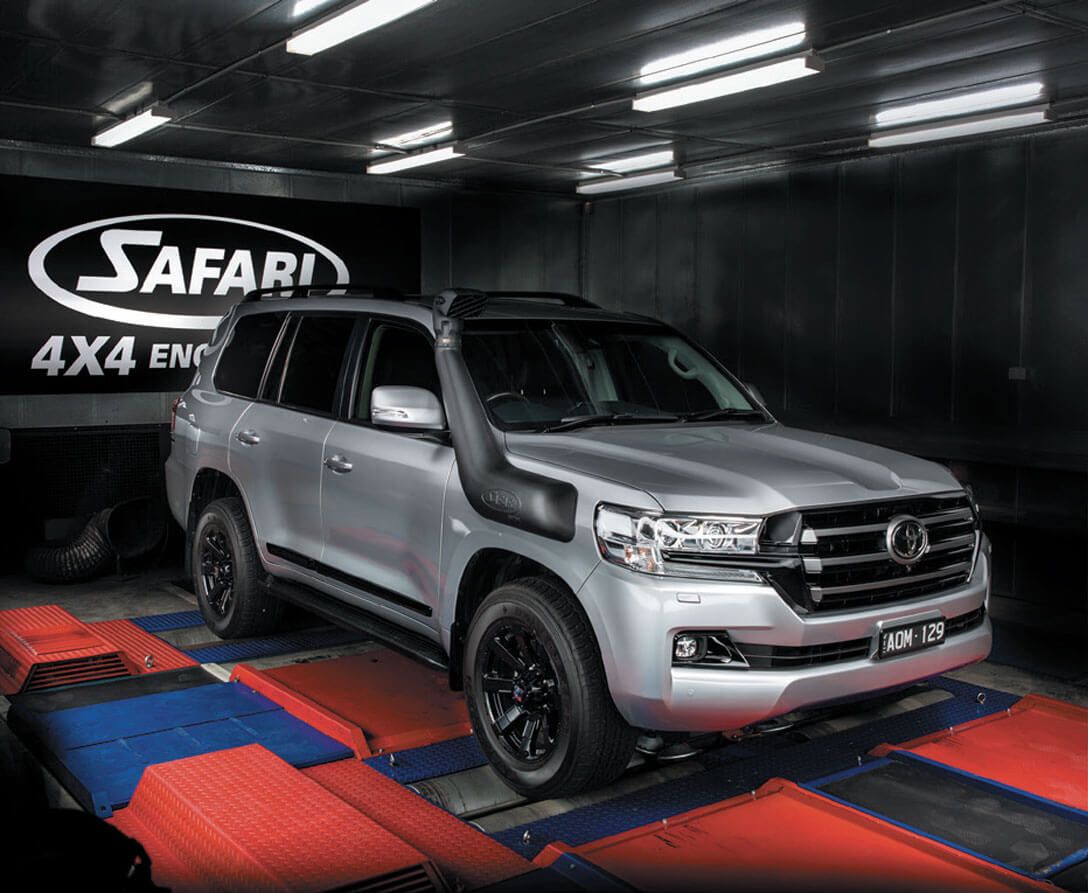
The V-Spec range primarily suits current model vehicles.
- Manufactured from Safari’s own Industrial Spec UV Stabilised Polyethylene material.
- Available for most popular, current model 4wd vehicles.
- Stainless steel mounting hardware & EPDM moulded rubber connection hoses to ensure the snorkel lasts the vehicle lifetime.
- Water tight raised air intake for ultimate engine protection against water and dust ingress.
- Australian Made.
Click & Collect Availability
- No results found

IMAGES
VIDEO
COMMENTS
In this episode I go through the steps I took to install a Safari Armax Snorkel. It looks good and was a great fit on the vehicle. It was fun to do once.
One of the first mods I try and do to any off road vehicle. Not only will it help with water crossings etc, but a bigger snorkel will help get more clean ai...
the grommet facing the panel side of the snorkel body. Install the stainless steel ferrule (item 12) into the grommet as shown. 8 Carefully install the snorkel body (item 1) to the guard panel. When correctly aligned, fasten the snorkel body to the guard panel with body washers (item 14) and nyloc nuts (item 15). Fasten the rear mounting
tight into the snorkel body (item 1) mounting inserts. 9 Place a strip of masking tape along the A-pillar panel. Carefully install the snorkel body (item 1) to the guard panel. With the snorkel body correctly positioned, mark the three upper mounting bracket hole positions onto the masking tape as shown. Hint: if necessary push the top of the ...
Toyota LandCruiser LC79 series single cab Pick Up truck (Ute).Fitted to date:ARB Compressor https://www.arb.com.au/products/arb-compressors/TJM Bullbar http:...
The SS79HFZ Safari Snorkels suitable for Toyota 70 Series Land Cruiser 4x4 is designed to deliver a huge volume of the coolest and cleanest air possible into the stock air cleaner assembly of 03/2007 to 2023 4.2L Diesel 1HZ engines. ... 3" Diameter mandrel formed High Output Exhaust system suitable for the 79 Series Wide Nose Body Toyota ...
installed onto the snorkel body outlet snout and the air cleaner base inlet, tighten both hose clamps. Re-install the inner guard plate using the original hardware. 14 Install the black hose clamp (Item 13) loosely to the base of the air ram (Item 2). Install the air ram onto the snorkel body. Align the air ram and tighten the
I installed the snorkel on my HZJ 71, and based on my previous experiences I did exactly this: 1. Transfer the template on to paper: paper is a lot more flexible than cardboard, and the template is designed to follow every curve on the quarter panel, so it is easier and more accurate if you have the template on paper 2. Place the template on the car: tape the template to the car and check and ...
Safari Armax Snorkel 79 Series VDJ suitable for Toyota 76, 78 & 79 Series Wide Front Landcruiser 4×4 03/2007 Onwards 4.5L Diesel 1VD-FTV (Factory Snorkel Replacement) · Up to 50% increased airflow for your 70 Series Land Cruiser engine. · Safari's rounded style Air Ram; however with minimum 4" neck and an optimised air flow, low ...
The SS79HPV Toyota 76, 78 & 79 Series Land Cruiser 4×4 Snorkel is designed to deliver up to 50% more air than the OE air intake for 03/2003 Onwards Toyota 76, 78 & 79 Series Land Cruiser engines. ... The genuine Safari Armax Toyota 76, 78 & 79 Series LandCruiser 4×4 Snorkel body and air ram is manufactured to the highest standards in durable ...
79 Series - Snorkels For Toyota Landcruiser 79 Series ... Safari Armax Snorkel & OCAM Weathershields For Toyota Landcruiser 76 & 79 Series (03/2007 - PRESENT) SS79HPV. $649.00. RRP $729.00. ON SALE. VIEW MORE. Add to Cart 4" Stainless Steel Snorkel Brushed To Suit V8 79/78/76 Landcruiser.
Toyota Landcruiser 70 Series (2007-2022) 79 78 76 Series 4.5 V8 Safari ARMAX Snorkel - SS79HPV. $660. VW Amarok (2016+) V6 ARMAX Safari Snorkel - SS1410HP. $699. VW Amarok (2016+) V6 ARMAX Safari Snorkel - SS1410HP - SALE. Sold Out. Sale. The Safari ARMAX™ Snorkels feature:- Safari's UV Stabilised Polyethylene Safari's rounded style Air ...
Model. Landcruiser. Series. 79 Series 4.5L Dual Cab, 79 Series 4.5L Single Cab. SKU. SN01SS. Torqit's 79 Series Snorkel comes with a full fitting kit and steel template. The template is laser cut and CNC folded to match the profile of the guard and includes a soft foam backing to protect the vehicle panel.
Carefully install the snorkel body (item 1) to the guard panel. With the snorkel body correctly positioned, mark the three upper mounting bracket hole positions as shown. Hint: if necessary push the top of the snorkel body towards the windscreen rubber, so that the edge of the upper mounting bracket has approximately 1mm gap to the windscreen ...
So here is my step by step.... 1. Remove airbox and fender inlet from under hood. Lower or remove plastic under fender wheel well (I just lowered mine). Remove air duct and power antenna. I just cut the antenna wire instead of trying to fish it out. -I chose to remove my antenna instead of trying to heat and bend the snorkel because with my ...
Once the snorkel is secured from inside the fender, add the upper mount bolts on the A-pillar and tighten them until they're snug. Step 25. Tighten Hose Clamps. With the snorkel fully secured, tighten the hose clamps with a 7mm socket on both the snorkel and the intake side of the adapter. Step 26. Install Airbox.
Forced induction & Snorkel systems manufacturer with expertise in Turbocharging, Supercharging & Intercooling 4x4 diesel/gasoline engines with Safari product range. ... 78 & 79 series Wide Front Landcruiser : 3/07 Onwards: 1HZ: 4.2Litre-I6: D: RHS: SS76HFZ: 1GR-FE: 4.0Litre-V6: P: RHS: SS76HFE Available: Replacement of Factory Raised Air Intake ...
Toyota LandCruiser LC79 series single cab Pick Up truck (Ute).Fitted to date:ARB Compressor https://www.arb.com.au/products/arb-compressors/TJM Bullbar http:...
Safari has been the leader in the snorkel game for ever and a day, and I don't feel that's going to change any time soon. If you're wondering are Safari Snorkels worth it, we'd comfortably say yes, they are. We are really happy with both of the safari snorkels we've had, and wouldn't hesitate to recommend them to anyone else.
4.5L V8 Diesel 1VD FTV Engine To Suit Toyota 71, 73, 75, 76, 78 & 79 Series. ARMAX PRODUCTS ... The Safari ARMAX snorkel air ram is designed to perform two very important roles. The most obvious is to funnel cool clean air into the snorkel body - but just as importantly, the Safari ARMAX air ram acts as a highly efficient water separator to ...
watch my dad and i install a safari armax on to my 70 series Landcruiser was good fun to try fit it we got it done and happy how it turned out please leave a...
Safari 4x4 Engineering's purpose built 1200cfm in-house air-flow bench ensures that every snorkel model is designed to supply the optimum amount of air to your 4x4's engine. In the case of ARMAX snorkels, this is used to ensure that we provide the maximum possible amount of airflow to your engine to compliment other engine modifications.
Hey guys! Welcome back to angry mack adventures!In this episode we install an Armax Safari Snorkel on the brand new 2021 land cruiser! This is a step by step...